Art comes to life when it has an audience. The presentation of a finished product provides an opportunity for human response, feedback, critique, and dialogue. It also necessitates complex critical thinking on the part of the artists, as they prepare for the final presentation of their work. They must consider if it’s ready, as well as how, where, and when to best present it. The National Core Arts Standards breaks this element down into three anchor standards:
- Select, analyze, and interpret artistic work for presentation.
- Develop and refine artistic techniques and work for presentation.
- Convey meaning through the presentation of artistic work.
National Core Arts Standards © 2015 National Coalition for Core Arts Standards.
Rights administered by State Education Agency Directors of Arts Education (SEADAE).
All rights reserved. www.nationalartsstandards.org.
Regardless if the final product is digital or physical, technology provides many excellent and cost-effective ways to share finished art with an audience. These can be in the form of portfolios or galleries of work that may be presented to a wide variety of audiences. The viewing audience may be comprised of students in your classroom, the full student body of a school, parents, the community, or more far-reaching audiences. No matter the audience, when sharing and displaying is done digitally, it can open up artworks to a much broader group of people while making it easier and less expensive to share. Larger audiences can provide students with new and powerful ways to receive feedback on their work, and this feedback can lead to positive reinforcement of their efforts as well as new inspirations for continued growth.
In addition to sharing their final products, you might also choose to have your students present their creative process. Screencasting and annotation tools provide students with powerful ways to capture, illustrate, and reflect on the stages of their personal creative process. This type of activity can stimulate metacognitive thought processes, which bring students an added awareness to how they have put their learning to use and how they have grown as artists. Students can even share these reflections with each other in order to use them as opportunities to learn virtually from one another. By witnessing the wide range of approaches and techniques used by their peers, students can gain new insights and accelerate their own learning and artistic development.
Over time, this gathering of finished products can become a portfolio of work that demonstrates each student’s range of artistic expression as well as a progression of growth over time. Virtual galleries are ideal for presenting final artwork, and these may be shared by individual artists or pulled together by collaborative groups of students, such as your classroom or even the entire school. Because they are digital, these final products can be shared easily with others through a link, QR code, or web address. Consider this list of digital options for ways to have your students share their work virtually with others.

Blogs are made up of a series of posts that are published in installments over time. One benefit of a blog is that you can develop it as you go, adding new pieces as they are finished. Posts are generally time-stamped and sequential. Another benefit is that blogs are often more interactive than static websites, allowing your audience to easily post comments and reactions to your work. This can be very beneficial if you are looking for feedback or a more dynamic relationship with your audience. Here are some popular blogging platforms that students might use.
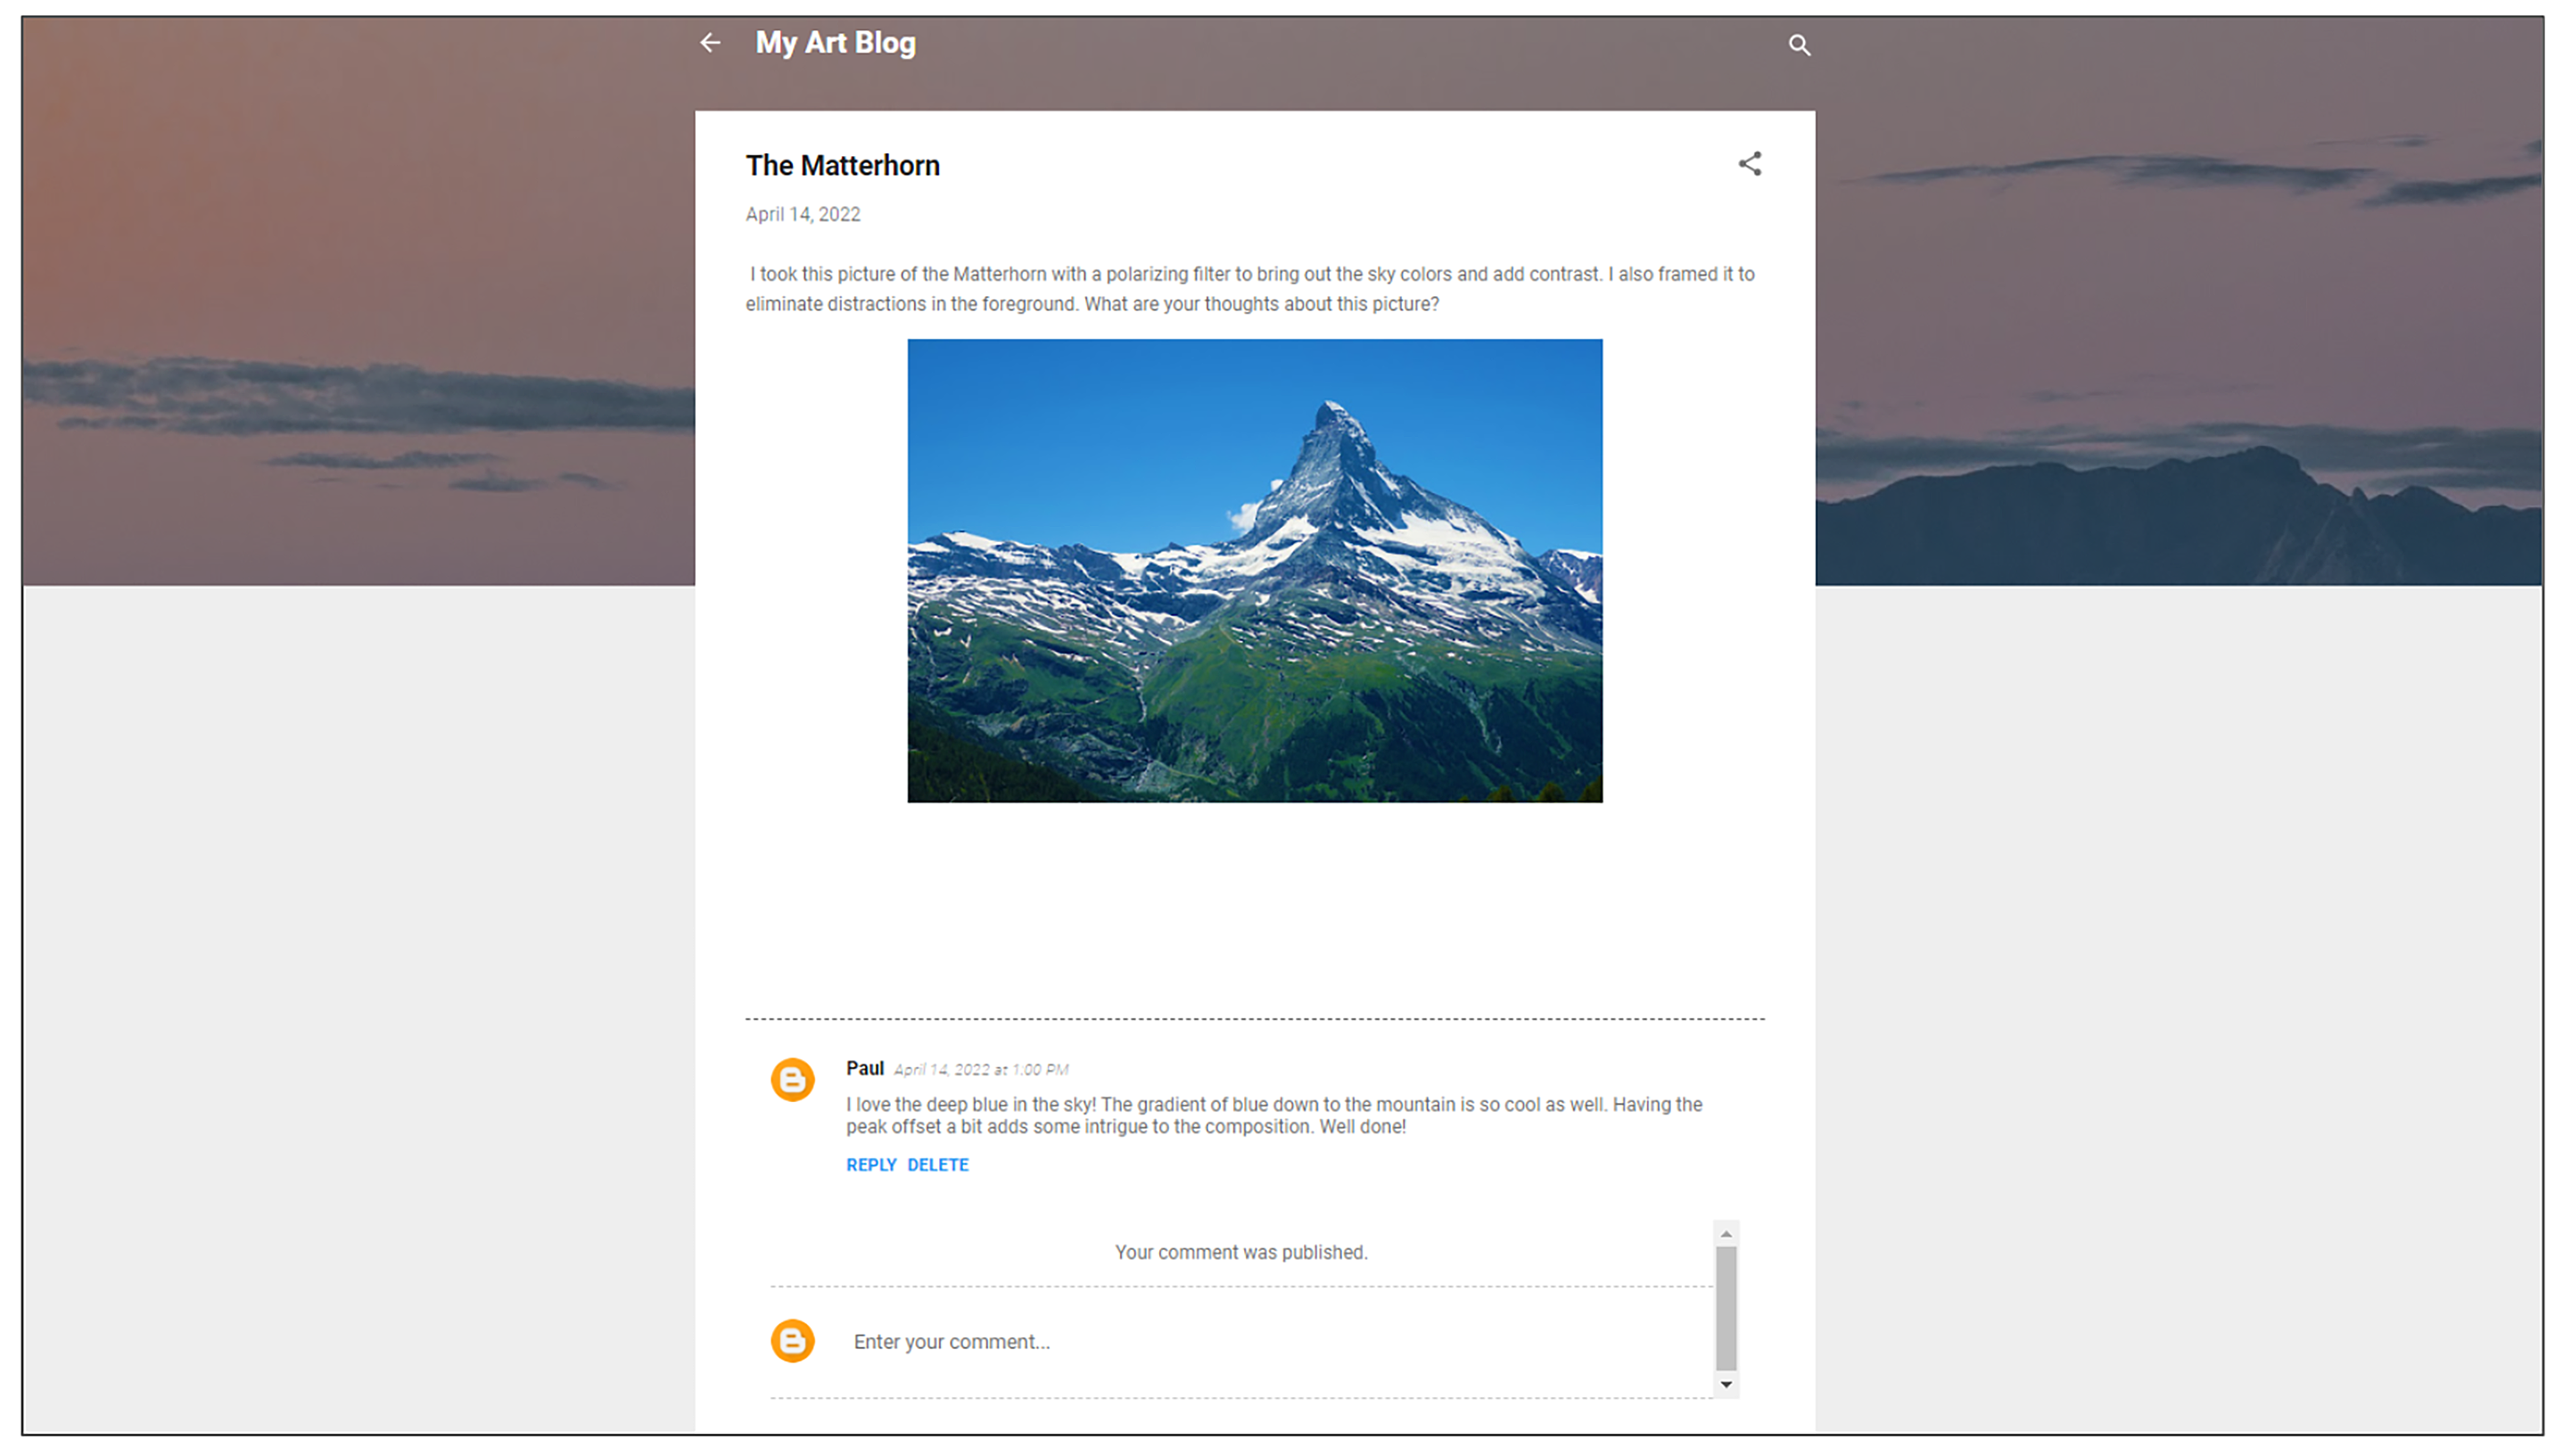
- Blogger: This Google tool is specifically designed for creating blogs. It is fairly simple and intuitive. You can choose to share with the world or only certain people.
- Edublogs: This is a blogging site created by educators, for educators. Access a free account to get started. Paid upgrades are optional.
- Seesaw (Tips): Rather than having each student create a separate blog, Seesaw allows you to create a class blog that is moderated by the teacher. Leave it open to the public or share with a targeted audience. One great option is to have a partner classroom with which you share blog entries. The teacher control you have with Seesaw creates a safe starting point for students entering into the world of blogs.
- Wix: This freemium website tool offers blog templates to get you started. Students must be 13 years or older to set up an account.
Art walls have the advantage of providing a collaborative space for multiple artists to engage with each other as they share their work. Each artist can post something, and the other participants can then comment. Typically, posts and responses can be made in multiple formats: text, image, audio, video, and link. Another fun element of this type of tool is that they are living resources that can evolve over time. Interactivity is similar to a discussion board, but the layout is less linear. Think of this as a virtual bulletin board hung up in your classroom for students to engage with when they have time. Some digital art walls include options for voting, which can be a fun way to choose and hand out peer choice awards.

- Dotstorming: This shared board is designed for group brainstorming and decision-making, and it can also be used to share art. It is much like Padlet but with the ability to vote for a predetermined number of posts. Create one board for free. Share it with a link.
- lino: Use this virtual corkboard to add sticky notes, text, images, and videos. Organize content into boards and search by date or tags. Collaborative posts are public.
- Padlet (Tips): Use this collaborative bulletin board to add text, images, videos, and links. Students are able to comment on items that are posted. Teachers get three active Padlets with the free account. Old Padlets can be retired, so new ones can be used.
- Wakelet: Create a collaborative list of resources (text, links, videos, images, PDFs, Google Docs, etc.). No account is needed to view a Wakelet, but accounts are required to create or collaborate on a list. Share as a link, as an exported PDF, or with an embed code.
Discussion boards and art walls have the advantage of providing a collaborative space for multiple artists to engage simultaneously with each other as they share their work. Artists can post their work, and the other participants can comment. Typically, posts and responses can be made in multiple formats: text, image, audio, video, and link. Another fun element of this type of tool is that they work well asynchronously, allowing students to post when they have time or when they reach a specified point in the creative process. This allows for meaningful differentiation of pacing.
- Learning Management System (LMS): The best source of discussion boards is typically through your LMS. Nearly all of these platforms offer an integrated discussion feature, and because it’s in a space that students are already familiar with, it’s typically the easiest option for both access and ongoing use.
- Flip (Tips): Flip’s video discussion format can bring comments to life. Students can capture their work as part of an initial post, and then classmates can record threaded video comments and responses. This allows for a very accessible and personal reaction to a student’s artwork and captures not only the words but the nonverbal aspect of how the message is delivered. This format can reduce miscommunication and misunderstandings.
- NowComment: This free tool allows you to upload a document, with students being able to comment on specific parts of it. By embedding images of artwork into the shared document, students can comment on each other’s art. Teachers can upload a document that includes artwork from the entire class, and then invite students to a private or public conversation about that document.
- VoiceThread: Students upload their artwork into what looks like a slideshow of content. Others can then comment and provide feedback through text, audio, annotations, and video. This is a freemium product, with some features requiring a subscription.
A digital portfolio is a great way to document the broad scope of your work as well as your progression and growth as an artist. Portfolios can be organized as you see fit: by quality, category, technique, style, or chronology. Here are a few digital tools that can work well for producing a portfolio.
- Artsonia: This site claims to host the world’s largest collection of online student art portfolios. You may work through the web browser or with an app. Apps are available for both Android and iOS.
- bulb: Add nearly anything digital to this online portfolio tool. Set share settings as desired. This site works much like a blog or website. Get 10 pages and 2 GB of storage with the free version.
- Google Sites (Tips): Build a website and publish it to your local domain, specific individuals, or the world. Using a website as a portfolio allows you to embed many types of content, including materials from Google Drive, your computer, or the Web.
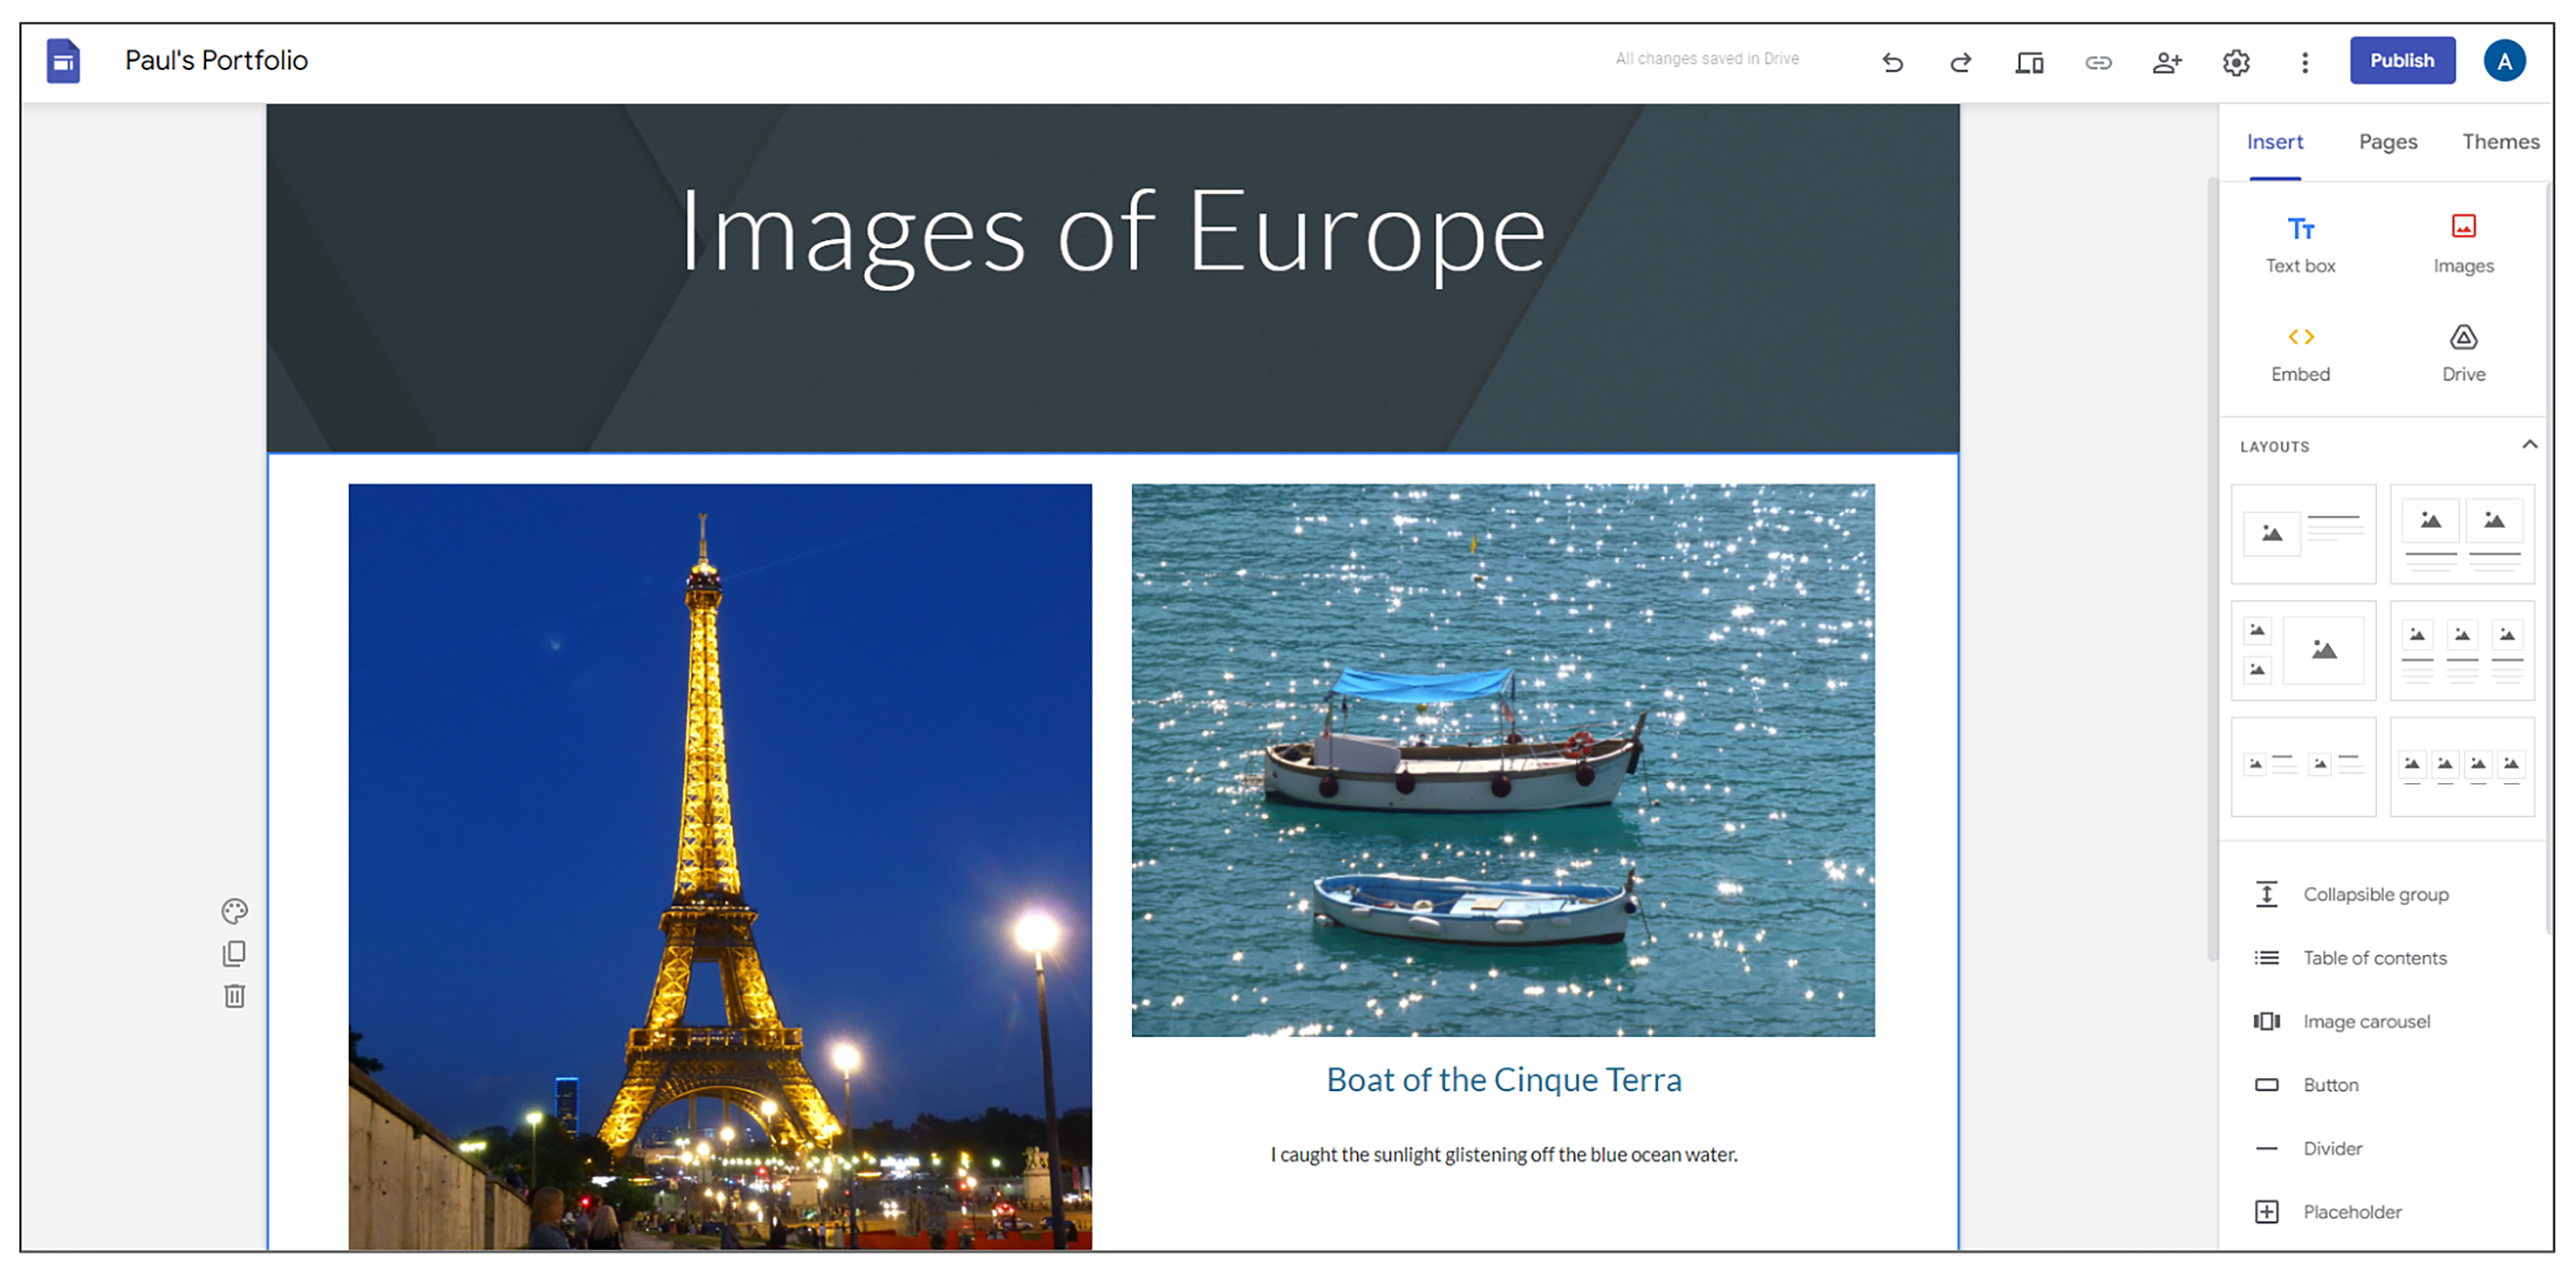
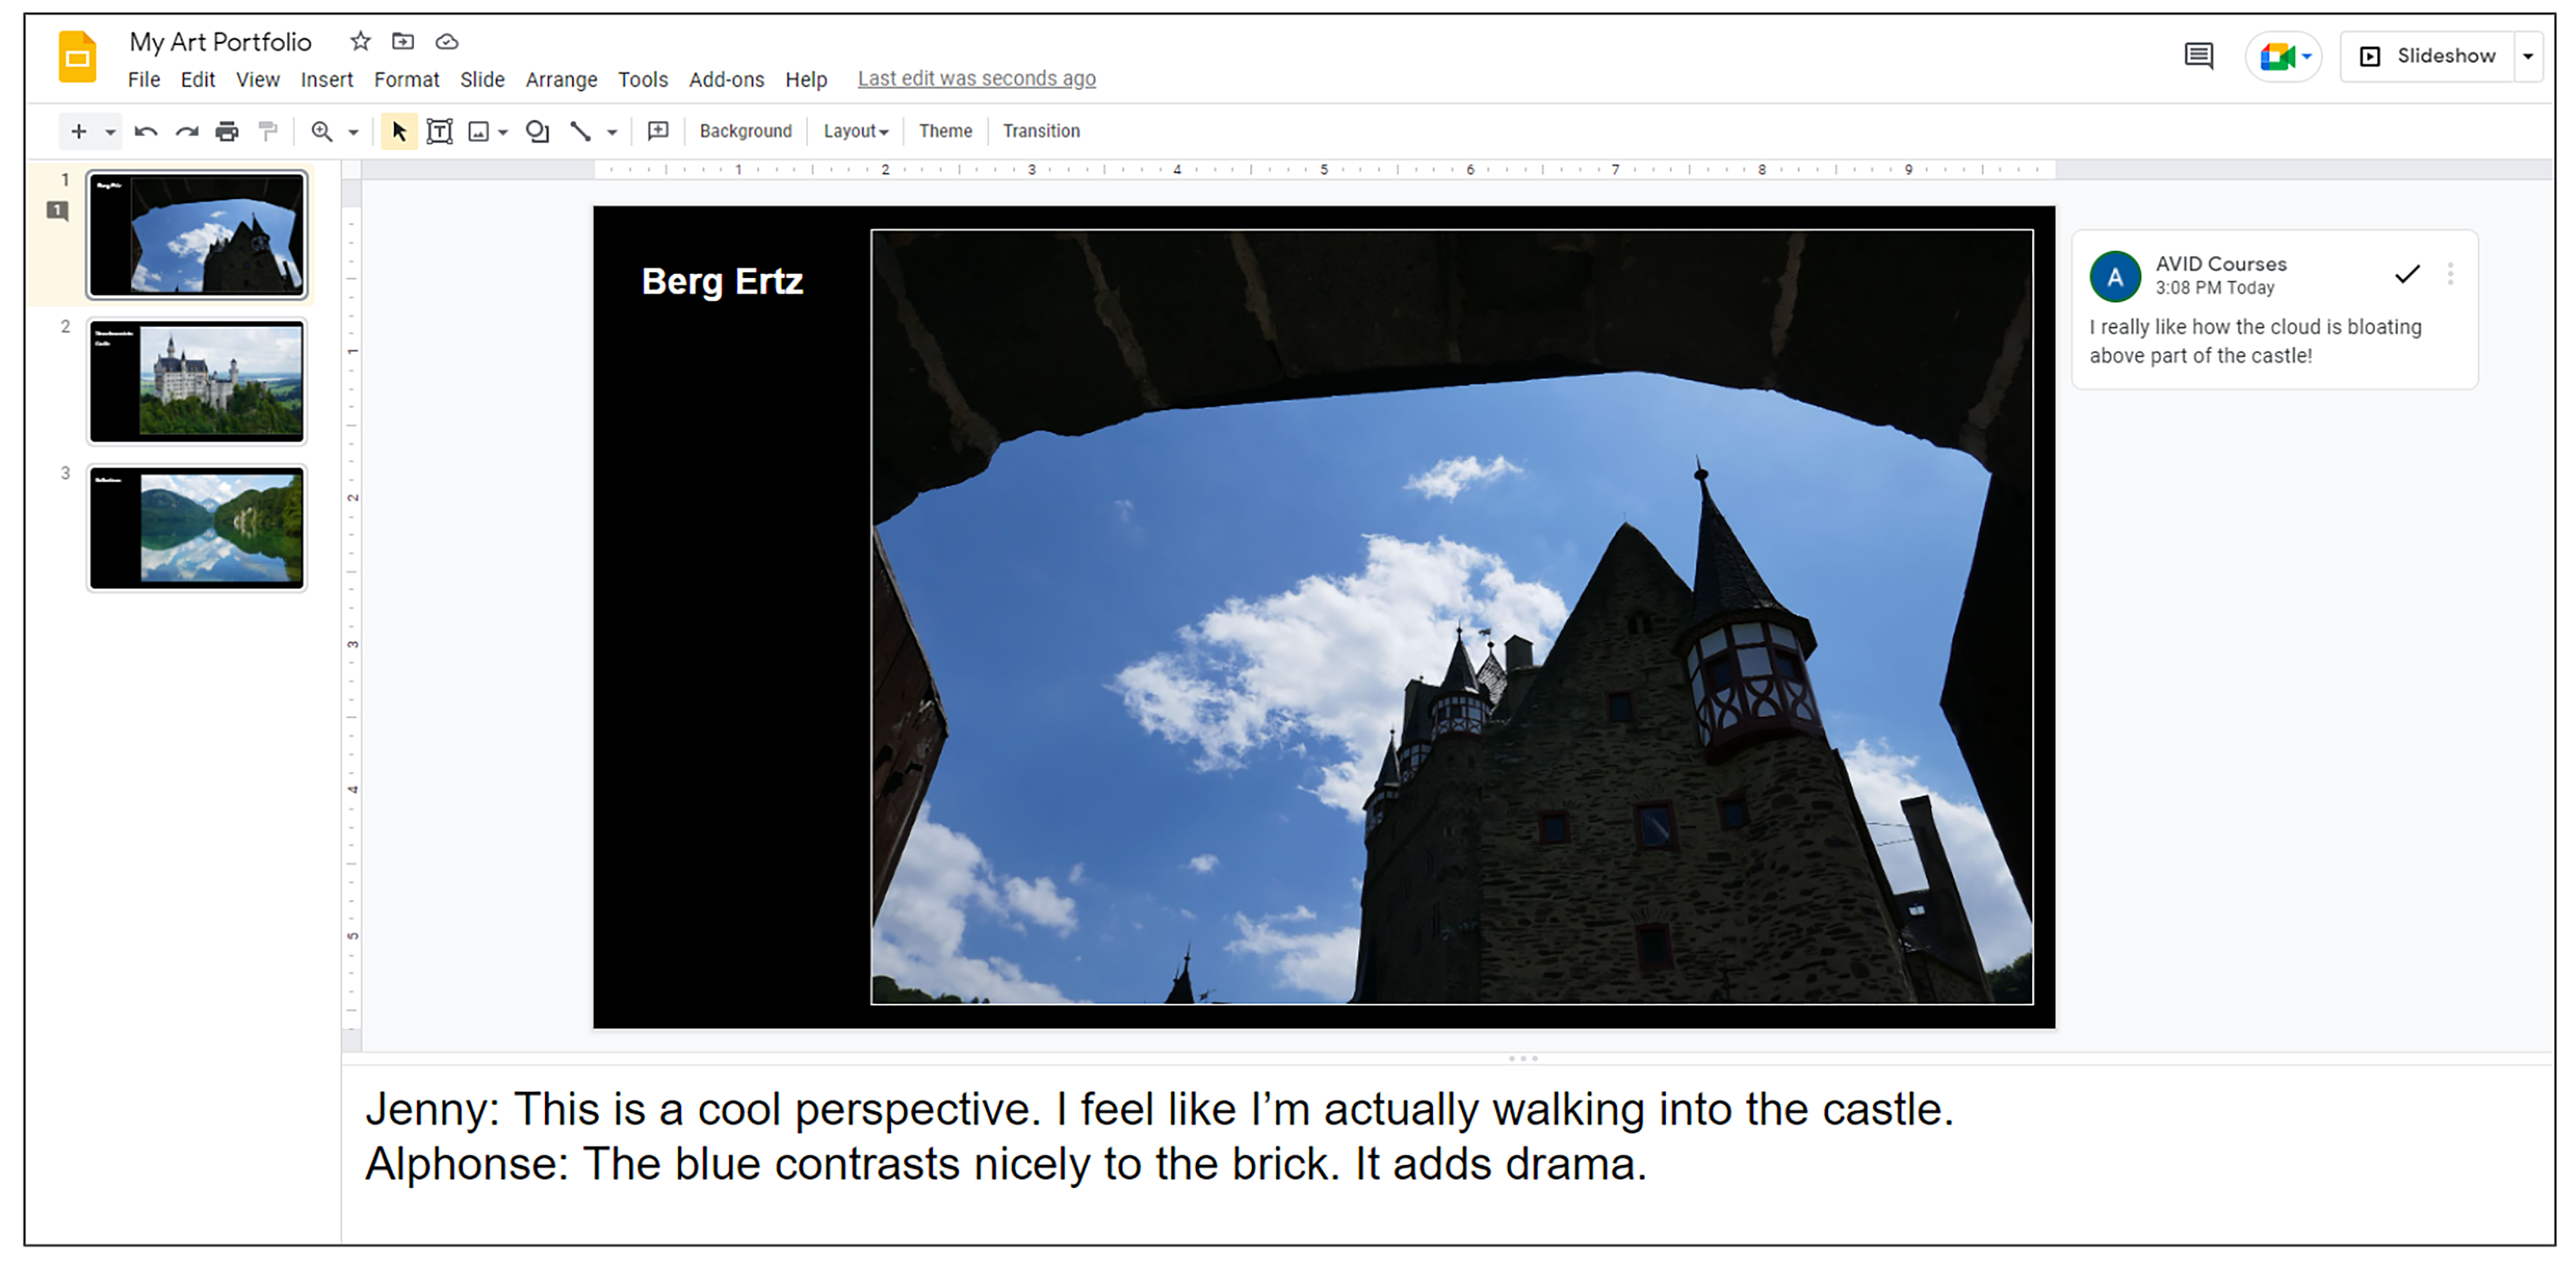
- Google Slides: Create a multi-slide portfolio. If you wish to print your final product, you can change the page size to 8.5 x 11 under File > Page Set-Up. If you are sharing this digitally, consider adding a table of contents on the first page, so visitors can jump around nonsequentially between slides. Publish it to the web to make it a fully interactive experience.
- Learning Management System (LMS) Options: Some learning management systems, such as Schoology, have portfolio options built into the platform. Explore your LMS to see if this convenient option is available for you and your students.
- Pathbrite: This online portfolio tool allows you to add images, text, video, documents, links, and more. Share your creation with a link.
- Seesaw (Tips): In addition to the class blog options, students can upload evidence of their learning and arts progression to their individual learning journals for their teacher and family to view. There is no option for individual students to share publicly.
Art publications can be created with multiple combinations of authorship: individual students, class anthologies, and school-wide editions. Publications are a great way to celebrate the best creative works of your students, and they honor what students have achieved by showing off their creations in a polished format. These publications may be published either on paper, digitally, or both. If you choose to distribute paper copies, you will still benefit from designing the pages digitally and then printing them off for duplication. Making your publication entirely digital may make distribution both cheaper and easier. Of course, the choice is yours, and you should choose the method that best engages your audience.
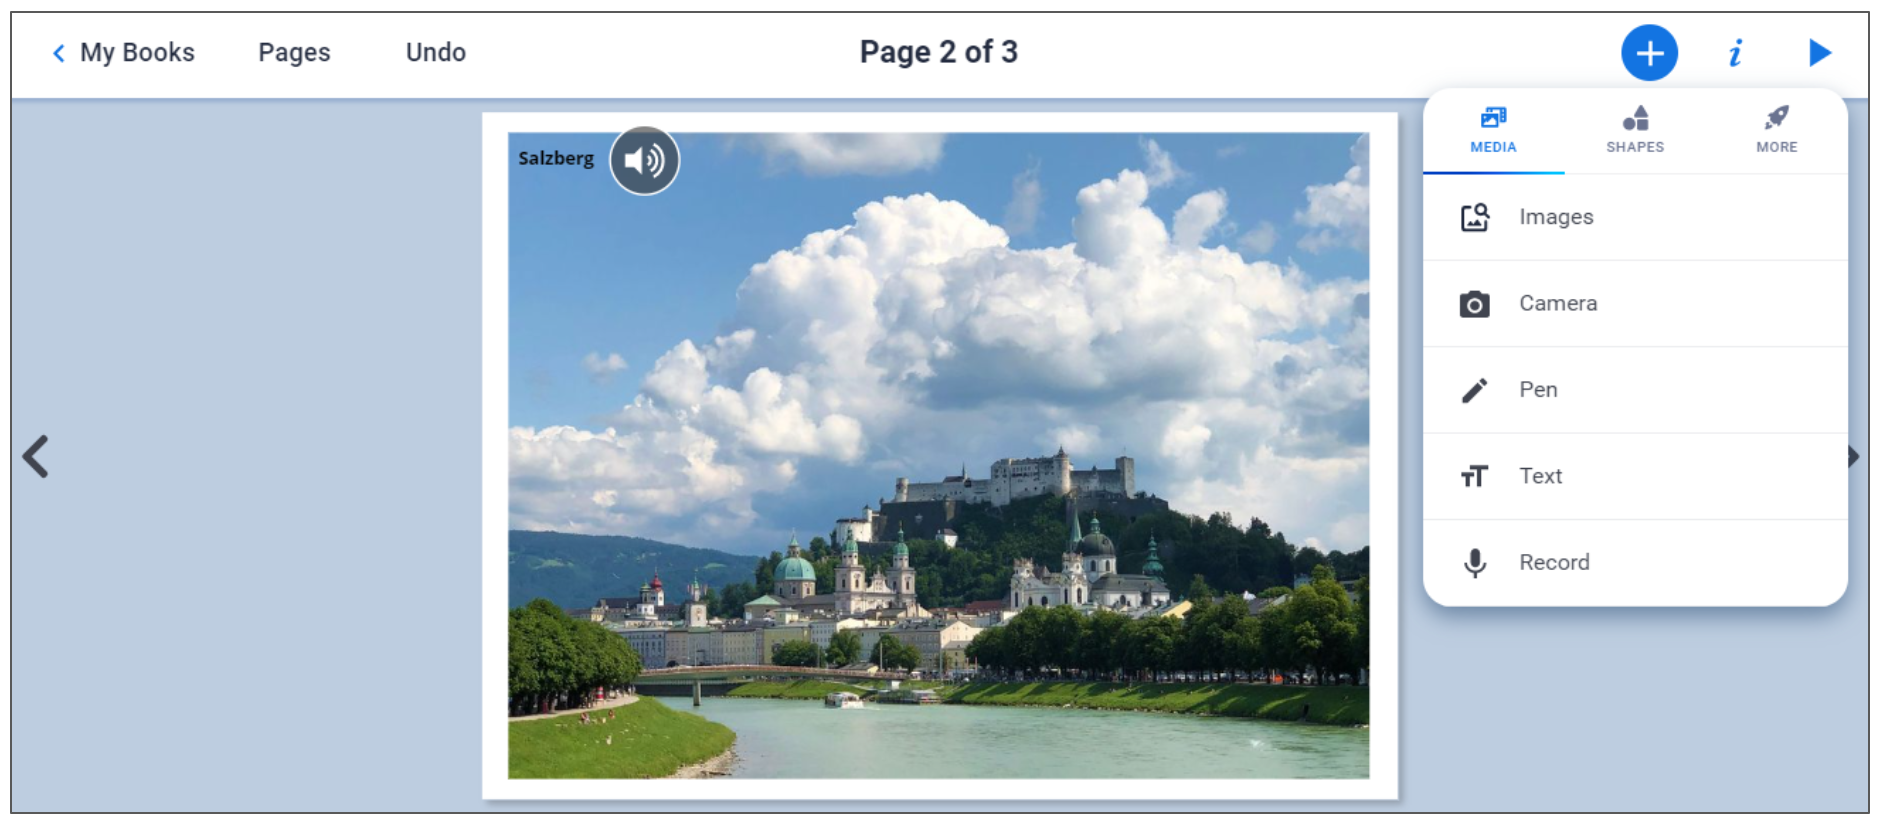
- Book Creator (Tips): This is an outstanding tool for the creation of online, multimedia books. Add pages, text, images, audio, video, and multimedia. Publish it online and share with a link.
- Digital Slideshow Software: Programs like Google Slides and Microsoft PowerPoint work well for creating multi-page publications. Students can create one page per slide and share digitally or print the final pages for paper distribution. If you wish to print your slideshow, customize your page size to match the size of the paper you wish to use, such as 8.5 x 11 or 11 x 17.
- Digital Word Processors: Programs like Google Docs and Microsoft Word work well for creating the pages for a digital book. Google Docs is best for pages with simple layouts since the placement of objects on a page is somewhat limited. Microsoft Word has more robust and adjustable formatting options.
- FlipHTML5: Convert PDFs into digital flipbooks. Upload a formatted PDF version of your publication and instantly convert it to a digital flipbook that is stored on your bookshelf. Share with a link or QR code. Flipbooks are searchable via Google with the free version. A local install is required to embed video, audio, and animation. Create one bookshelf with unlimited books for free.
- Flipsnack: Create a flipbook magazine from a variety of templates. Convert PDFs into a “flippable” online magazine or create your publication in the program. Templates are available if desired. Include GIFs, PDFs, audio, video, images, text, and more. Share with a .gif, link, or embed code. Finished books are downloadable. With a free account, published work is public, and you get three catalogs (books) of up to 30 pages each.
- Madmagz: Create web, PDF, or print magazines. The web version is free.
- StoryJumper: Create a picture book. Design your own characters and add pages, text, images, props, scenes, multimedia, and voice-overs. Publish your finished book online.
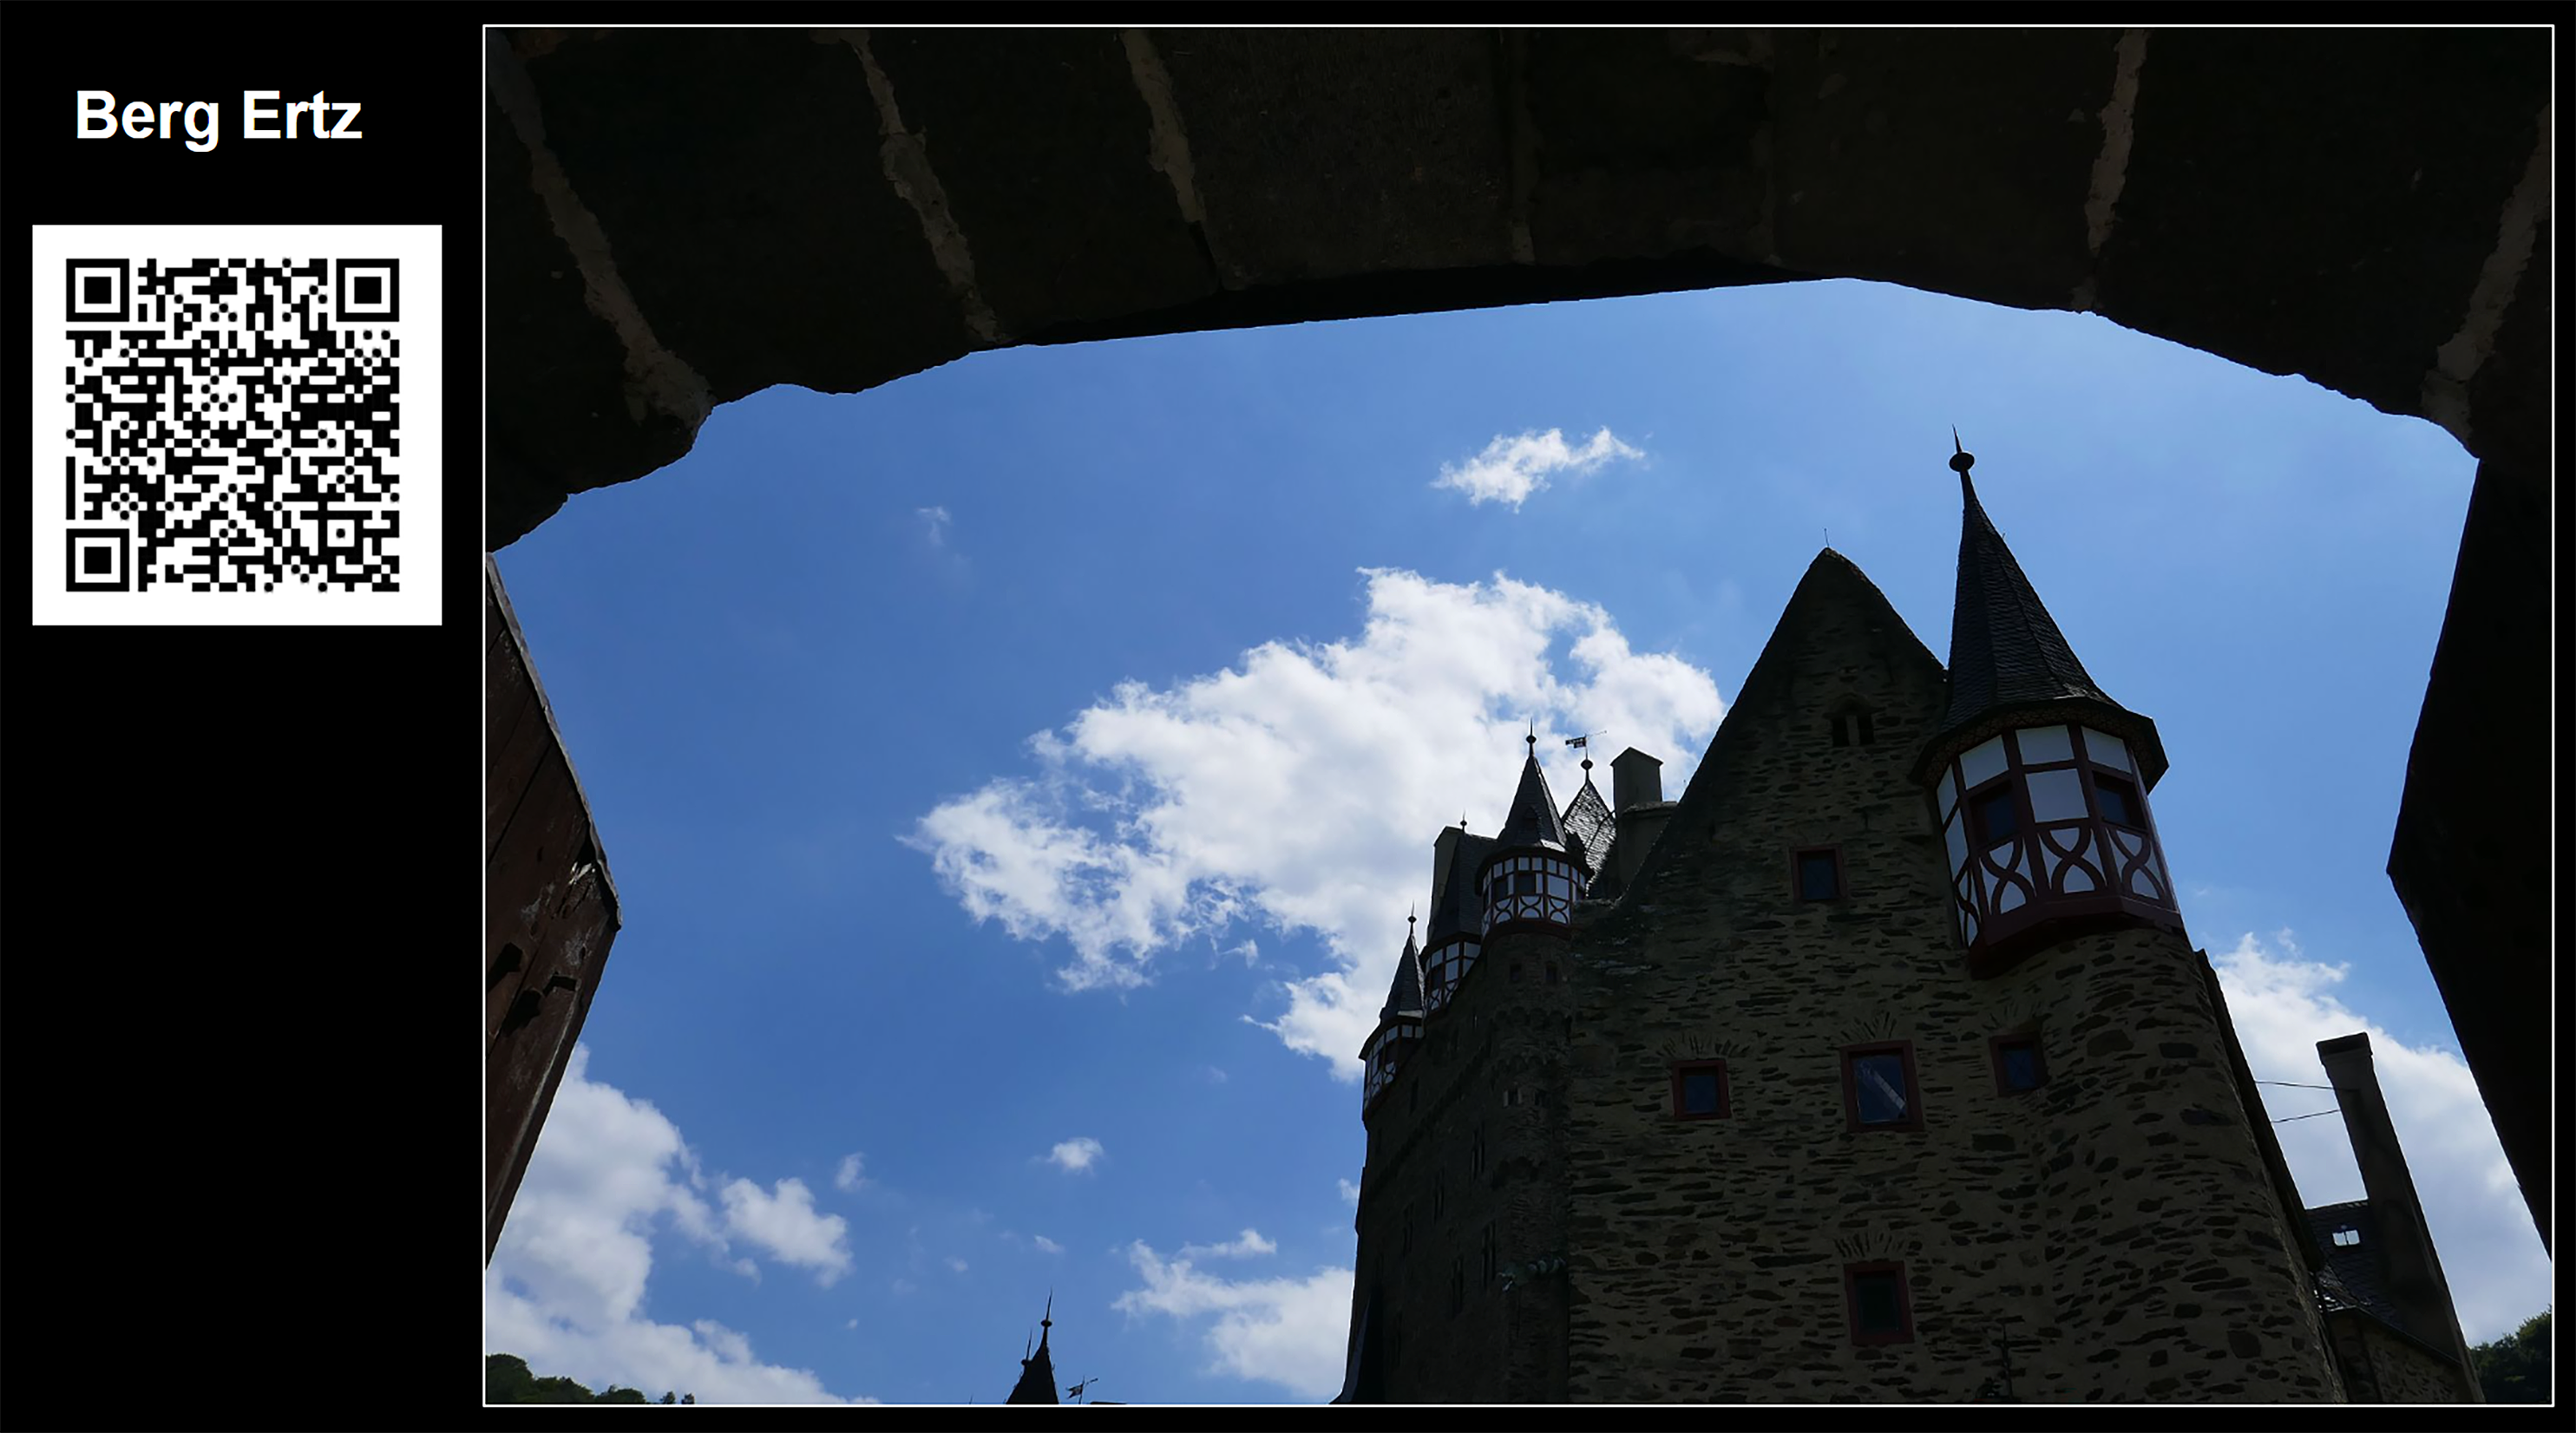
If you choose to display classroom art in a physical space, QR codes can be a great way to bring in a dynamic digital element. To use these, first have students create something that enhances the experience of viewing their displayed art. This might be a video or audio recording of them explaining their work, sharing an artist statement, or revealing the inspiration for creating that piece. It could also include links to websites, digital writing, additional images, or anything else that can be stored on the web and accessed with a link. Once the digital resource has been created, students create a QR code that can be printed and displayed next to the artwork. When a viewer scans the QR code with a tablet or smartphone, the digital resource is displayed on their device. Video and audio are especially powerful, as they bring the artist’s actual voice to the viewer to personalize and deepen the viewing experience. There are many free QR code generators available online. Here are two good ones to get you started.
- QR Code Generator: With this generator, you can add QR codes that are editable and trackable, with branding and customization features.
- QRCode Monkey: High-resolution and powerful design options are available for QR code creation through this generator.
These tools are powerful in their simplicity. Students are typically quite familiar with how to create digital slideshows, so they can focus their energy on design and content, rather than the technical creation process. Slideshows can also be used in several effective ways. They can be used for individual live presentations, or they can also be shared as a collaborative space where multiple students add art content to the common document. This team approach can be a great way to facilitate collaboration and peer critique. Comments can be shared through email or in person. Comments can also be added with the built-in comment tool or put in the speaker notes section at the bottom of each slide. Another available option with slideshows is to create a stand-alone display option; this can take the form of a kiosk, where an audience engages with hyperlinks built into the presentation. This kiosk experience can even be embedded into a webpage to access a broader audience. Here are a few popular slideshow creation tools.
- Adobe Express: This versatile tool includes a slideshow option. In addition to slideshows, you may also choose to create graphics, collages, and webpages.
- Google Jamboard (Tips): While not specifically designed for presentations, this collaborative Google whiteboard can contain up to 20 pages (frames) of student work—which can be used as a presentation tool. Add text, images, backgrounds, shapes, and drawings.
- Google Slides: Use Google’s free presentation tool to create slideshows with text, images, videos, animations, and more. SlidesMania offers a collection of fantastic free templates. Specifically, you may want to explore this Interactive Art Gallery Template. Make a copy of the template to customize and create your own classroom gallery.
- Microsoft PowerPoint: Like Google Slides, PowerPoint is a powerful presentation and slideshow tool. Embed text, images, videos, animations, and more.
- Microsoft Sway: This tool offers a unique scrolling slideshow experience.
- Prezi: Create a visually interesting presentation by zooming in, out, and around a larger canvas image. This is ideal if you want to break a larger visual concept (or artwork) into smaller pieces of analysis. Create up to five projects with the free version.
- Seesaw (Tips): With the premium version, students can use the draw feature to create up to 20 pages/slides of content. While these remain in the student’s account, the teacher can project these to the class for students to present.
Video can be a very engaging way for students to share their work. Not only does it allow them to visually show what they’ve created, but they can also add audio commentary along with it if they choose. There are a number of free, quality screen capture programs available that allow students to record their voice along with anything that is displayed on their screen. If a student creates a slideshow of work to share, they can polish their visuals ahead of time for a professional look, and then record themselves narrating the presentation. If students want to edit their production and include other multimedia elements, they can use a full-featured video production suite for deeper editing and production.
Video Capture
- Awesome Screenshot and Screen Recorder: Capture your screen as an image or video and mark it up with built-in annotation tools (text, blur, arrows, etc.).
- Flip (Tips): Students can record their camera or screen when posting to Flip. They can also insert images into their recordings.
- Loom (Tips): Create screencasts by recording your screen, webcam, or both. The premium version is free for students and educators who complete the verification process.
- Nimbus Screenshot and Screen Video Recorder: Capture your screen as an image or video and mark it up with built-in annotation tools (text, blur, arrows, etc.).
- Screencastify: Create screencasts by recording your screen, webcam, or both. Access the tool with the Google Chrome extension. Files are saved to Google Drive. Recordings are limited to 5 minutes with the free version.
- Screencast-O-Matic: Create screencasts by recording your screen, webcam, or both. The full version can be installed on a PC or Mac. Free videos are limited to 15 minutes.
- Seesaw (Tips): Students can use Seesaw to screencast. To do this, have them create a new drawing, insert or design their art on the available pages, and then record themselves explaining their work with the built-in record option.
Video Production
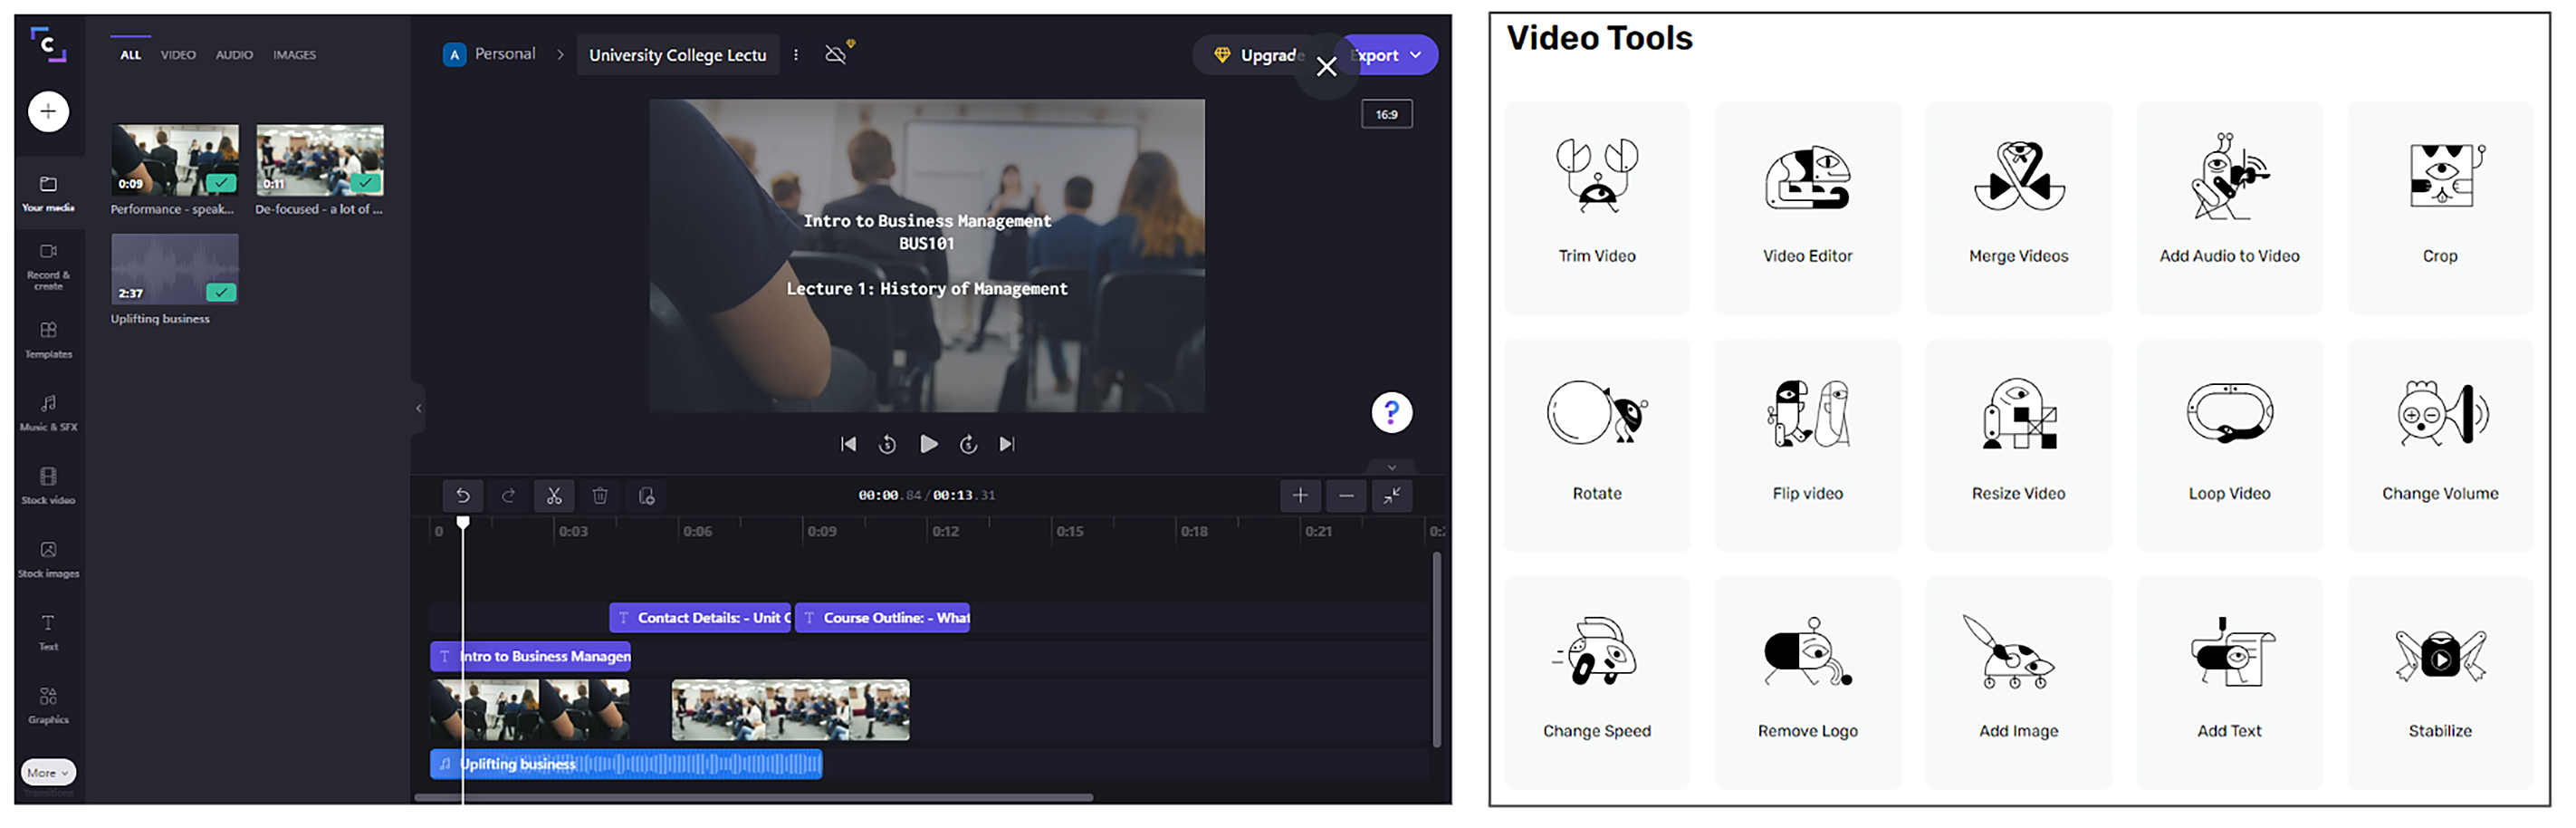
- Clipchamp (Tips): The free editor is quite robust, as it allows editing of video, image, and audio files, with the ability to add subtitles, filters, and visual effects, like slow motion. With the free version, you can record webcam videos up to 5 minutes in length and export videos up to 480p (standard definition).
- iMovie: iMovie is the full-featured video editing program from Apple. There are versions for both Mac and mobile iOS devices. If you have an Apple device, this is likely your best option since it is both powerful and free to Apple users.
- iOS Screen Recording: iOS devices have a built-in recording tool that can help you screencast what is appearing on your phone or iPad.
- Kapwing: The free Kapwing editor allows access to all Kapwing tools and projects up to 7 minutes long. Content stores on the site for 2 days, so this is best for quick projects. Final videos are public and can be downloaded. Kapwing offers a wide gallery of video tools beyond their editing studio (meme generator, subtitler, video resizer, etc.).
- WeVideo (Tips): WeVideo is a full-featured, web-based video production studio. With the Google Chrome extension, you can create screencasts with annotations. These can be imported into WeVideo for deeper editing.
In the AVID Open Access article, Create Art Using Technology, we discussed students creating websites as a way to develop their art and design skills. Websites are also great tools for having students share their artwork. They could use this site for a class assignment and then take it with them as a virtual portfolio to share with others when they graduate. Students could even use it to help them apply for a college or job. If they are aware of this future use, they may be more motivated to create a professional-looking final product.
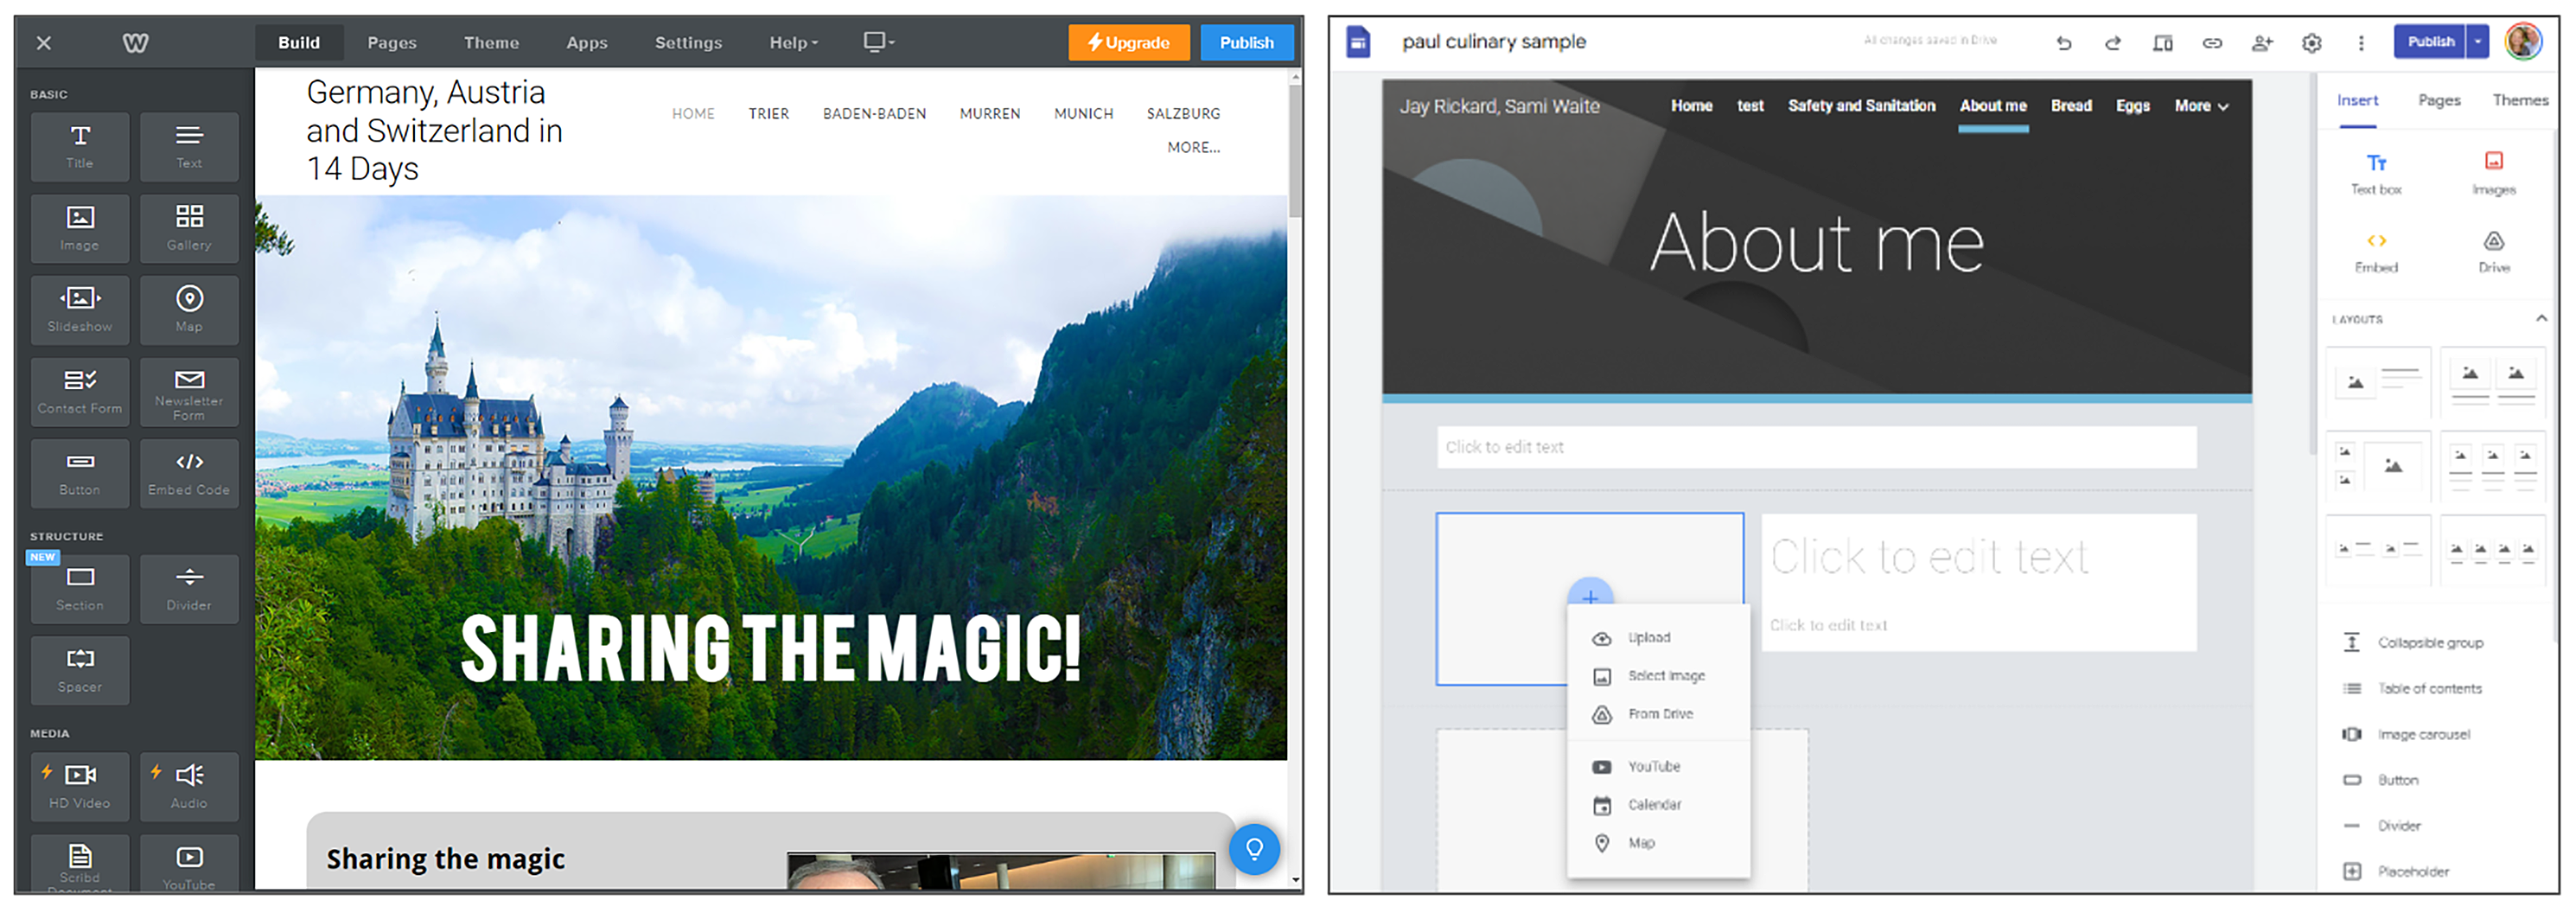
- Google Sites (Tips): This is an ideal starting point for students working in the Google ecosystem. The program is robust and accessible for students of all ages. Teachers can choose to have students publish globally or just within their school domain. Sites can also be created collaboratively.
- Weebly: This is a freemium product requiring a subscription to access advanced features. However, the free version will meet nearly every classroom need. Students must be 13 years or older since an account is required.
- Wix: This product is very similar to Weebly and offers basic tools for free. Once again, students must be 13 years or older to set up the required account.