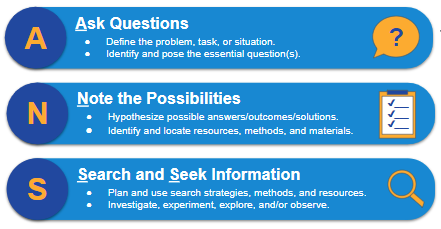
Up to this point in the process, students have done a lot of thinking, planning, exploring, and gathering. These first steps in the ANSWERS inquiry learning process have provided them with a solid foundation upon which to build. So far, they have asked questions, noted the possibilities, and sought out information to help answer their driving inquiry questions.
These first three steps are not truly finished until their project is complete, and students will continue to revisit them throughout the process, but they should now be adequately prepared to dig in more deeply and move on to the next step of the inquiry process.
As they proceed, students will continue to learn, and they will use their deepening understanding to begin weaving information and new learning together in a meaningful way. To do this, they will need to apply critical thinking skills while they read, view, listen, and observe the information they have gathered. As they process this new learning, they will record their findings, take notes, and organize their learning in a meaningful way.

This step can feel very messy. Students may be unsure if their new learning is relevant or how it fits into their overall inquiry goals. In some cases, the information might not fit together as they had anticipated, and it will need to be set aside. In other cases, new learning might inspire them to loop back to one of their earlier steps. Perhaps, something they learn will raise a new question, highlight a new possibility, or prompt them to do some more research. This is all very acceptable—and in many ways, ideal—since we often “don’t know what we don’t know” until we start learning. Whenever possible, new learning should continue to inform the process and help guide them toward finding the best answers to the questions they ask.
As they weave information together, they will be applying several key inquiry strategies and skills. It’s important to note that not every strategy will apply equally well to every inquiry scenario or to every learner. Each inquiry is unique and some strategies will be more beneficial than others. That being said, it is critical that students know what these skills and strategies are so that they can choose those that will best meet their needs.
Think of this process as filling an ever-expanding toolbox. The more tools and skills that students have at their disposal, the more likely they can find one to meet their needs. It is sort of like building a house. Having a hammer in the toolbox is important, but it is hard to build an entire house with just a hammer. Most projects, including the inquiry process, will require a wide collection of tools and skills. Therefore, you will find a broad menu of options below that can be used during each step of this weaving process to help make the inquiry process more efficient and effective. It is important to guide students in determining what will work best for their own unique learning styles and inquiry needs.
To help guide your students through this step of the ANSWERS inquiry process, you can use this Weave the Information Together study guide and Think Critically and Comprehend Information bookmark template. Feel free to make copies of these templates and refine them as needed to best meet your students’ needs.
Critically read, listen, and/or view/observe.
One key skill in this part of the process is critical reading, listening, viewing, and observing. AVID’s critical reading process can be a helpful model to guide you and your students through this step. Although it is technically a reading process, these six steps can be effectively applied to any type of media. As you review the steps, simply swap out the word “text” with “resource” and exchange “read” with “read, view, listen, and observe.” This will help you apply the process to nearly any context. While the formats may change, the core skills remain the same. Like with our overall ANSWERS process, the critical reading process will likely need to be adjusted and adapted to each unique situation, but it can be a very helpful guiding framework.
AVID’s critical reading process is composed of six components that help to increase comprehension and retention:
- Planning for reading (viewing, listening, and observing)
- Selecting the text (or resource)
- Pre-reading (listening, viewing, and observing)
- Building vocabulary (both academic and subject-specific)
- Interacting with the text (or resource)
- Extending beyond the text (or resource)
During the weaving step of the ANSWERS inquiry process, you will probably spend most of your time on Steps 3–5. The first two steps were largely completed when you asked questions, noted possibilities, and found resources. Step 6 is the application stage of this process, and while this should be guiding your work throughout the process, it will be a more specific focus later on in the ANSWERS process.
For Steps 3–5, consider how these more specific strategies can be incorporated into your lessons:
- Scan and identify the organization and structure.
- Build vocabulary and define unfamiliar words.
- Annotate the material (mark the text, write in the margins, take notes, etc.).
- Ask questions and make connections to prior knowledge.
- Connect the material to other texts or content.
This Think Critically and Comprehend Information bookmark template can be printed back-to-back and distributed to students as a handy way to remind them of key strategies to digitally mark up their resources. To learn more about this six-step process, review the AVID Open Access collection, Explore Critical Reading and Viewing in a Digital Age. As you explore the resources, consider how these skills and strategies apply to your specific inquiry context.
In addition, consider the tools and strategies listed below. These can be used to help students annotate various types of resources.
- Students can copy and paste information into an editable Microsoft Word document or Google Doc, so they can then annotate it.
- The digital formatting tools in Google Docs or Microsoft Word—like underlining, italics, bold, font colors, and highlighters—can be used to highlight main ideas and supporting details.
- The comment features in Google Docs or Microsoft Word can be used to “write in the margins.” Students can summarize ideas, ask questions that they want to further research, and make connections between other ideas or prior knowledge.
- The Highlight Tool Google Docs add-on can be used to create custom highlighter sets. Students can select a different highlighter color for each of the main topics related to their inquiry, and then quickly export their highlighted notes so that they are organized by those topics.
- Print Friendly & PDF is a Google Chrome extension that can be used to create PDF files of websites.
- Students can then mark up those PDFs using PDF annotators, such as Kami, DocHub, or PDFescape.
- For Chromebooks or when using the Google Chrome browser, students can take a screenshot and annotate the image using Chrome extensions, such as Nimbus Screenshot (Tips) or Awesome Screenshot.
- For Windows computers, students can also use the native Snipping Tool or download the Snip & Sketch tool for free from the Microsoft Store.
- For Mac computers, students can use the native Markup Toolbar.
- These Google Chrome extensions can also be used to annotate and/or add notes to web pages: Hypothesis, Sticky Notes, Page Marker, and Scrible Toolbar.
- InsertLearning (Tips) is a Google Chrome extension that enables students to add comments and highlight text on websites. As a teacher, you can also use this tool to assign students specific website readings in which you include notes, questions, discussions, and even formative quizzes. The free version supports creating up to five lessons for an unlimited number of students. You can also delete lessons to add additional ones.
- Google Chrome extensions, like ReClipped or YiNote, can be used to create time-stamped notes as students watch videos. These notes are saved and can be accessed later.
- If students are recording their observations, they can use video editing tools, like WeVideo (Tips), Clipchamp (Tips), or iMovie, to mark up their video.
- As students encounter new vocabulary, they can use online dictionaries, such as Merriam-Webster or Learner’s Dictionary. They can also use the built-in dictionaries within Google Docs or Microsoft Word to define new words.
- Postlight Reader, Text Mode, Read Mode, and Just Read are chrome extensions that remove distractions while reading online.
- Visor and Reading Ruler are Google Chrome extensions that aid reading and reduce eye strain.
- Rewordify.com is a website where you copy and paste text, and it “rewordifies” by producing a simplified version. The reworded words are highlighted, and you can click them to hear and learn the original, harder word.
- Text-to-speech tools, often called screen readers, convert the text on a computer screen into audio. Some popular screen readers include Read Aloud (Tips), NaturalReader, and Use Immersive Reader on Websites [unofficial].
- Closed captioning is the text that appears on the bottom of a video screen. If needed, students can turn captions on and off on YouTube.
- Translation tools can help to reduce language barriers by converting text into a different language. ImTranslator and Google Translate are two Google Chrome extensions that can be used to translate resources.
- Many research databases and programs have accessibility services built into their tools. Be sure to ask your library media specialist for assistance in leveraging options that are available in these platforms.
- Review the AVID Open Access article, Empower Students With Accessibility Tools, for even more options.
Take Notes. Record Findings. Organize The Information.
As students are learning and collecting ideas, they will need to record their findings in a meaningful way. This includes taking notes and organizing the information, and it is a key part of the sense-making process. By categorizing and organizing, students will begin to make connections between ideas and structure them in a way that makes sense holistically.
Like most of this process, it can be messy, complicated, and sometimes confusing. This is normal. After all, learning is a messy process, but part of what makes inquiry so powerful is that students engage in productive struggle, which can ultimately lead to deeper and more complete understanding. It’s also very engaging and forces them to use their critical thinking skills to the fullest.
Like with critical reading, AVID has developed a powerful focused note-taking process, which includes five phases. Once again, this process can be adapted and revised to meet your specific needs, but by following the overall flow of the process, students can better document, organize, and make sense of their new learning. These five steps include:
- Taking notes
- Processing notes
- Connecting thinking
- Summarizing and reflecting on learning
- Applying learning
During this phase of the ANSWERS inquiry process, students focus on Steps 1–3 of focused note-taking. As they critically review their sources and gather information, they will record their key learning, process and organize their notes, and begin connecting the ideas together. Through this process, they will gradually make sense of the disparate pieces of information and synthesize new learning into a more meaningful whole. Of course, students need to remember that all of this work is ultimately driving them toward the final application and sharing of their learning. To learn more about the focused note-taking process, review the AVID Open Access collection, Develop Your Students’ Focused Note-Taking Skills.
As with the critical reading process, you may want to review and take advantage of the wide range of digital tools that can help to make this process more effective and efficient.
The format for taking notes will be dependent upon the nature of the inquiry, how students can most effectively process their new learning, and how students will ultimately use their notes to demonstrate their learning. The following list provides examples of note-taking formats and tools.
- Column Format: Use columns or tables to identify important ideas, as well as note responses and reflections, in Google Docs, Microsoft Word, or PDF.
- Mind Maps: Show connections between ideas by using mind mapping tools, like MindMeister, Popplet, Mindomo (Tips), Bubbl.us, Creately, Draw.io, Canva, MindMup, or Coggle.
- Graphic Organizers: Organize the information using the draw features in Microsoft OneNote, Google Drawings (Tips), Google Slides, or Microsoft PowerPoint.
- Sketchnotes: Combine handwriting and drawings by using tools such as Sketchboard, Explain Everything, Drawing Pad, Google Jamboard (Tips), or Autodesk SketchBook.
- Audio Notes: Record your notes by using the audio recording tools in Google Docs, Microsoft OneNote, or a website like online-voice-recorder.com.
There are many digital tools available that can be used to both collect and organize notes.
- Notebook tools include Evernote, Notability, Google Keep, Zoho Notebook, and Microsoft OneNote.
- eBinder tools include Google Sites (Tips), Microsoft OneNote, Google Slides, Microsoft PowerPoint, Google Keep, and Seesaw.
- Use a template to save setup time. Here are some templates to get you started: AVID eBinder templates and SlidesMania’s Slides and PowerPoint templates.
As students collect information, they will need to organize it.
- Use the bullet and outline tools in Google Docs, Microsoft OneNote, or Microsoft Word to outline main ideas and supporting details.
- Use Microsoft Teams or Google Drive to organize digital resources. See the Organize Your Materials: eFiles poster for suggestions.
- Set up an organizational system for notebooks and/or eBinders. See the Organize Your Materials: eBinders poster for suggestions.
- Use bookmarks to manage web resources. Browsers include bookmarking features, including Google Chrome bookmarks, Safari bookmarks, and Microsoft Edge favorites. Save to Pocket is a Google Chrome extension to tag and bookmark online resources.
- For even more ideas, review the AVID Open Access article, Develop Your Students’ Digital Organization Skills: eFiles, eBinders, and ePortfolios.
As students take notes, they will need guidance on how to properly paraphrase and give credit to the information. The following tools can help students know if they are paraphrasing well or plagiarizing.
- QuillBot can be used to help rephrase text and suggest alternative synonyms.
- Plagium (Google Docs add-on), Plagiarism Checker by Grammarly, and Citation Machine are “freemium” checkers, where you can copy and paste text to check for possible plagiarism.
- Google for Education provides “freemium” originality checkers in both Google Classroom and Google Assignments.
- Turnitin is a premium plagiarism checker that includes grading and feedback features.
- Interesting fact to share with students from Merriam-Webster: “Plagiarize (and plagiarism) comes from the Latin plagiarius ‘kidnapper.’ This word, derived from the Latin plaga (‘a net used by hunters to catch game’), extended its meaning in Latin to include a person who stole the words, rather than the children, of another.”
As students use sources, it is important that they learn how to give proper credit to the authors and/or publishers of the information. Fortunately, there are many tools now available to help automate this process so that students can focus more on their writing and less on the technical aspects of giving credit to a source.
- Google Docs Citations and Bibliography and Microsoft’s Citations & Bibliography tools can be used to add, manage, and format citations in MLA, APA, or Chicago style for books, websites, and articles.
- Citation Machine, EasyBib, and CiteMaker are online tools that can be used to create citations.
- OWL is maintained by the Purdue Online Writing Lab and includes research and other citation resources to guide students.
- Many research databases and programs have citation generators built into their tools. Be sure to ask your library media specialist for assistance in leveraging options that are available in these platforms.