In the writing process, once you have your ideas collected and organized, it’s time to start drafting. While you can certainly write without the use of technology, digital tools can offer significant advantages throughout the writing process, including when creating your first draft.
Choosing a Tool
The first thing you’ll need to do is choose a writing platform, and your specific choice will be shaped by your intended publishing format. Most often, you will begin by using a word processing program, like Microsoft Word or Google Docs. Even if you plan to later place your text into a multimedia platform, like a website or blog, you may still find it helpful to draft the initial message in a word processing program since this will give you access to a powerful suite of tools specifically designed for writing.
In most cases, you’ll likely end up using the tool promoted by your school district, but sometimes, you might have a choice of several options. While most writing tools are similar, they do have a few functional differences. Be sure to explore the pros and cons of each platform and choose the one that will work best for you and your writing project.
Five Tips for Using Technology While Drafting
1. Use your outline.
When writing your first draft, it’s important to have your outline nearby. The more well-developed the outline is, the easier the drafting process will be because it will provide you with meaningful direction.
It’s like mapping out a trip before you head out on the road. If you know where you are going, why you want to get there, and what path will be most efficient, you will be able to drive with purpose. While your trip may still include detours and some unplanned—and potentially beneficial—new stops, you’ll almost certainly make fewer false starts and take less wrong turns if you follow a plan.
2. Tile your screen.
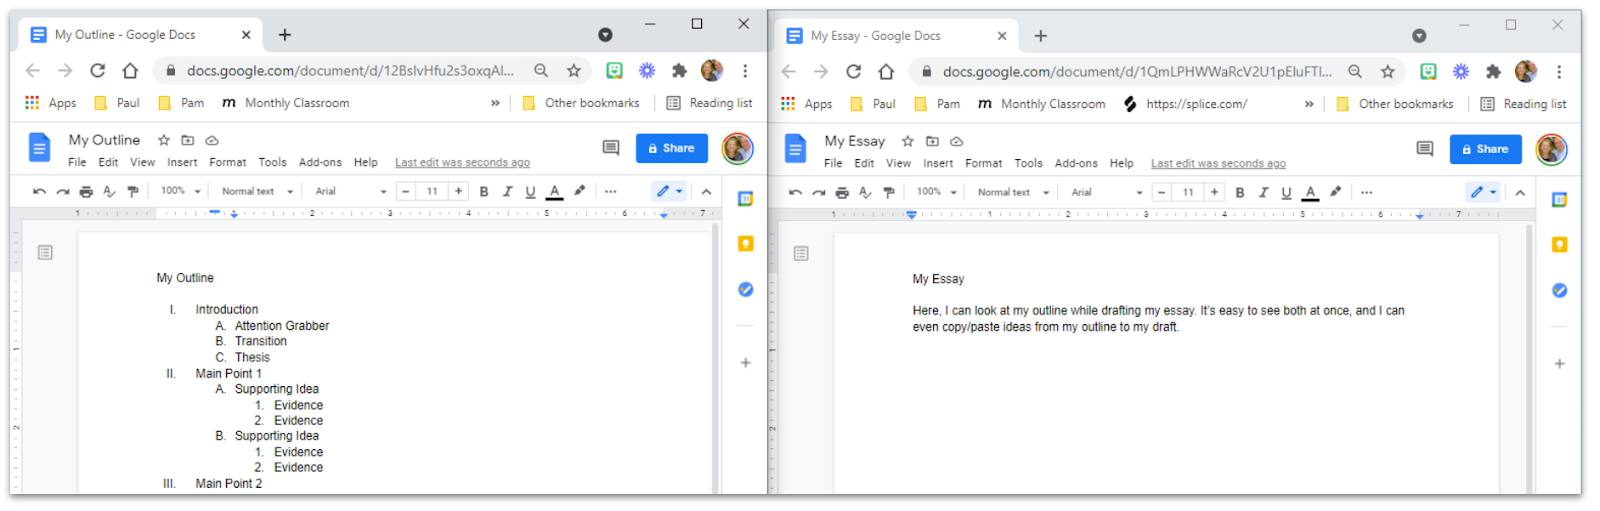
If your outline has been written on paper, you can lay it beside you as you type on the screen. However, if both your outline and draft are digital, it’s helpful to tile your screen.
Tiling means placing two open windows side by side, so you can see both documents at once when looking at your computer screen. This approach allows you to write without having to flip back and forth between browser tabs. It also allows you to quickly and conveniently copy and paste ideas from your outline into your draft.
The process of tiling your screen will be slightly different depending on your device. You can manually resize your windows and drag them to different sides of the screen, or you can use built-in shortcut commands to instantly snap your windows to one side of the screen or the other.
For instance, on a Google Chromebook, you can type Alt + [ to snap to the left and Alt + ] to snap to the right. You can also click, hold, and drag the title bar of a window to one edge or the other, and it will snap to that half of the screen. If you’re not using a Chromebook, a quick internet search will give you the shortcuts for your device or browser.
3. Use the integrated writing tools.
Word processors include many integrated tools with quick and easy access. They’ve been built into the tool because they are the most common and useful tools sought after by writers. Here are a few to consider as you write your draft.
Speech-to-Text
While it’s common to simply type text into your document, speech-to-text options can also be used. With this feature activated, you speak your ideas, and the speech-to-text program converts your words to text on the screen.
This is especially helpful for those who don’t type well, but even proficient typists may find it faster to dictate their ideas than to type them. Also, some writers compose better if they can verbalize their ideas out loud, and these tools allow them to efficiently capture their ideas in text format. Google Docs includes a Voice Typing option under their Tools menu, and Microsoft Word uses their integrated Voice Access feature.
Formatting Toolbar
Even when you are primarily drafting and capturing ideas, you will still likely be doing some editing and formatting along the way. The convenient shortcuts on the toolbar give you quick access to the most common tools, like alignment, font color and size, and text formatting.
As you are drafting, it can be a helpful strategy to highlight ideas that you wish to revisit later. Using the highlighter tool or comments feature can be great ways to tag these spots for future review and revision. Doing this can help you keep moving and achieve a completed draft before slowing down to edit and revise.
Cut, Copy, and Paste
Even though you’re not in the editing stage yet, you’ll almost certainly be moving things around as you compose. This is a natural part of the composition process. The ability to cut, copy, and paste might be the most powerful benefit of using a word processor to write and revise.
When a draft is written out on paper, it can be very tedious to completely rewrite the work to create the next draft. However, when it’s easy—as it is when using a word processor—you will be much more likely to see it through. It also promotes the idea of changing your thoughts as your ideas evolve, which can help foster a growth mindset.
Word Prediction
With the rapid growth of AI, most tools now include word prediction. You might be most familiar with this in terms of text messaging, when your phone suggests words that you might intend to use next. This word prediction feature can be helpful when drafting a message.
Artificial intelligence helps writing programs learn your tendencies and predict what you might want to say next. While we don’t want students to fall into the trap of using the same ideas over and over, this scaffold can be especially helpful for young writers, language learners, or students with learning disabilities.
Dictionary and Thesaurus
Writers no longer need to carry around a thick, backbreaking dictionary and thesaurus. These are now conveniently integrated into almost all word processors. While you may turn to these tools when revising, they can also be very helpful while composing. These features are often available through menu options or by highlighting a word and right-clicking on it.
Spelling and Grammar Checkers
Even though spelling and grammar checks are part of the revision and proofreading stages of the writing process, integrated spelling and grammar checkers can still be very helpful during the drafting stage. If you can quickly catch these mechanical errors when drafting, it will help you shift your focus during the editing stage from mechanics to ideas. This often leads to more substantial and helpful feedback.
Mechanics are important, but the ideas are the heart of any writing experience. These integrated tools help to automate the low-level components of writing, allowing you to focus more fully on your message.
Word Count
While this is not the most important writing tool, it can be very helpful when you are given an assigned length for a writing project. It can save a lot of time tracking the progress of your work. This recaptured time can then be spent on the actual writing.
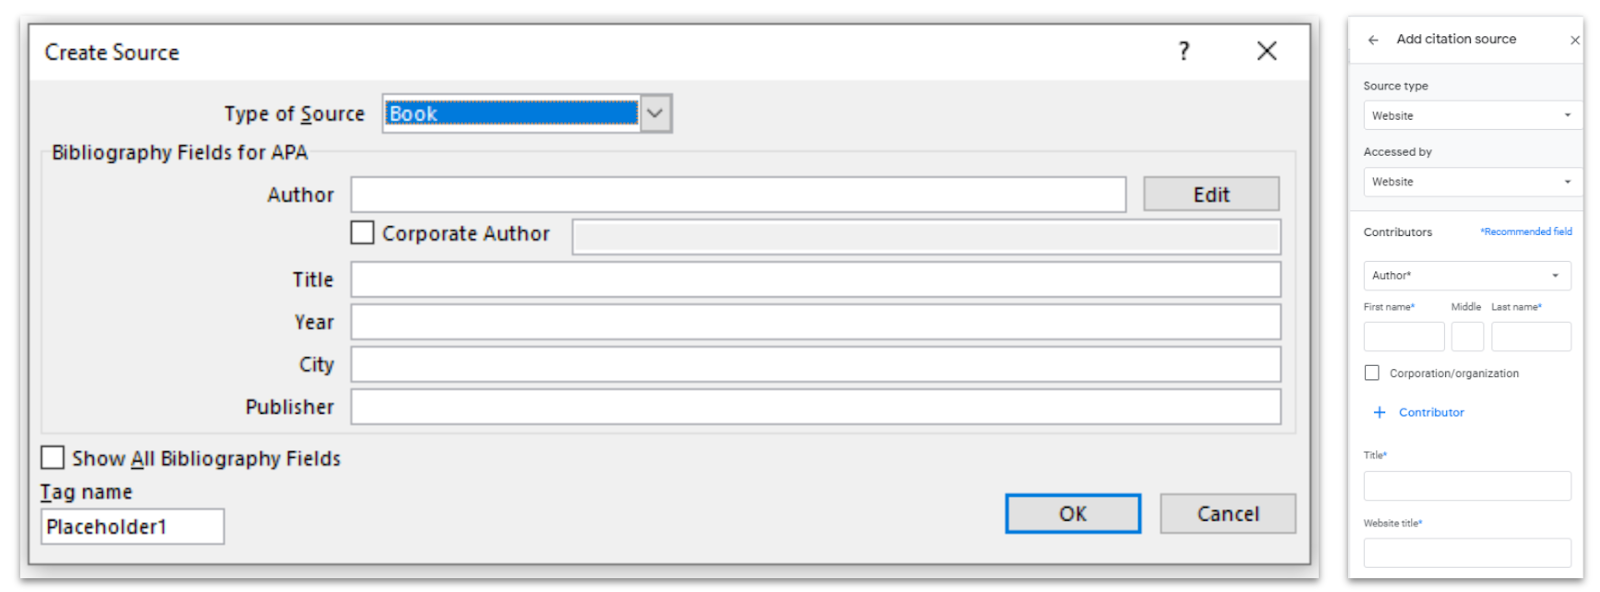
Citations
Google and Microsoft both offer integrated citation generators. In Google Docs, you will find this under the Tools menu, while in Microsoft Word, it is located under the References tab. Use these tools to keep track of the sources that you are using in your writing.
4. Explore add-ons and extensions.
While it’s a good idea to become proficient with the integrated tools of your word processor first, you may not want to stop there. There are increasing numbers of add-ons and extensions that can be very helpful to you while writing. Microsoft offers add-ins through their AppSource. Google Docs and Google Chrome offer the largest selection of additional options through their Workspace Marketplace. Here are a few examples of add-on tools that you might find helpful:
-
- OneLook: This Google Docs add-on from Datamuse gives you a quickly accessible thesaurus that pops up on the right side of your word processor. It can help students find synonyms, related words, rhymes, and more. While basic thesaurus tools are integrated into the standard programs, this add-on can offer additional functionality and improved ease of use.
- MathType: Typing in math characters can be a challenge. That’s where this Google Slides and Docs add-on from Wiris comes in. It allows you to easily type in math equations and chemical formulas. There is also a Microsoft version available. Similarly, Music Snippet from Tutteo Limited allows you to add musical characters and notations in Google Docs, and Yatin Bayya’s Easy Accent Marks allows you to conveniently add language accent marks to typed text in 15 different languages.
- Google Docs Offline: This can be a lifesaver for students who don’t have internet at home, as it allows them to continue working on a Google Doc even when a Chromebook or device is offline.
- Draftback: This is a Google Chrome extension developed by James Somers that allows you to play back the drafting of a document as if it were a movie. While teachers often use this as a way to detect plagiarism or copy-and-pasting from AI, it can also help students review their thought process through the revision history. It can even be used retroactively on existing documents.
5. Leverage AI tools.
During the drafting process, it’s important that students don’t depend on AI tools to do all the writing for them. For that reason, AI is probably most often used during the pre-writing, revision, and editing stages of the writing process. Still, there are ways that it might make sense during the drafting process. Here are two options to consider.
Questioning
The first strategy is to teach students how to ask questions about their own writing. Essentially, this strategy has the students write out their draft first and then ask the chatbot questions about that writing—much like they would ask their teacher for input. To do this, they would paste a draft of their writing into a generative AI chatbot, and then ask a variety of follow-up questions, such as:
-
- “What am I missing in my development of this idea?”
- “Does my main idea make sense?”
- “What questions might a reader have after reading this paragraph?”
- “Is there anything confusing or unclear in this section?”
They could ask these questions about a portion of their writing or perhaps the entire work.
Custom Chatbots
Another potentially powerful option is to create a custom chatbot with a tool like SchoolAI. By creating your own custom chatbot for student use, you can retain more control over the AI interaction, including how much and what type of help your students receive from the chatbot.
With this approach, students may still use the strategy of pasting in content and asking a question, but by offering a custom chatbot, you can shape the feedback that students receive. For instance, you might direct the chatbot to only pose probing questions or give hints, rather than composing text for the student. This can help the chatbot act more like a coach or helpful teacher.
For many students, the drafting stage of the writing process is the most challenging, and it requires a high level of critical thinking. While we don’t want technology to do the writing for our students, having them use technology scaffolds and strategies can help make the challenge a little less daunting.
AVID Connections
This resource connects with the following components of the AVID College and Career Readiness Framework:
- Instruction
- Rigorous Academic Preparedness
- Student Agency
- Insist on Rigor
Extend Your Learning
- Voice Typing (Google)
- Voice Access (Microsoft)
- AppSource (Microsoft)
- Workspace Marketplace (Google)
- SchoolAI (official website)