Quality pre-writing can set you up for success in the writing process. It’s like the foundation of a house. If the foundation has been planned well, plotted accurately, and poured with quality materials, you will have a solid base upon which to build your home. The same goes for writing. If you have a strong plan, a clear purpose, solid ideas, and a quality organizational structure, you are set up for increased success throughout the process.
During pre-writing, you will complete several tasks that will make your writing more efficient, cohesive, and effective. As we look at each pre-writing task, we’ll explore digital tools that can help you power up each corresponding aspect of the writing process. Together, these ideas can help to successfully guide you through your pre-writing work.
Your first job as a writer is to identify and clarify your writing task. Why are you writing? Is your intent to inform, persuade, or entertain? What is your topic? Who is your audience, and how will your final product be published? If you don’t know the answers to these questions, you may end up wandering aimlessly through the writing process without ever establishing a clear focus or coherent message. On the other hand, with a clear vision, you can be intentional about each decision in your progression through the writing process, and you will increase the odds that you will end up with a quality final product.
Deconstructing a Prompt
If you are given a writing task, you can answer many of the key pre-writing questions by deconstructing and interpreting the writing prompt you’ve been given. Being given a specific prompt is common in school, but it also applies in career settings. Journalists are given writing assignments. Lawyers write briefs that are aligned to their cases. Advertisers and the companies they work for are trying to sell a product. Law enforcement officers write their reports about the specific cases they are overseeing. In other words, it can be good, authentic practice to be given a writing prompt.
To deconstruct a writing prompt, you will conduct a careful and systematic breakdown of each word and key element included in the prompt. By carefully identifying its essential components, you will be more likely to recognize, and therefore meet, all of the writing assignment goals and expectations given to you.
To help break down your prompt, you can conveniently use the technology tools built into your word processing program. Specifically, use the highlighters, text formatting options, and comment features to mark up and annotate your text.
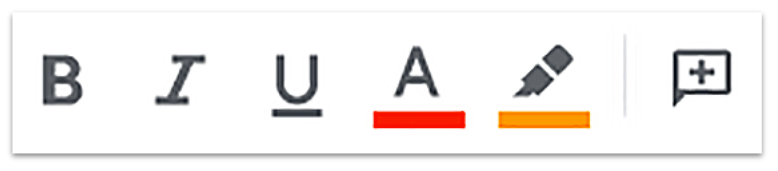
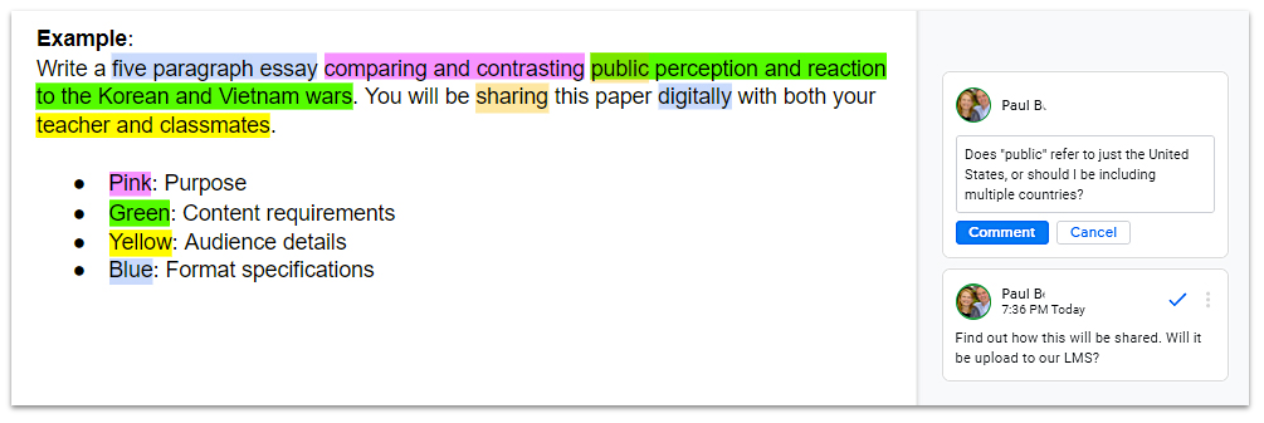
One effective strategy is to use the highlighter to identify the key words in the prompt. This will help you systematically examine the details of the prompt one word at a time. It can be helpful to set up a color-coding system to identify each aspect of the prompt. Here is one example of how colors could be assigned:
- Pink: Purpose
- Green: Content requirements
- Yellow: Audience details
- Blue: Format specifications
While the integrated highlighters work very well, you could choose other methods if you prefer, such as changing font colors, bolding important words, or otherwise annotating your prompt.
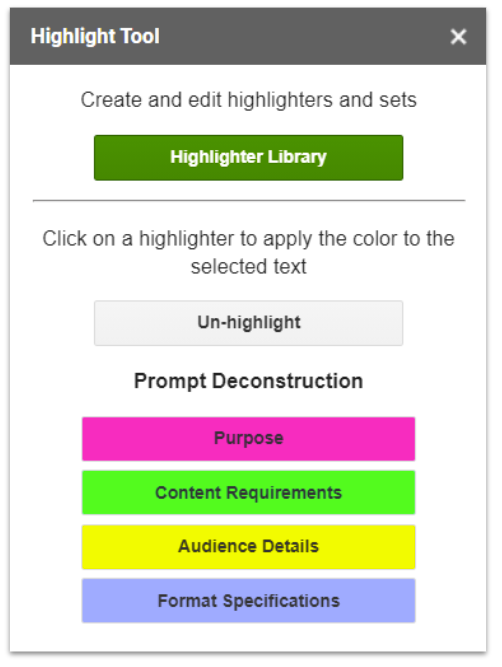
To enhance the highlighter strategy, consider trying out the Google Docs Highlight Tool add-on. This tool offers you the ability to create custom highlighter sets with a corresponding legend that appears at the side of your page. As the teacher, you have the option of creating color-coded highlighter sets ahead of time and can export them for your students to import into their document to use. Of course, students can also use the add-on to create their own, personalized highlighter sets.
To take this deconstruction process to the next step, use the comment tool to pose questions or initial thoughts about specific parts of the prompt. You might include clarifying questions or ideas about how to approach a specific aspect of the writing assignment. In the following example, the writer uses the comment tool to wonder about the specific meaning of the word “public” in the prompt and desires a clarification about how the final product will be shared.
Finding a Writing Topic
If you have been given a prompt, your writing task is largely defined for you. However, if you are choosing to write on your own or are tasked with finding your own topic, you might need some inspiration to get you started. For instance, maybe you are assigned to write a short story, but you need to come up with your own topic and storyline. Online idea generators, such as those detailed below, can be a great way to jump-start creativity or to build a writing prompt:
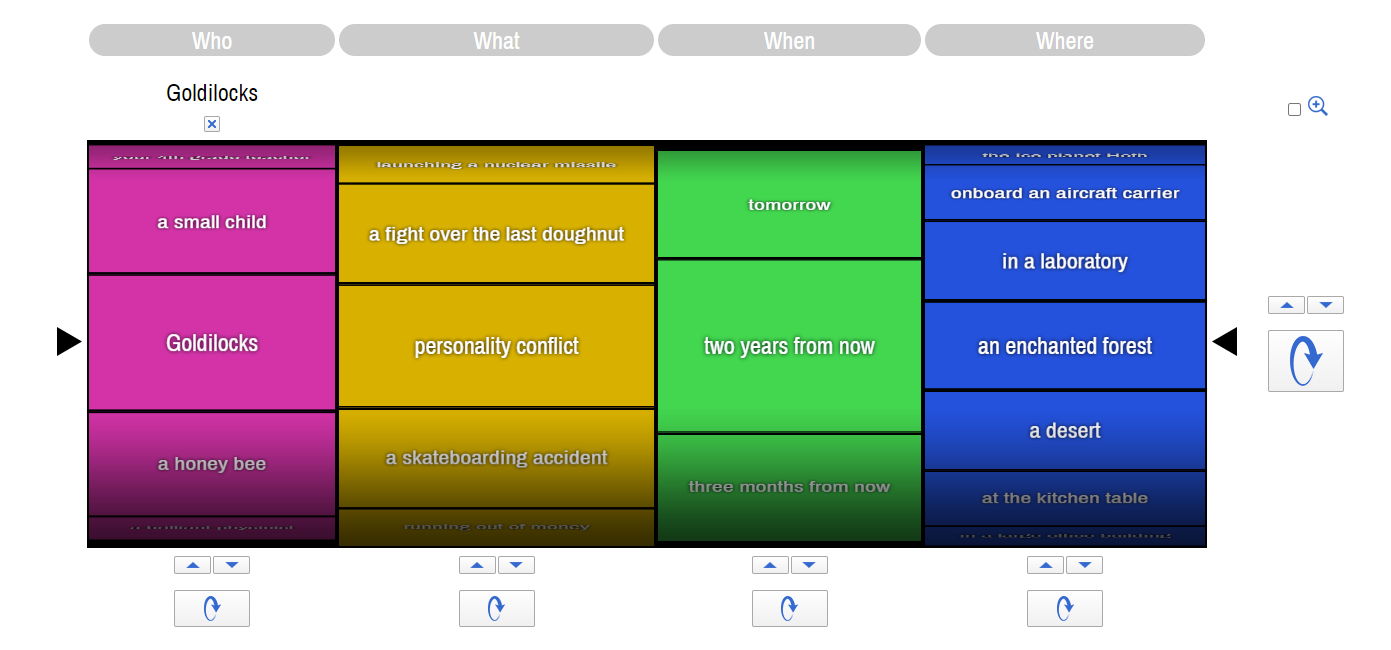
- Flippity Randomizer: This free tool gives you a random writing prompt that includes the who, what, when, and where. You can use the premade sample spinner, or you can add your own options to a customized version. By adding your own key words and categories, you could use this for almost any type of writing.
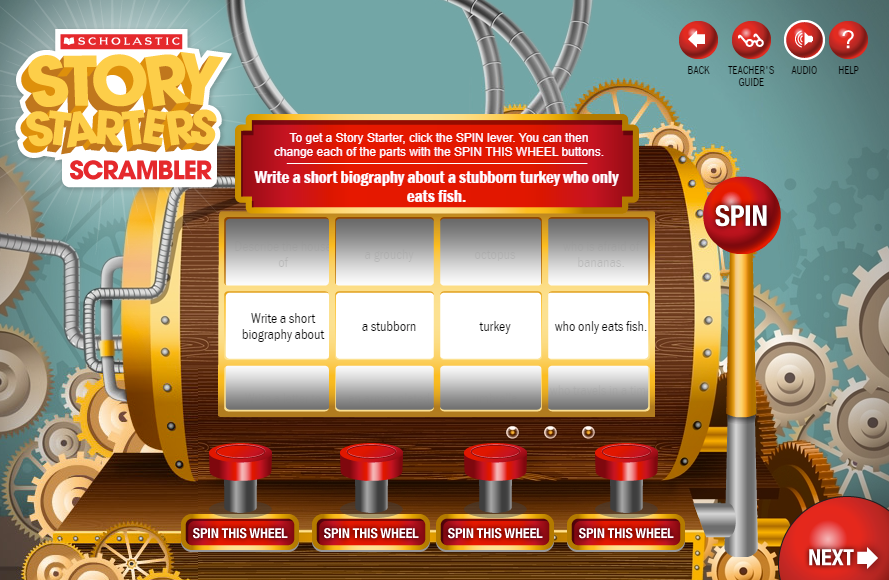
- Scholastic’s Story Starters: This random idea generator is intended for grades K–6 and works much like the Flippity wheel. It includes preloaded prompts for adventure, fantasy, and sci-fi, as well as a random scrambler option. If you want to go further, this site also walks you through guided steps to produce one of four final products: a notebook, letter, newspaper, or postcard. Once you’ve finished following the prompts, you will have the option of printing or downloading your finished product.
- The Story Shack: This prompt generator is best suited for secondary students. As soon as you load the page, you are given a writing prompt to get you started. If you don’t like this first option, you can click “Get ideas” for more ideas. Each click will generate a new prompt.
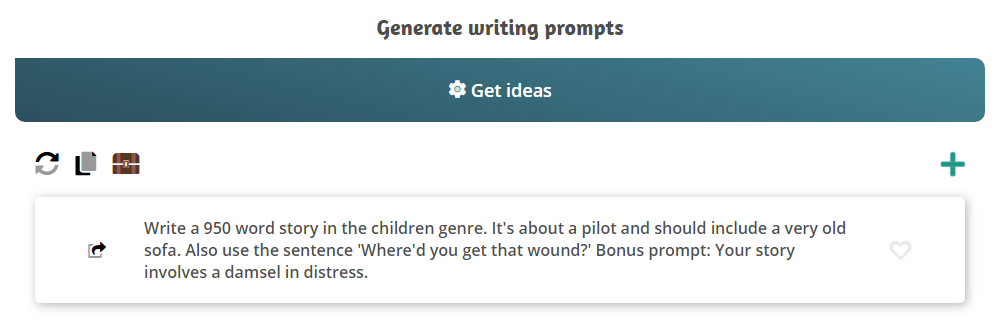
The “storage chest” icon above the prompt takes you to other random word and name generators that you can use to spur your creativity. For example, you could use this feature to help choose character names. - Visual Writing Prompts: This site provides prompts intended for grades 3–12. You can filter by genre, grade, or subject area (Language Arts, Science/STEM, and Social Studies). The prompts vary in purpose and include both fiction and expository topics.
- PIC-LIT: With this tool, you start with a photo. Then, you can drag words from a word bank up to the image, much like you would do with magnetic poetry. You can also use freestyle to type your own words and take back a little creative control. You can choose to use this as your writing canvas or simply as a prompt generator to get you going. Get inspired by the pictures or words in the accompanying word bank. Both can be effective story starters.
- Writer Igniter: This idea generator is unique because it combines a word prompt with a picture prompt. It provides random ideas for character, situation, prop, and setting.
- Story Cubes: This blog post from Control Alt Achieve gives directions for using Google Drawings to create a story cube. Once it has been created, you can roll the dice to get your prompt. If you create multiple dice, you could generate a series of ideas to include in your writing, much like the spinner generators mentioned earlier.
- Emoji Writing Prompt Generator With Google Sheets: In this second blog post from Control Alt Achieve, Eric Curts offers a random emoji generator created with Google Sheets. Choose the number of emojis to see and refresh the page. The sequence of emojis you receive can be used to ignite your story writing imagination.
- Writing Exercises: This site offers a variety of writing prompts. Choose a title, plot, character, first line, random picture, news headline, and more.
- NaNoWriMo Young Writers Program: While this site doesn’t give you a topic, it gives you a purpose: to write a novel in a month. This is an ambitious task, but motivated young writers love this challenge. The program supports under-18 writers and K–12 educators during the main contest hosted each November. There are smaller writing challenges throughout the year.
If you are writing about a non-fiction topic, the Internet can be your best friend. By conducting a Google or Wikipedia search using a broad topic, you can find connections that you might not make on your own. These discoveries can lead you to a writing topic.
For instance, you might be assigned to chronicle a year in history. In this case, you could conduct a search for that year and explore the key words and timelines that come up in your list of Google results or on the Wikipedia page for that topic. Alternatively, perhaps you need to choose a part of the circulatory system to research. A quick search of “circulatory system” will turn up numerous details and subtopics from which you can choose. This same strategy can be used with online encyclopedias, pro–con websites, news organizations, or content-specific websites. The options are nearly endless. Explore and be inspired!
Once you’ve defined your task and have a clear mission for your writing, you will want to generate some preliminary ideas to inform your work. Depending on your purpose, this might take several different forms.
If you are engaging in creative writing, you may want to begin by brainstorming. Brainstorming is a great way to get some initial ideas down on paper without evaluation. In fact, the key to quality brainstorming is to turn off your internal critic and let the unfiltered ideas spill out. This can be challenging, but it’s a key component to tapping into your right-brain thinking—or the creative half of your brain. Banish those logical thoughts and the inclination to self-critique. Let your imagination have fun making random, free associations! This is where the most original ideas are often born.
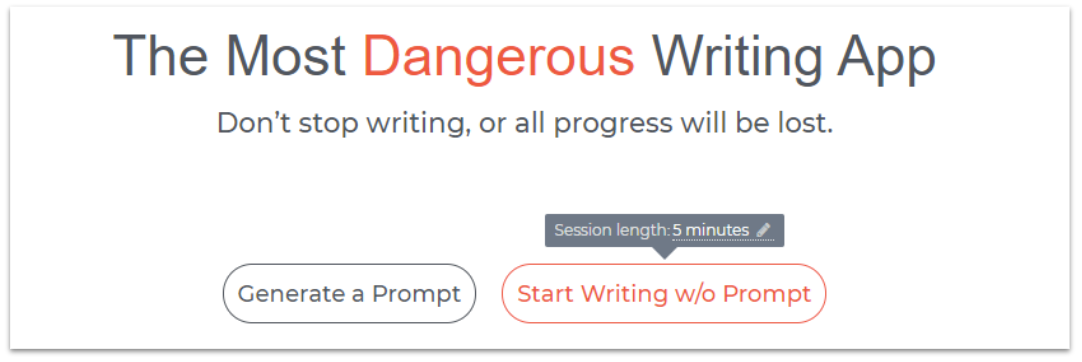
The Most Dangerous Writing App is a website by Squibler that inspires freewriting with its creative approach. It offers a writing space and a time limit to get you started. The catch is that you must keep writing continuously. If you stop, everything you’ve written will disappear. The intent is to get you freewriting and generating as many ideas as possible in a short amount of time. You can set the timer anywhere from 3 to 60 minutes. You can choose to receive a randomly generated prompt, or you can start writing without a prompt. It’s up to you. For even more fun, choose “hardcore mode.” With this setting turned on, your writing will be blurred out until you finish.
If your goal is expository writing, you will probably want to do a little preliminary research and idea exploration to give you context during the brainstorm process. After all, it’s hard to brainstorm if you don’t know anything about a topic. For this research, you can return to your favorite search engine, an encyclopedia, or a quality research database.
- Conduct a general web search. Use Google or another web browser and search for your topic, keeping it broad. Start with just your general topic. Then, scan the results for key words and general ideas that seem to come up repeatedly. These are likely key subtopics that deserve further exploration. If you see terms or names that you don’t recognize, you will probably want to dig in and find out more. You may also run across related topics that you hadn’t initially considered. Be on the lookout for synonyms. Are there other terms used to describe your topic? As you learn more, you may discover that you were not using the best key word for your searches.
- Search an encyclopedia. Encyclopedias are not intended for serious research, but they are excellent for providing general information. Since you’re just collecting ideas at this point in the pre-writing process, even Wikipedia can be a fine option. As you search, look for clues. What are the key aspects of your topic? What are people debating? Is there key vocabulary that you need to know? What should you explore next? To answer these questions, look for the following features included in most online encyclopedias:
-
- Outlines: Does the encyclopedia break down the topic into outline format? This can be very helpful in identifying key aspects of the larger topic.
- Headings: Scan the headings to see how the topic has been broken down.
- Bold or hyperlinked words: Encyclopedias often bold or hyperlink key words. If they are called out, they are probably important, so take note of these. It can be especially helpful to find the names of important people, places, events, and studies.
- Bibliographies or references: You will often find a gold mine of source material at the bottom of encyclopedia entries. Follow up on these to dig deeper into the topic. Hyperlinks often make it quick and easy to jump to these resources.
- “See also” references: Many times, you will find “see also” lists that can guide you to related subjects that can better inform your quest for information.
- Research databases. While databases will often be the source of more specific research later on in the process, they can also help provide context and overview. By conducting a general search, you will often find many of the same features available in encyclopedias: content outlines, key words, and “see also” references.
At this point in the process, you are not looking for specific evidence or supporting content yet. You are in an idea-gathering stage, and you’re looking to gain a better general understanding of the topic, which will allow you to discover subtopics and key ideas to explore further. Because of this, you don’t need to keep detailed notes at this stage of the process, but you should keep track of the key words and ideas you find. You will reference these in future steps.
By the end of this second task, you should have generated enough focus to be able to identify the general idea for your creative writing or the thesis for your expository work. This clear focus will be essential in guiding you through your next steps.
This task will again be shaped by your purpose, but regardless of intent, you need to begin deciding how you will develop your ideas. If you are writing about a personal experience or conducting creative writing, you may want to return to the brainstorm stage. However, when you brainstorm this time, your work can be more targeted to specific ideas that you wish to develop in your writing. In a sense, you are generating a bank of raw material that you can use to build your writing project. By brainstorming digitally, rather than on paper, you will have a searchable document that can be more accessible later on in the writing stage. It will also allow for easier cut/copy/paste actions that can save you lots of time if you choose to use brainstormed ideas.
If you need to conduct research for your project, this is the time to do it. You should have identified topics and ideas in the previous task that you can now use to guide you through the research process. Many times, writers will sketch out a preliminary outline that can define the research they will do and the content they need to gather.
To help guide you through the research and inquiry process, explore the AVID Open Access article, Search and Seek Credible Information: Step 3 of the Searching for ANSWERS Inquiry Process. This article breaks down ways to gather ideas and content, provides online search tips, and reviews methods for finding credible material. The Internet has revolutionized the research process, and this article will help you maximize its power.
If you intend to cite information from other sources, you will want to generate and keep track of source information. The Purdue Online Writing Lab (OWL) is an excellent reference site to help guide you through the research and citation process. Think of it as an online writing guide that even includes an integrated version of the citation generator from Citation Machine. Digital citation generators can automate much of this process for you, thereby saving you time that you can rededicate to your writing. Here are a few citation generators to get you started:
As you are taking notes and gathering ideas, you will want to keep them organized. Most of us are familiar with the strategy of using recipe cards to capture our research and organize them into categorized piles. While this can still work, there are a few digital options that you can also explore. Here are several benefits to collecting your notes digitally:
- They are searchable.
- Ideas can be quickly cut/copied/pasted.
- They will be stored online and accessible anywhere.
- It’s easy to apply color-coding.
Some options for managing the note-taking process include:
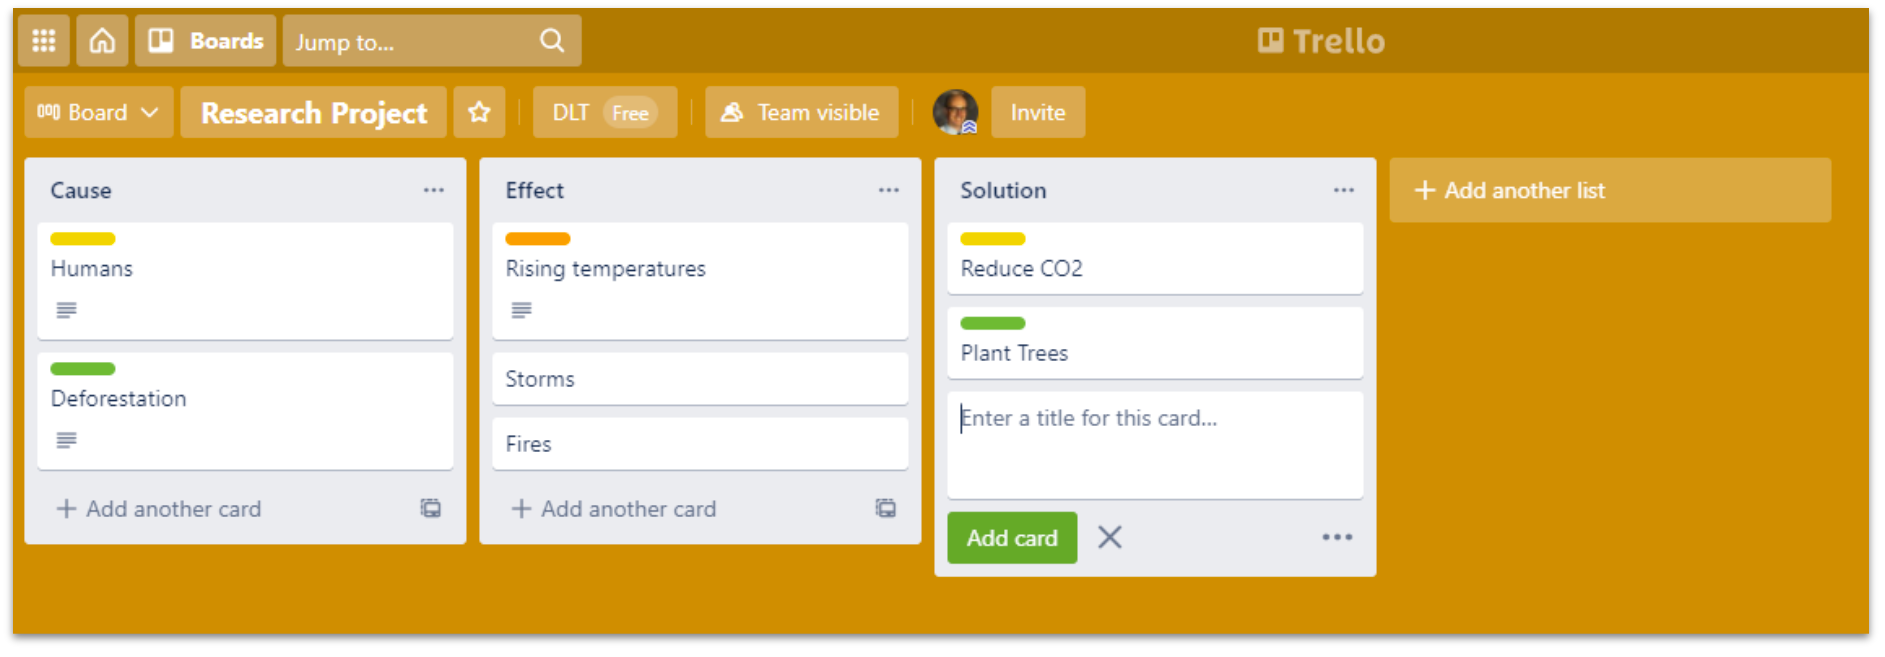
- Trello: Trello allows you to create visual boards. On each board, you can create lists—which can be your research subtopic—with cards attached below the list. Notes can be tagged with color-coded labels to help you align to your sources, and you can even add checklists or attachments to each card. Cards can be dragged and dropped to reorganize. As a bonus, cards can be searched.
- SuperNotecard and NoodleTools: These tools are specifically designed for the note-taking process, but they are paid products. If you have access to these, they are ideal and allow you to connect notes to sources automatically.
- Microsoft OneNote: If you have access to this Microsoft digital notebook tool, you can create tabs for each of your main points and then pages and subpages for more specific notes. Eventually, you can reorganize your tabs until they morph into a sequential outline. You can also list your sources in one of the sections, and then label each one with a tag or code of your choice. This will help you keep track of source information for references and citations. OneNote is searchable, which makes it easy to relocate your ideas.
- Word Processors: Using Google Docs or Microsoft Word will be much like taking notes on paper, and you’ll need to determine how you will organize the notes. You could keep track of them by source, but it is more beneficial to organize them by topics listed on your preliminary outline. To keep track of which source each note came from, you could color-code the information to match a source. You could also place a source code next to each note (a letter or number to represent the source), or you could bookmark the source entries and hyperlink the notes back to the source.
- Evernote: Evernote allows you to create virtual notebooks. You can then create notes with titles and tags that are organized into these notebooks. The tag feature can be a convenient way to connect a note to a source or to categorize by subcategory. Add links, images, and items from Google Drive.
- Milanote: Milanote describes itself as the Evernote for creatives. It provides a visual board space where you can add notes, images, links, and more. The free account allows up to 100 notes. These notes can be moved around, stacked, and color-coded.
The task of organizing and planning almost never happens in isolation, and it probably won’t be neatly packaged at the end of the pre-writing process. Much like the writing process in general, organizing your ideas is a messy process, and it will happen continually throughout your writing journey. Still, it’s a step that needs to be largely completed before moving on to the drafting stage since this will guide your writing and help to keep you focused.
You may find that you’ve already begun organizing your ideas during the previous steps. This is great, and it means you’ve already started to see connections between ideas. If you have not connected ideas yet, that’s fine too because you will shift to that focus during this stage of pre-writing.
There are many ways to organize your ideas. The most common method is to create an outline. If you are comfortable jumping right into outlining, go for it. However, you might want to consider other options, as well as potential scaffolds, to help guide you through the outlining stage.
Mind Mapping
Mind mapping tools are great for visual learners. They allow you to create virtual labels that you can arrange on a canvas and connect with lines and arrows. Some allow you to integrate multimedia. Mind mapping tools allow you to cluster similar ideas and draw connections between ideas. These tools are ideal for moving ideas around, categorizing thoughts, and visualizing connections. Some people can write directly from the mind map, while others may need to formalize the ideas in a more linear-style outline.
When organizing, consider the main organizational patterns: logical, chronological, spatial, cause/effect, and problem/solution. You don’t need to restrict yourself to these, but they are good starting points and can help guide your organization process.
Mind mapping tools may also be beneficial during the earlier pre-writing tasks when you were generating ideas. Some people like brainstorming in a web or branching style. If this is your preference, mind mapping software is the perfect choice. It’s empowering to give your students permission to use these tools whenever they are helpful to them in the process. They don’t need to be confined to using them on just one step.
You might want to give your students a choice of two or three mind mapping tools. Remember that too many choices can be paralyzing, but some choice is empowering. Voice and choice will give your students the opportunity to find a tool that best meets their personal style. Here are six popular mind mapping tools for you to explore:
- Mindomo: Add text, video, images, and more to this collaborative mind mapping tool.
- MindMeister: Create three mind maps with the free version. Include icons, notes, links, and more.
- Creately: If you wish to create diagrams and flowcharts, the drag-and-drop shapes in this program make it a great option.
- Sketchboard: This tool facilitates creative team sketching. You can also include text, icons, and connectors.
- Google Drawings (Tips): Use the shapes, lines, images, links, and text tools to create your mind map. Share the file to collaborate.
- Circly: This site allows you to add labels and images to round shapes that you drag onto the canvas. Group related ideas inside larger circles.
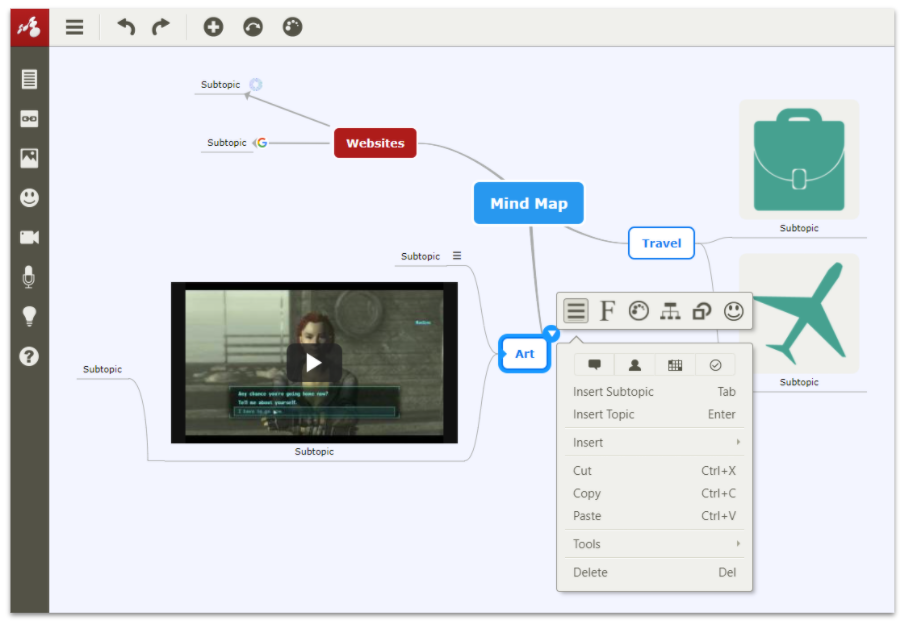
Mind mapping tools (like Mindomo, pictured above) are great for those who like to visually organize their ideas. The ability to add multimedia to the canvas is a bonus that opens up additional creative opportunities.
Outlines
Outlines are the most common way to organize ideas before writing, and word processing programs offer convenient outlining tools within their menu options. We might take this simple solution for granted, but it’s very effective. Because the ideas are entered digitally, they can be easily moved around and reformatted. This makes revision much easier, and therefore, more likely to happen. If an outline is handwritten, students might be less inclined to create another written draft in order to reorganize their ideas.
If you want your students to use a formal outline structure, the bullet and outline formatting tools in most word processors can help students to quickly snap their ideas into a prescribed format. Of course, there might be times when you want to allow your students to quickly generate a less formal outline using spaces and simple bullet points. There’s no one right approach. Consider your end product and decide what’s most appropriate in your situation. You can even involve your students in this discussion to give them some ownership in the decision-making process.
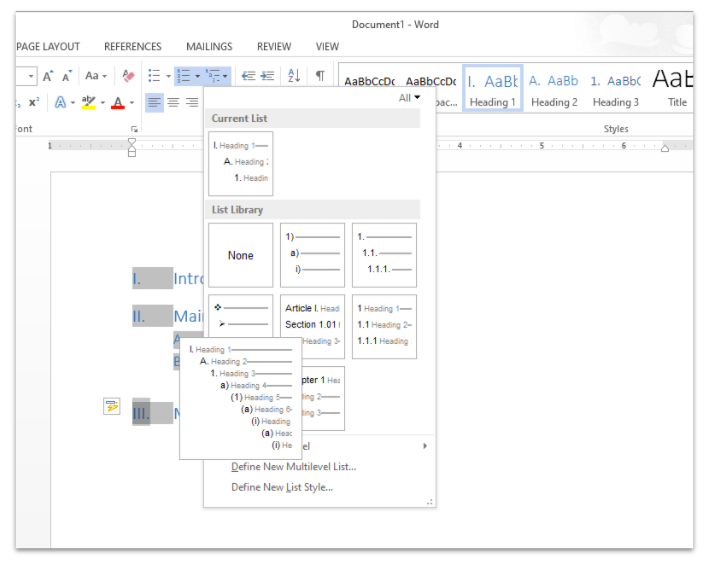
Word processors can be great tools for arranging and outlining your ideas. The format tools can help with structure, and the cut/copy/paste features can encourage your students to revise their ideas.
Other Formats
You don’t need to limit yourself to mind maps and outlines. If you are writing to produce a message that will be communicated in a multimedia format, other organizational tools might be more helpful. For instance, if you are creating a video or a comic strip, you might want to use a tool like Storyboard That to create a storyboard that maps out each scene or frame. If you are creating a website, you might want to create a flowchart, so you can map out all the interconnections of ideas and pages within the site. Creately would be a great tool for that. No matter what format you choose, the main objective is to choose a tool that works for you and that helps you get to a successful final product.
If you’d like to explore other writing formats to engage your students, check out the AVID Open Access article on creative writing across the curriculum.
Once you’ve finished the pre-writing work, you are ready to start writing. In our next article, we’ll explore how to use technology to power up the drafting stage of the writing process. Until then, let the pre-writing begin.
Extend Your Learning
- Think It, Write It: Creative Writing Across the Curriculum (AVID Open Access article)
- 6 Creative Prewriting Activities for Academic Writing (Academic Writing Success)
- How to Write a Story Outline (Writers.com)
- Essay Outline: An Ultimate Guide (PapersOwl)