Images are everywhere. We hang them on our walls, view them on billboards and advertisements, capture snapshots with our phones, post them on social media, find them integrated into movies and video, and see them embedded on nearly every web page we view. Because they are so ubiquitous, we might overlook them or take them for granted. However, it’s important to remember that in the hands of our students, images can be a powerful and creative medium.
The options for creating and communicating with images can range from a quick snapshot to a complex piece of art with multiple layers and visual effects. Similarly, the tools that students can use to capture and manipulate images range widely. They might use their cell phones to take a quick picture and share it without editing it at all, or they might embed the image in a slideshow presentation. On the other hand, students might choose a much more involved path. They might take that image, import it into a robust photo editing suite, and modify it significantly before sharing. Some students may even use digital images and editing software as an opportunity to create works of art as they communicate their message.
As is often said, “A picture is worth a thousand words.” With images and digital editing, we can give our students an amplified opportunity to express themselves in our classrooms and beyond.
5 Ways for Students to Create With Images
There are many ways to use images in the creation process, so we’ll cluster them together into five main types of use. We’ll start with the simplest integration ideas, and then progress to more complex tools and applications. In many cases, the tools do not have to be complicated or difficult to stretch students creatively. In fact, sometimes, limitations require students to be even more creative in order to find ways to accomplish what they imagine in the planning stage.
This first option takes the least amount of time and student effort. There may be a limited amount of student “creation” with this choice, but it can be a good place to begin introducing images to your students. Students can either find an image taken by someone else or capture an image of their own. These images can then be shared as a way to communicate a message or show understanding. The pictures might be turned in to the teacher, shared with classmates, passed on to families, or included as part of a learning portfolio. This process is quick and simple, and it can be completed with very little instruction.
Of course, if you want students to take their own pictures, they will need a camera. Students might use the cameras on their cell phones, or if they don’t have a phone, they can use the camera integrated into a tablet or computer to capture their images. In some cases, school media centers may have digital cameras that can be checked out.
Disclaimer: This information is not, nor is it intended to be, construed as legal advice. You should consult with a licensed attorney in your state if you have specific questions and for advice regarding your individual situation.
If you decide to have students find images instead of taking their own, it’s important that they understand copyright and fair use. First, they should understand that someone has taken and owns the photos they find online or in print. In fact, they should know that the photographer owns the rights to those images as soon as they take the picture. Second, they should understand that there are limits to how they can use someone else’s images.
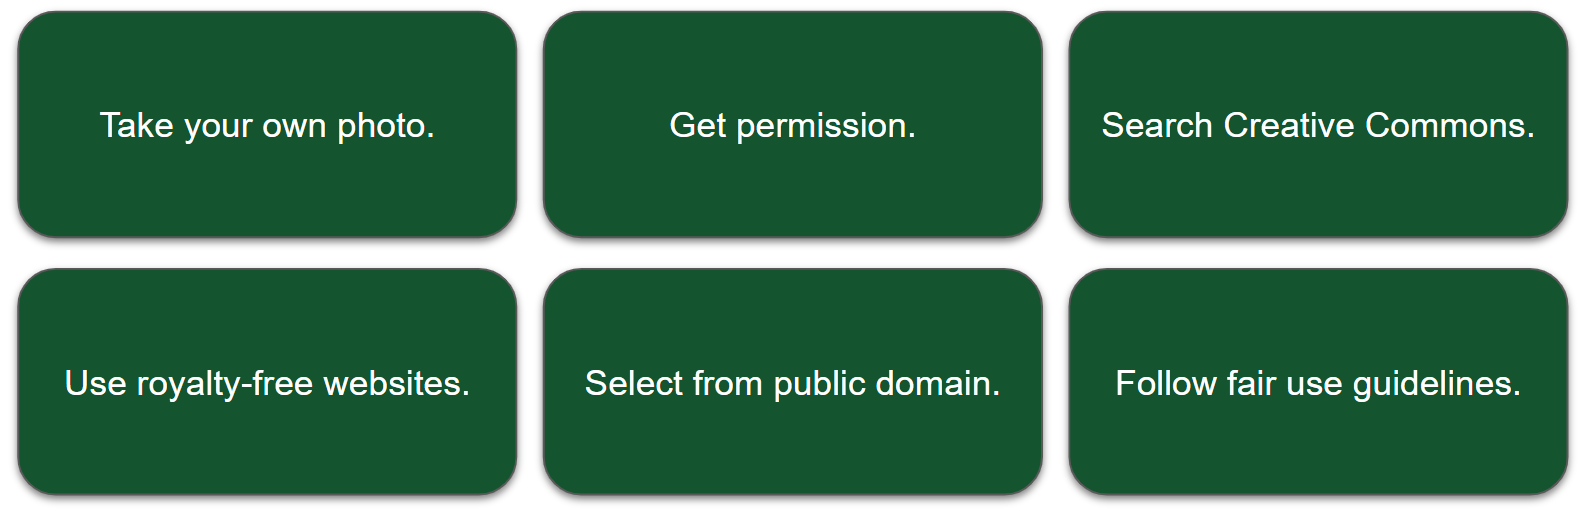
Ways You Might Use Images
- Take your own photo. You own the copyright as soon as you take it.
- Get permission to use another person’s photo. It’s always recommended to get this approval in writing.
- Find an image with an appropriate Creative Commons license attached. Read the fine print to know what is allowed.
- Use a website that offers royalty-free images for public use, like Pics4Learning, Unsplash, or Pixabay. Be sure to double-check the terms of use.
- Use an image in the public domain, which includes any images with an expired copyright.
- Follow fair use guidelines.
Integration Ideas for Using Unedited Images:
- Document projects or class work: Students can take pictures of their offline work and then either share them with others or add them to a learning portfolio as evidence of learning. Portfolios can be a great way for students to monitor their growth over time.
- Record scientific evidence: Students can take pictures at different stages of a science project to document an experiment or phenomenon. These images can later be used to analyze or communicate findings.
- Illustrate a concept: Students can use a picture to show that they understand a concept. For instance, elementary math students could find pictures of different types of angles, and literature students could collect pictures that accurately illustrate the setting of a story.
This concept is closely related to the first one, but it takes the process one step further by adding annotations or notes to the images. This process still begins with an unedited image that is either taken by the student or found from another source. An additional option for capturing an image is to take a screenshot of your computer screen or use specialized screen capturing software for this purpose.
The process for taking screenshots varies depending on your device. The following list includes some of the most common devices and their corresponding screenshot options. If your device is not on this list, a quick internet search should give you the process for your platform.
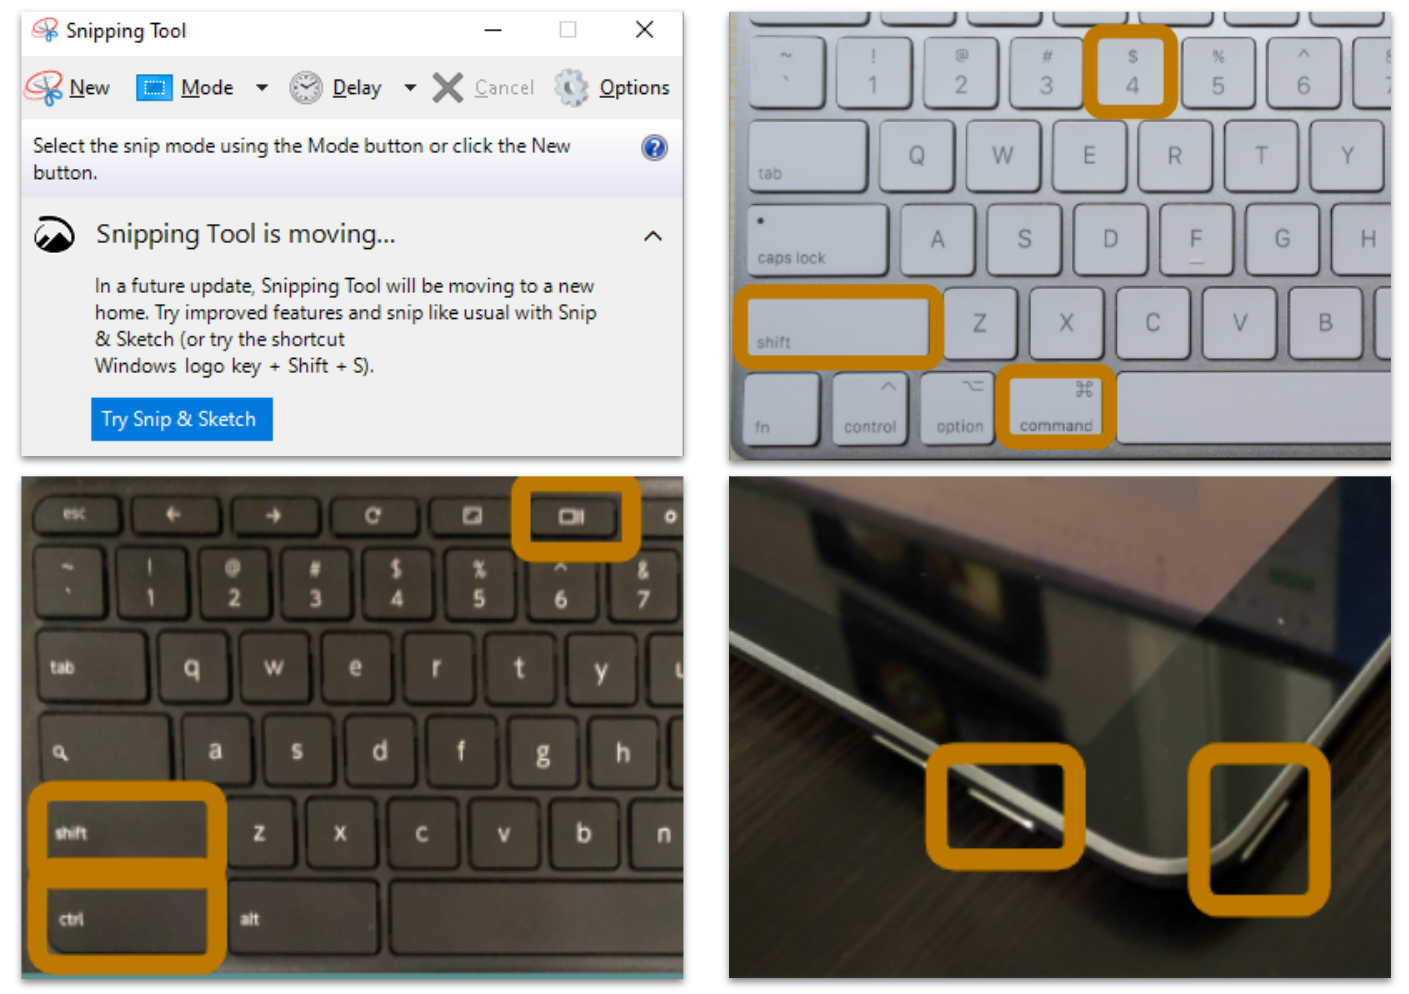
Ways to Take a Screenshot
- PC: Use the Snipping Tool, which is included with the operating system.
- Mac: Click “Shift + Command + 4” at the same time on your keyboard. Then, use your cursor to select the area to snip. The image will save to your desktop.
- Chromebook: Click the screenshot key to capture the entire screen or press “Alt + Screenshot key” to capture part of the screen.
- iPad: Press the top button and the volume up button at the same time.
- Android: Hold down the power button and press the volume down button at the same time.
To share these directions with your students, you may make a copy of this slideshow.
An alternative to taking a screenshot is to use a Google Chrome extension to capture your screen. The main benefit of using one of these tools, instead of the integrated screenshot function, is that they generally offer a built-in suite of annotation tools. These features allow you to mark up your image without the need for a separate tool, making it faster and more efficient. If you use the Chrome web browser, Nimbus Screenshot (Tips) and Awesome Screenshot are two powerful extensions that you can add for free. The browser shortcuts to these extensions allow for quick and easy access to these tools. While not an extension, Microsoft’s Snipping Tool also includes some basic annotation tools, such as pens, highlighters, and an eraser.
Annotation tools allow students to take their use of images to the next level. By adding annotations, they can interact with their image, mark it up, and point out key elements. Another way to annotate an image is to import it into another program, such as Google Slides or Microsoft PowerPoint, and then use the annotation tools built into those programs.
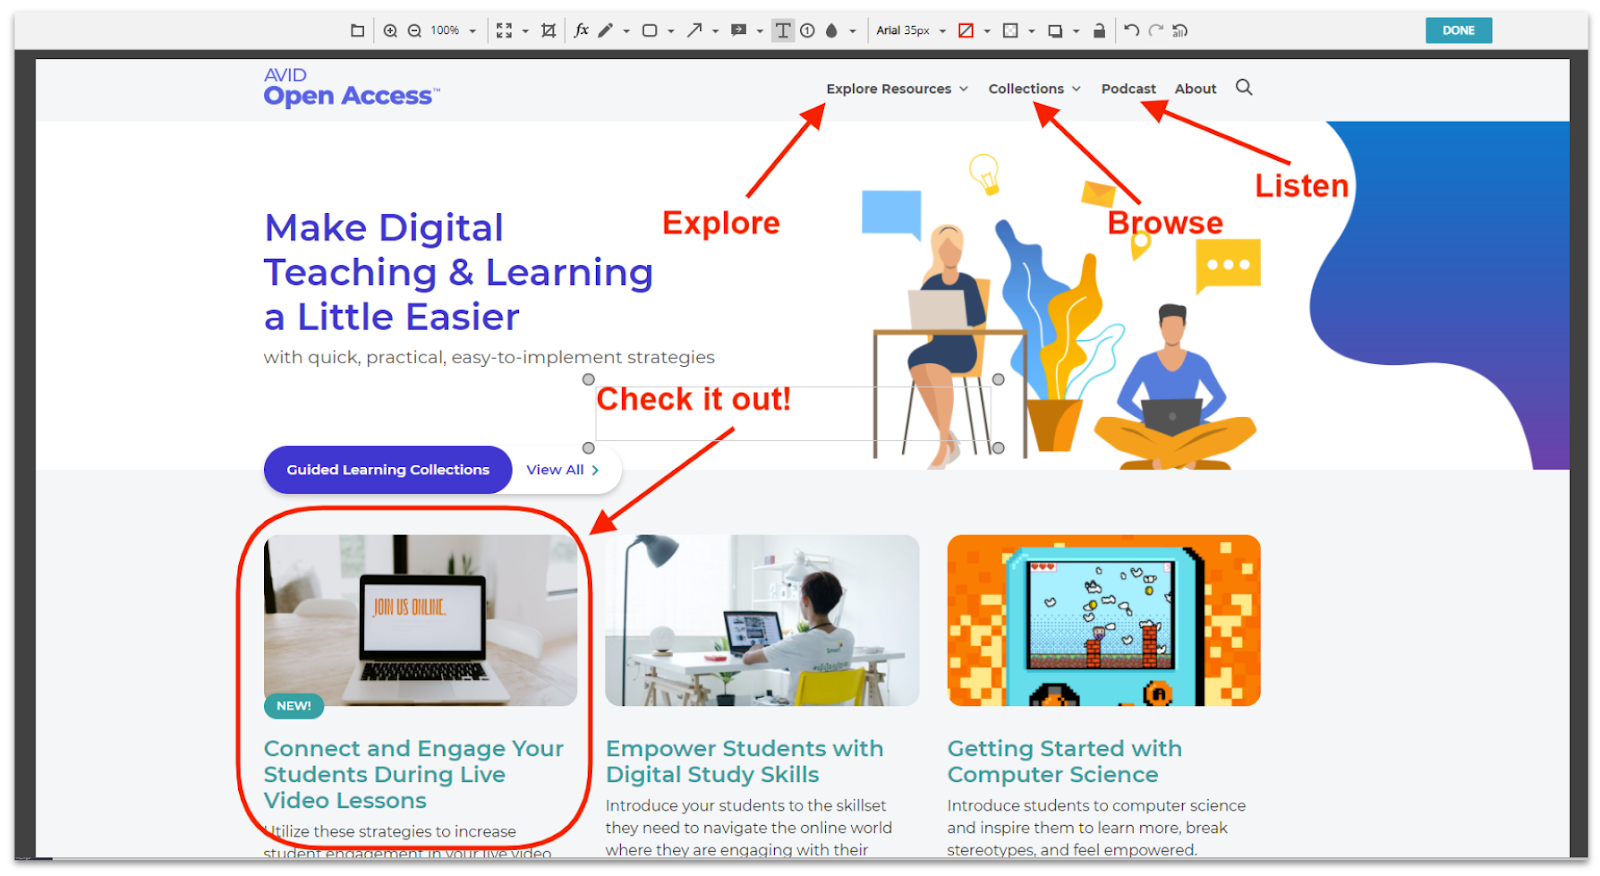
This image shows an example of a screenshot being annotated with the Nimbus Screenshot extension. Check out our tool tip sheet on Nimbus Screenshot for details about how to use this tool.
Integration Ideas for Screen Captures and Annotations
- Labeling: Students can use arrows, shapes, and text to label various aspects of an image. For example, students could point to locations on a map, parts of a cell, geometric shapes in a room, or important elements of a historical photo. Arrows on a map could also indicate movement or progression over time.
- Directions: Annotations are very effective for giving visual directions or teaching a process. Students can number and label the image with the steps to be completed. Text can be added to label the steps or provide detail.
- Feedback: Annotation tools can be used to provide feedback on a project. Students can mark up a screenshot, pointing out specific elements and adding text comments.
- Privacy: The blur tool can be used to hide private information, such as names, phone numbers, or even faces.
- Sketchnotes: If students use a digital whiteboard tool, like Canva Whiteboard or Seesaw (Tips), they can either download their drawing as an image or take a screen capture of it. This allows them to create a drawing rather than using a photo as their image.
- Evidence: If students complete modules or activities on academic websites, they can take and submit a screenshot of their completion screen. This is an efficient way for you to verify that a student has completed online work while also providing you with formative data. For this integration, students aren’t really creating with images, but it’s still an effective use of screenshots
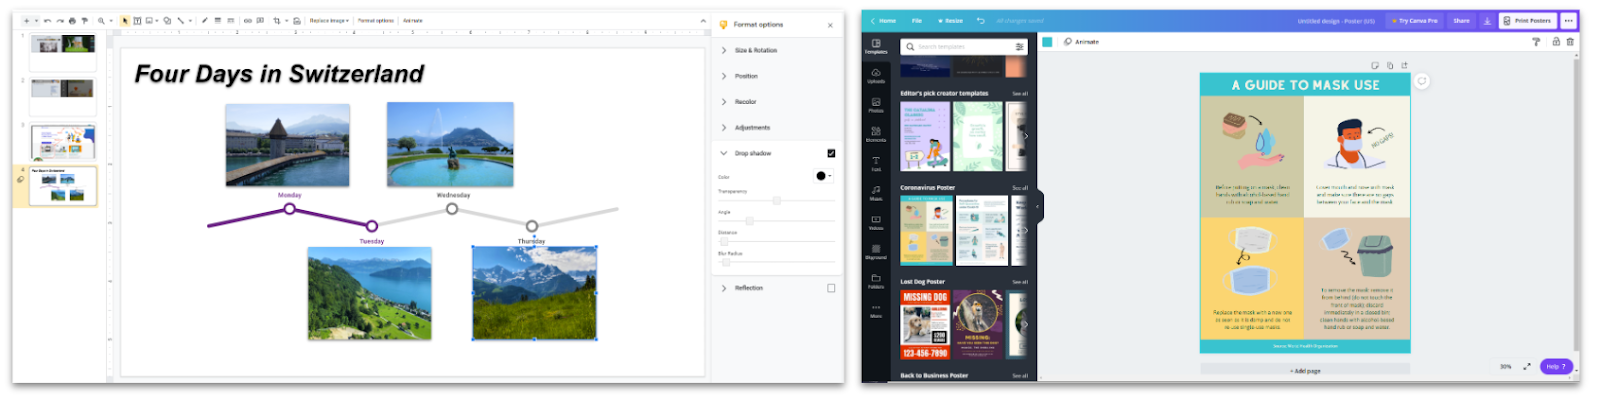
This might be the most common use of images. Instead of the image being the final outcome, students use images as building blocks toward the creation of something larger and more complex. The first step, of course, is still to collect the images. Then, once the images have been gathered, the creation process can begin. Students might arrange images into a collage, combine them with text, or integrate them into a website or multimedia presentation. The options are broad and present numerous opportunities for student creativity.
Tools for Integrating Images
There are far too many potential tools to list here, but this list will get you started with some of our favorites.
- PicCollage: This popular app is available from the Apple App Store as well as Google Play. It’s easy to use, even for the youngest learners.
- Canva: Canva offers over 250,000 free templates and thousands of free photos and graphics. It’s a great tool for creating posters, collages, and infographics.
- Smore: Smore is a flyer and poster making site. It also has many templates to get you started.
- Seesaw (Tips): Students can take or upload pictures into the design canvas, where they can add backgrounds, text, video, and more.
- Piktochart: This is a free online infographic maker. Use a template or create your own from scratch.
- Genially: Use this free online tool to create interactive images, infographics, guides, and more. Templates are available.
- Google Slides or Microsoft PowerPoint: We might take these core tools for granted, but don’t forget about them. They are versatile and easy to use, and you can leverage them for almost any image integration idea you have.
- Google Drawings (Tips): This is a great tool for creating collages, posters, timelines, or anything else you can dream up on a digital canvas.
- Google Sites (Tips): If you are a Google school, this is a great option for creating photo-rich websites. You can even customize the share settings to determine who can see the final product.
- Imagine, Record, Create: The Power of Video in Student Creation: For video production tools, visit our AVID Open Access article about video creation. There are numerous tools listed here, and images can be integrated into nearly all of these options.
- Flippity (Tips): Students can make timelines with nearly any of these tools, but some students may find the Flippity template helpful in structuring their work.
- Student Meme Generator: There are many meme generators available online, and you’ll want to review them for inappropriate content that can be buried in the templates. This student meme generator from Imgflip is a simple site that allows students to choose from popular images, link to one, or upload their own.
- Book Creator (Tips): This powerful online book creator is an excellent choice for creating any type of story or book, including picture books.
- Photovisi: While this site has a paid version, you can create collages with the free version (and even without an account). Choose a template, upload images, and add text. Downloads include a watermark with the free version.
Integration Ideas for Using Images in Larger Projects
- Collages: Rather than using a single image to communicate learning, students can gather multiple images into a collage. This provides an opportunity for communicating more complex ideas as well as for encouraging students to provide multiple examples of a single concept. For instance, younger students might find images with specific word sounds in them, while older students might find images to represent a theme, period in history, or a scientific concept.
- Timelines: A timeline is somewhat like a collage in that students will bring together multiple images. However, the images in a timeline are presented chronologically and communicate events that have occurred over time. History lessons lend themselves well to this format, as do plot sequences in literature. Science students could show the stages of a chemical reaction or the steps in an experiment.
- Posters: Instead of creating paper posters, students can create posters digitally. In fact, this format offers more options than traditional posters because all types of media can be integrated (images, video, audio, links, text, etc.). These can be informative, like an infographic, and they can also integrate pop culture and entertainment. Students could create a movie billboard for a story they read or a campaign poster for a historical candidate.
- Infographics: Infographics are a specific type of poster. They use images, text, and potentially other media to inform an audience about a topic. Oftentimes, they begin with a larger image that is broken down into parts. Other times, these include multiple graphs and charts. Infographics can be integrated into any subject area as a visual way to process and communicate information.
- Slideshows: This might be one of the most often used applications for images. Students are frequently asked to create presentations and then illustrate concepts with images, diagrams, and maps. With the addition of audio narrations or interactive links, slideshows can be transformed into learning stations or kiosks where other students look through them individually, learning at their own pace.
- Memes: Around every corner of social media, you’re likely to find a string of memes. A meme is a humorous image, video, or GIF that has simple lines of text added to it. Memes are often used over and over with new text, and therefore, new interpretations. While often intended to be humorous, they can also be used to summarize learning. For example, “Create a meme that the main character of the story would post on social media.”
- Videos: Most video productions include images in addition to video footage. These are often an effective way to reinforce the narration and illustrate a point. Images can be further enhanced by using the “Ken Burns effect,” which is zooming and panning the image to emphasize a certain part of the image while adding interest. You can also add text or arrows as overlays to provide additional emphasis.
- Stories: Images are a great way to tell a story. Students could create a slideshow that presents the images in an intentional order to tell a story. Students can also create picture books that might include text or rely entirely on the images to communicate the story. While storytelling is common in language arts, students can tell stories in any subject. For instance, they might share historical stories, the story of a lab experiment, or even the story behind how they subtract fractions while eating a pie.
- Tours: Images are a great way to facilitate virtual tours. These might begin as one of the formats mentioned already, but then they can be enhanced further with either live or recorded narrations. Tours can also be integrated into any subject area. Geography students can guide us through regions of the world. Literature students can show us a fictional world or the setting of a story. Science students can bring us to places ranging from another planet to the inside of the respiratory system. Art students can guide us through an art gallery, and the list goes on.
- Websites: Students are no strangers to websites, but they may not always understand how they are made or how content gets on the web. By having students create their own websites, they will naturally integrate images as part of webpage development, but they will also gain a deeper understanding about the internet. This demystifying of the web can be an integral part of becoming more informed digital citizens. It also gives them an authentic purpose for their images.
Students can make their images “come alive” by adding interactive elements to them. Some of these techniques have already been mentioned in conjunction with earlier image integration ideas, but it is worth calling these out separately. These strategies can either stand on their own or be integrated into larger projects. In any case, by making the image more interactive, we can transition our audience from the role of passive viewer to active participant, thus engaging them at a deeper level with the image.
Tools and Sites for Adding Interactivity
- ThingLink: Insert hot spots on your image that link out to other resources.
- GIPHY: Find animated GIFs with this popular site or with the GIPHY for Chrome extension.
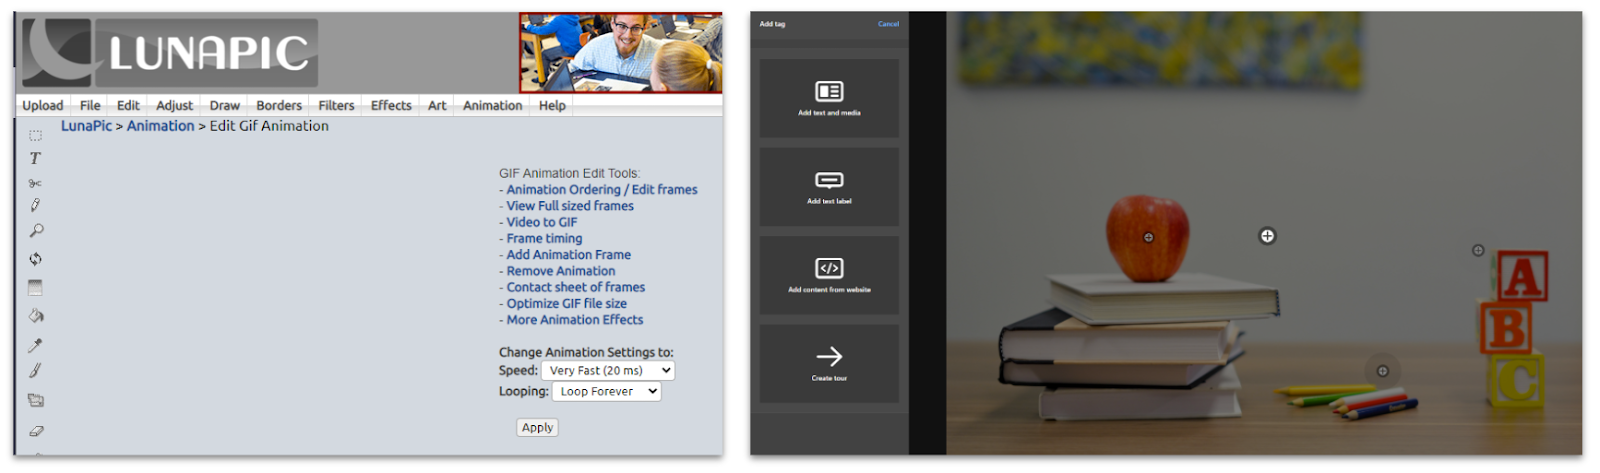
- LunaPic: This versatile tool allows you to create GIFs or edit images.
- Clipchamp (Tips): Use the “Export” option and select the “GIF” tab in this video editing tool to create an animated GIF.
- Tall Tweets: This site lets you create animated GIFs from Google Slides.
- Genially: This presentation and infographic creation tool also includes an option for adding interactive hot spots to your image.
- Google Sites and Microsoft PowerPoint: Use the hyperlink features in these slide presentation tools to create interactive kiosks by linking images (or parts of an image) to other slides that provide more information.
Integration Ideas for Interactive Images
- GIFs: We’ll start with the least interactive of our examples. GIFs are animated images—essentially pictures that move. This doesn’t necessarily require the viewer to interact with the images, but it does make them more captivating, and therefore, more engaging. Also, when students create these, they must think more deeply about what they are trying to communicate (rather than simply posting a picture). Students can also create animated memes using GIFs. You can find GIFs at GIPHY. If you are looking to create your own GIFs, try using LunaPic, Clipchamp (Tips), or Tall Tweets.
- Hot Spots: One way to make an image interactive is to add hot spots, which are locations on the image that can be clicked. These hot spots can link out to text, websites, videos, audio, another picture, and more. It’s a great way for students to pack more information into their picture canvas, and it requires them to find additional data and think about how and why they would link to those items. In turn, other students can have a highly interactive experience viewing the image, and they can follow the links to learn more. Although you can create hot spots in Google Slides or Microsoft PowerPoint, you might want your students to explore ThingLink, an online tool specifically designed for this type of project. Genially also has an interactive image option; however, be aware that the free account requires final products to be posted publicly.
- Kiosks: Kiosks are a way to link several pictures (and other slide material) together through a series of hyperlinks. When students click on a link or image hot spot, it takes them to another slide. This can be set up in a variety of ways. Sometimes, it’s a quiz-type experience, where students answer questions about a slide by clicking a hyperlinked answer. Depending on their answer, they get redirected to a feedback slide (either congratulating them on the correct answer or providing some reteaching). Kiosks can also be set up in a “choose your own adventure” format. Students click on part of an image that they want to learn more about or choose the path that they think a character should take. Each choice redirects them to a different slide (and therefore, a different path). Planning out the options for these kiosks is a great mental activity in itself and can introduce some basic concepts of coding. The easiest way to get started creating kiosks is by using Google Slides or Microsoft PowerPoint. Create your slides, and then add the desired hyperlinks between slides.
While these are technically two different ideas, they are so closely related that we’ll combine them here. Images are a great form of visual art, and while this type of art can be created without editing, most creative photographers use image editing software to both enhance and transform their images. Students can create art by taking their own pictures. They can study the elements of photography and capture artistic compositions with visual effects using their own cameras. If they don’t have access to cameras, students can find examples of art concepts in photographs posted online.
However, your students can take this process one significant step further. They can use photo editing software to conduct deep editing on an image. As with website development, photo editing is a great way for students to be creative while also introducing them to the world of image manipulation. By seeing how easily images can be altered, our students can become more critical (and responsible) consumers of media.
Projects usually begin with a primary image, but advanced students can use the integrated brushes and selection tools to create virtual paintings within the photo editing software. In fact, many visual artists use these platforms to create their sketches, drawings, and paintings.
While image creation and image editing can be the ends in themselves, these platforms are also valuable tools for helping students refine and customize the images they wish to use in other projects. Maybe they want to remove the background, or maybe the color doesn’t match their design pallet. Perhaps they need to crop the image, remove part of the image, or blend elements of several photos together. Photo editing software allows them to accomplish those tasks and more, and this can often improve the overall quality of their projects.

Photo Editors
- Apple Photos: This is a great option if you’re using an iOS device. You can adjust light and color, apply filters, and copy and straighten your images.
- Chromebook Editor: Chromebooks have a free, integrated photo editor. To use this, you will need to download the image, and then double-click on it to launch the editor. This provides very basic editing tools, like cropping, brightness and contrast, and rotation.
- Adobe Photoshop: This is the gold standard in image editing, but it’s also one of the most expensive image editing programs. If your students have access to this tool, it is a powerful option and the tool used by most industry professionals.
- LunaPic: This fun website allows you to quickly upload and edit images online. It features borders, filters, effects, art, and animation (making it work for creating GIFs, as well).
- Pixlr (Tips): This is an excellent option if you are looking for an image editor that is comparable to Adobe Photoshop. Not only is the interface designed in striking similarity to Photoshop, it is available online, and it’s free. Pixlr currently offers two versions of its editor: Pixlr X (simple) and Pixlr E (robust).
- remove.bg: We’re adding this one as a bonus tool. This simple website allows you to remove the background from an image. This can be very handy when you are layering your image over a background.
Integration Ideas for Enhancing and Creating Photos as Art
- Enhance an image: Even when students are preserving the original integrity of an image, they may want to enhance it. Photographers do this all the time. They might sharpen the image, enhance the colors, crop it, or change it to black-and-white. These techniques are nearly always applied to published images, and students can use these techniques to improve the quality of their own images.
- Emulate an artist: Students can transform a photograph into a piece of art using the various effects available in image editing software. After studying the particular style of an artist, they can try to replicate that style by applying these effects to an image of their choice.
- Create an album, movie, or book cover: Students could do this without editing software, but these tools provide more options and allow students to create professional-looking artwork. Students could create the cover for a story, novel, or historical documentary.
- Alternate outcome: Students could take a historical image and manipulate it to represent a different reality. Perhaps they use this as a prompt for a “What if…?” discussion (for example, “What if this hadn’t happened this way?”). Students could take a real book cover and redesign it to represent a different point of view.
- Mash-Up: By creating layers, students can create a collage or a new version of an image by combining elements of several images into one. They might superimpose their own face on a historical figure or combine something from one time period into the image for another time period. These mash-ups can become original works of art or discussion starters for concepts being studied in class.
Extend Your Learning
- 5 Smart Ways to Use Digital Images in the Classroom (TeachThought)
- 21 Ways to Use Photos in the Classroom (WeAreTeachers)
- How to Get and Use Free Images the RIGHT Way in Class (Ditch That Textbook)
- 9 Ways Classroom Photos Can Create Student Connection (WeAreTeachers)
- Teaching Students to Legally Use Images Online (Cult of Pedagogy)