Consider this common remote-learning scenario: You’re planning your next lesson. You’ve gathered some great resources to post online for your students: a PDF of a highly reviewed article, an information-rich website, and a Google Doc full of content that you’ve written or pulled together over the years. You know it’s best practice to have students interact with the content, so you plan to have them mark the text, write in the margins, define terms, and connect with other resources. You’ve done this for years in your face-to-face classroom, but now, you must decide how your students will do this with digital materials in a remote-learning context. You ask yourself, “What are my options? Where should I start? What will work best for my students?”
The list of resources provided on this page are intended to help you make informed decisions as you design your remote lesson. Consider which of these common text-based formats you plan to post for your students and choose the best strategies and tools for your learning situation. You might even decide to offer your students several choices for each format, so they can find the option that works best for them. We all learn in different ways and have different preferences, so offering students voice and choice in this process honors them as individuals.
Editable Documents (Microsoft Word or Google Docs)
Providing editable documents offers students a fast and easy way to digitally mark up their text. Because these are editable docs, students can use the tools that are natively built into each word-processing program. While specific menus and processes may differ, both Microsoft Word and Google Docs offer similar options. In either platform, if students have “read-only” versions, they can easily make a copy that will become editable. These copies can then be annotated, saved, and shared back with the teacher as needed.
When planning your lessons, consider integrating the following critical reading strategies as well as some of the suggested tools that will allow your students to apply them digitally.
Mark the Texts
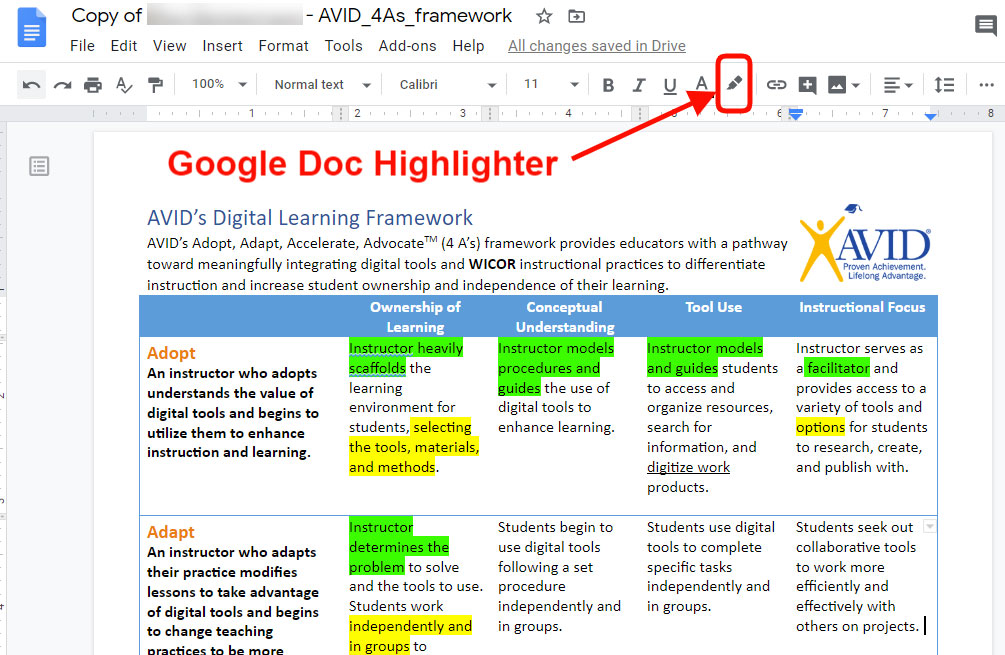
Use digital highlighting and text-formatting tools to mark up a document. This strategy is both simple and powerful. Each type of annotation can mean something different, so consider making a legend that shows the meaning behind each type of formatting. Here is an example:
Sample Legend
Highlighting:
- Green = main idea
- Yellow = supporting detail
Font Styles:
- Bold = vocabulary word to look up
- Underline = connection to other learning
- Italics = idea to explore
- Font Colors = each color relates to ideas supporting a different subtopic
Pro Tip
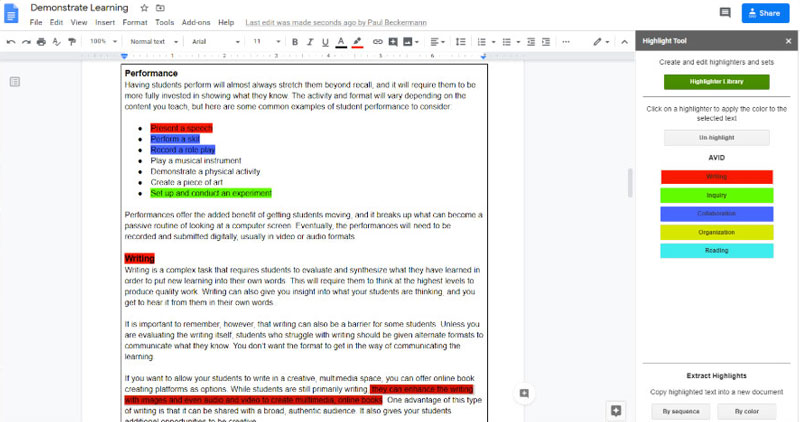
Add the Highlight Tool add-on to a Google Doc. This tool provides you with a customizable set of highlighters. You can create and name highlighters and save them to your library. After you have finished highlighting your document, you can extract the highlights by color or sequence for a quick summary of your annotations. Highlighter sets can even be exported and shared with students.
Write in the Margins
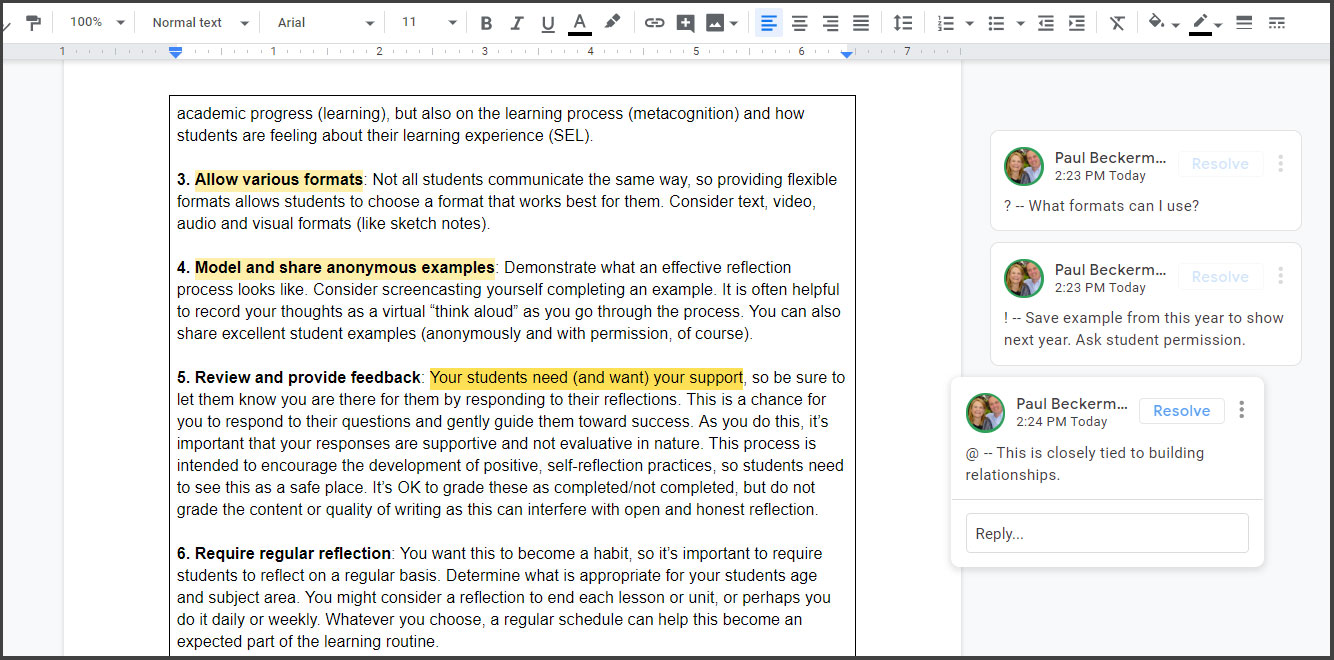
The easiest way to write in a digital margin is to use the comment feature. Typically, this works by highlighting some text, clicking on the comment tool icon, and typing your note. These comments save in the margins and are connected to your highlighted text. You can even reply to your own notes as you gain new insights.
One way to add meaning to these margin notes is to create a legend of symbols that represent different types of comments. By starting each comment with a symbol, you can quickly scan the page and see what types of notes you have made. Writing in the margins is a great way to actively process what is being read. Here is an example:
Sample Legend
- ? = question
- $ = summary
- ! = reaction/response
- @ = connections to other learning
Pro Tip
Add the Talk and Comment Chrome extension to allow you to add audio comments to your document. Simply highlight some text, click the “Talk and Comment” icon, and record your note. You can then copy this recording and paste it into the comment box. This creates an audio player in the margin. Press play to hear your comment. This can be particularly helpful for students who are more effective in speaking rather than writing their thoughts. (Suggestion: Disable this extension when you’re not using it to maximize responsiveness of your word processor.)
Insert Hyperlinks
This is a great way to extend your learning and connect the text to other materials. Students can either highlight text and link that out to other resources, or they can insert a link at the end of a paragraph or in a comment field. The hyperlink tool can usually be accessed through an “Insert” menu at the top, through a chain link icon on the toolbar, or by right-clicking on the highlighted text.

Define Words
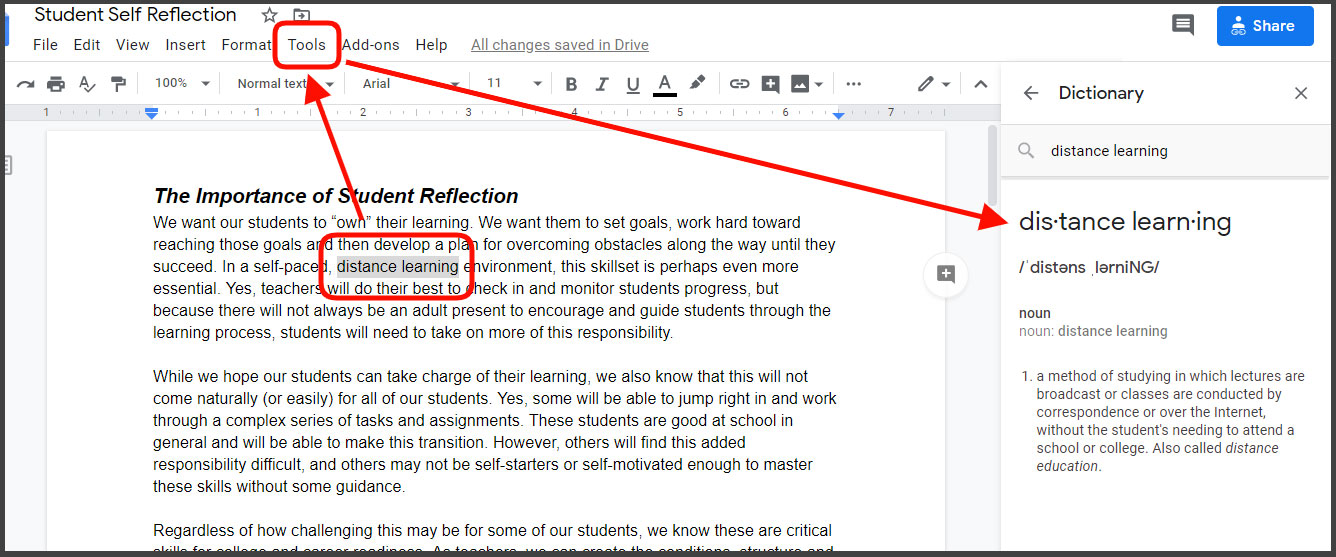
Online programs like word processors offer the convenience of built-in virtual dictionaries. By accessing the dictionary tool inside these programs, students can quickly and conveniently view definitions for words that are unfamiliar to them. By highlighting a word and clicking on the dictionary, students get instant access to definitions. For academic language learners, the use of a thesaurus is a way to scaffold unfamiliar words as dictionary definitions for unfamiliar words often include even more unfamiliar words. This easy access makes it more likely that students will use a dictionary, or thesaurus, and define words that are new to them.
Insert an Outline or Table of Contents
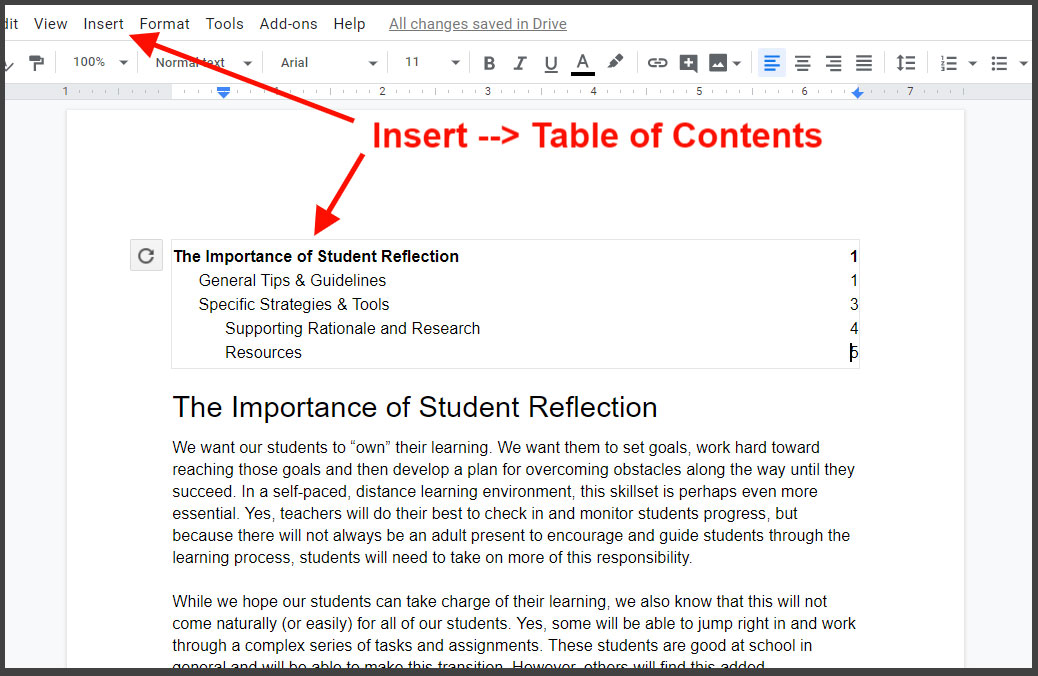
For longer texts, it may be helpful to create an outline of the content or insert a hyperlinked table of contents. This can help you quickly jump to a section you wish to review or give you an overview of the material at a glance.
Outlines can be typed manually at the top of the document, calling out main sections of content. A table of contents can often be created automatically by formatting the headings in a document with preset choices, like “Heading 1” and “Heading 2,” and then using the Insert >> Table of Contents option to auto-generate an interactive outline.
Collaborate
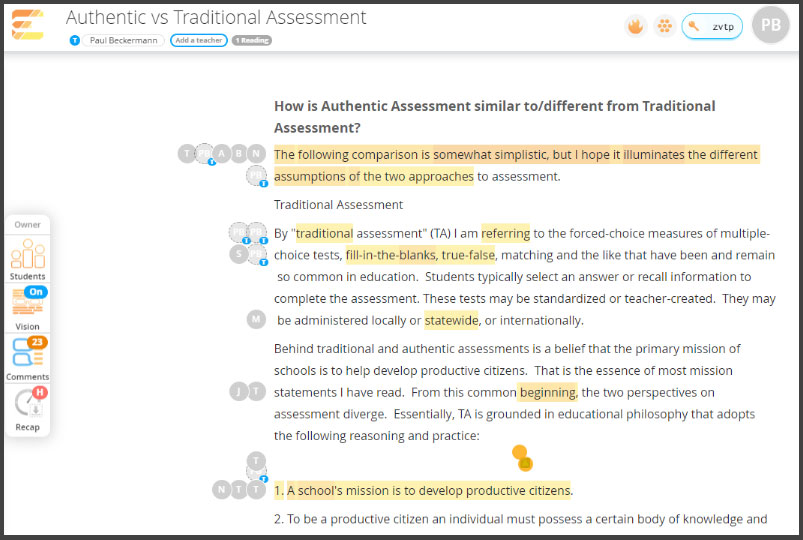
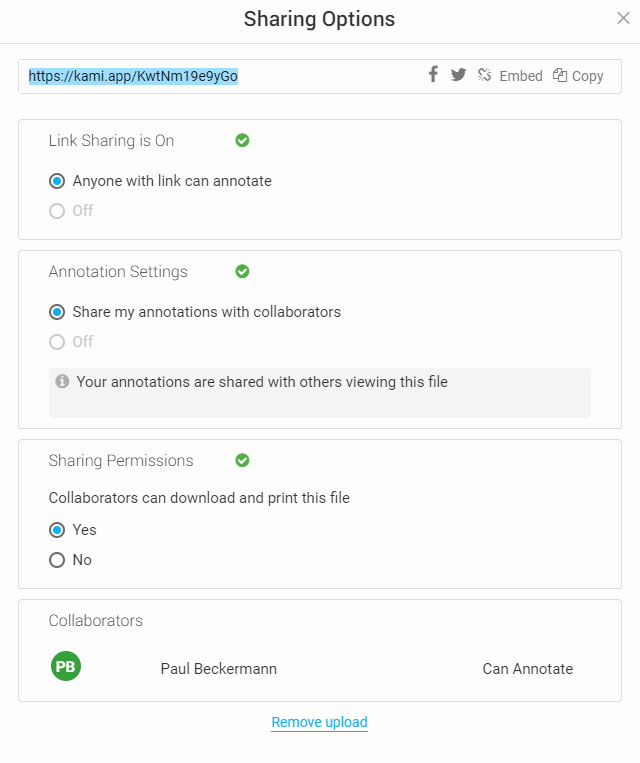
Most online word processors allow users to share edit rights with others. This allows for real-time collaboration. There are many ways to leverage the power of collaboration. One option is to have each student annotate their own document first and then share it with another student who would ask questions or extend what the first student did. Another option is to have students divide up an article, with each annotating a different section. They could also split up annotation tasks, with one student looking for main ideas and supporting details, while the partner focuses on posing questions about the content.
PDF Documents
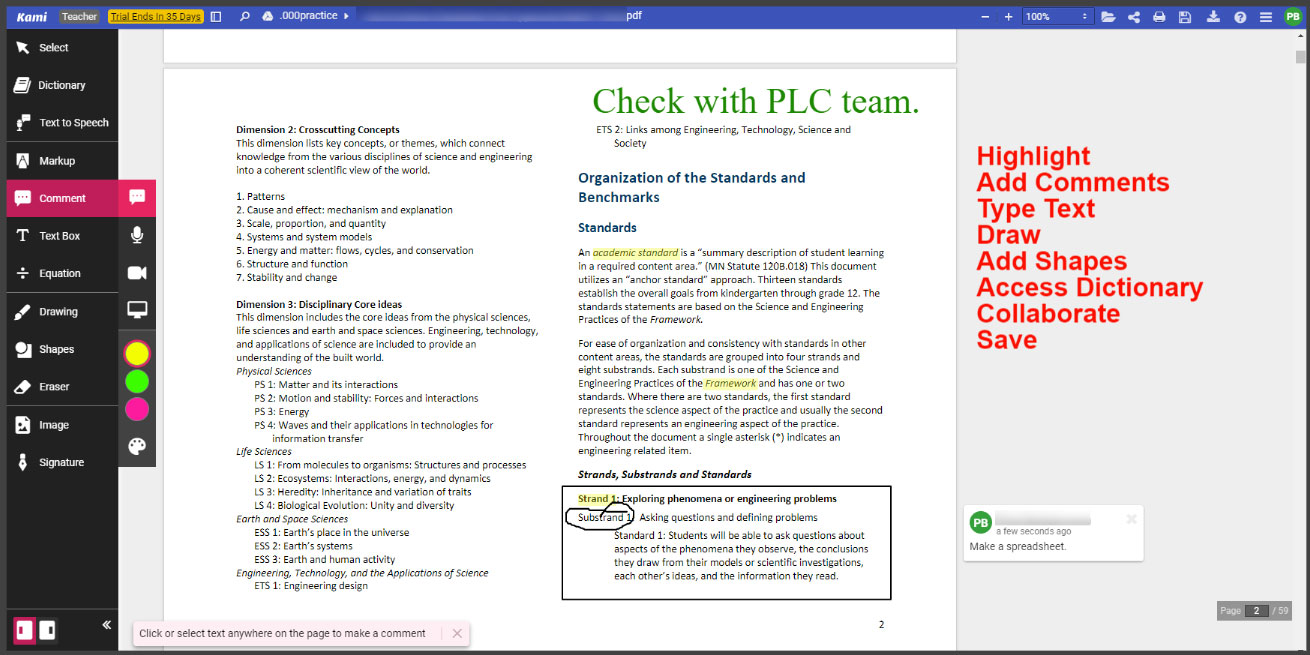
PDFs are very common document types and are viewable with software that is available in most browsers or accessible with a free download. The same strategies that were reviewed for editable documents will also work with PDFs. However, because PDFs are often “read-only” documents, students will likely need to use another program to be able to annotate PDF files. Once PDFs are opened with one of these programs, students will be able to highlight, add comments, and even draw on the document.
The list below provides two main types of tools for manipulating PDFs. The first allows users to annotate PDF documents, while the second provides tools for converting websites into streamlined PDF formats.
Mark Up and Annotate PDF Documents
When a PDF is opened with any of these tools, it can be annotated much like you would mark up a Google Doc or Microsoft Word document. In fact, these tools often provide additional features and functionality, such as the ability to draw on the document with multicolored pens or insert shapes to call out sections. Like the word-processing programs, most PDF annotation tools include a built-in dictionary, as well. When you are finished marking the text, you can download the annotated file or save it to the cloud.
Popular Tools for Marking Up and Annotating PDFs
Convert Websites Into User-Friendly PDF Documents
This second tool allows you to strip away advertisements, videos, and other unnecessary material from a webpage, and then convert it to a PDF document that can be annotated with Kami, DocHub, or Xodo PDF Viewer & Editor. Each of these options requires you to first install a Chrome extension. Once installed, you open a webpage, and then click on the extension to begin customizing and converting.
Popular Tools for Web to PDF Conversion
- Print Friendly & PDF (Simplify and save as PDF.)
- Postlight Reader (Simplify, adjust view, and print as PDF.)
Websites
Websites have become a primary source of information, and both the quantity and quality of highly credible websites continues to grow every day. In fact, as organizations produce fewer print materials, it is increasingly common for information to be exclusively available online. Because of this, teachers will often be directing their students to online content.
In order to mark up or annotate website content, you will need to copy/paste the website text into an editable document, convert the web content into another format (like a PDF), or take advantage of some helpful third-party annotation tools. Some tools, like InsertLearning, allow the teacher to guide the process. Other tools (many of them Chrome extensions) are designed more for the end users to take charge and decide which options are best for their personal learning needs. Teachers can introduce these options to their students, and then let students decide which is best for them. The list below offers some popular options for annotating websites.
Insertlearning
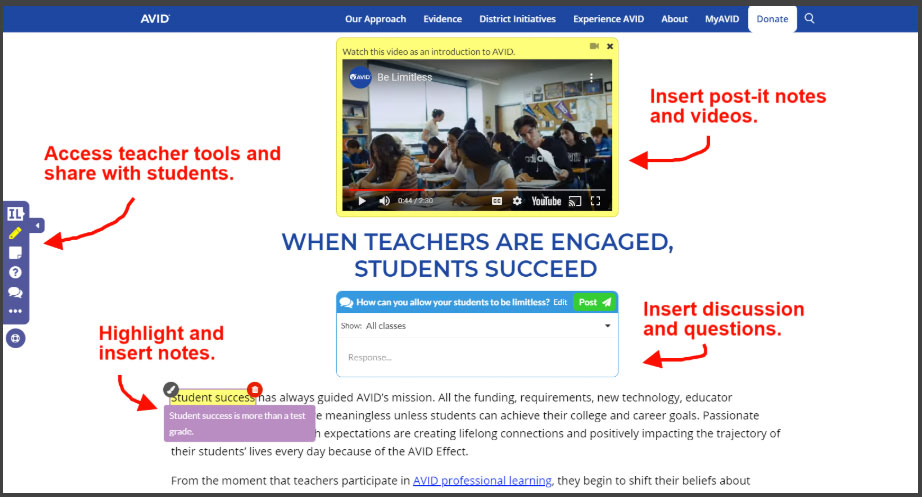
InsertLearning allows teachers to guide the online reading experience by embedding interactive elements directly into webpages (notes, videos, discussions, and questions). Hyperlinks can then be shared with students who can annotate the text and respond to inserted prompts. Teachers can conveniently monitor student activity through a teacher dashboard.
Talk and Comment
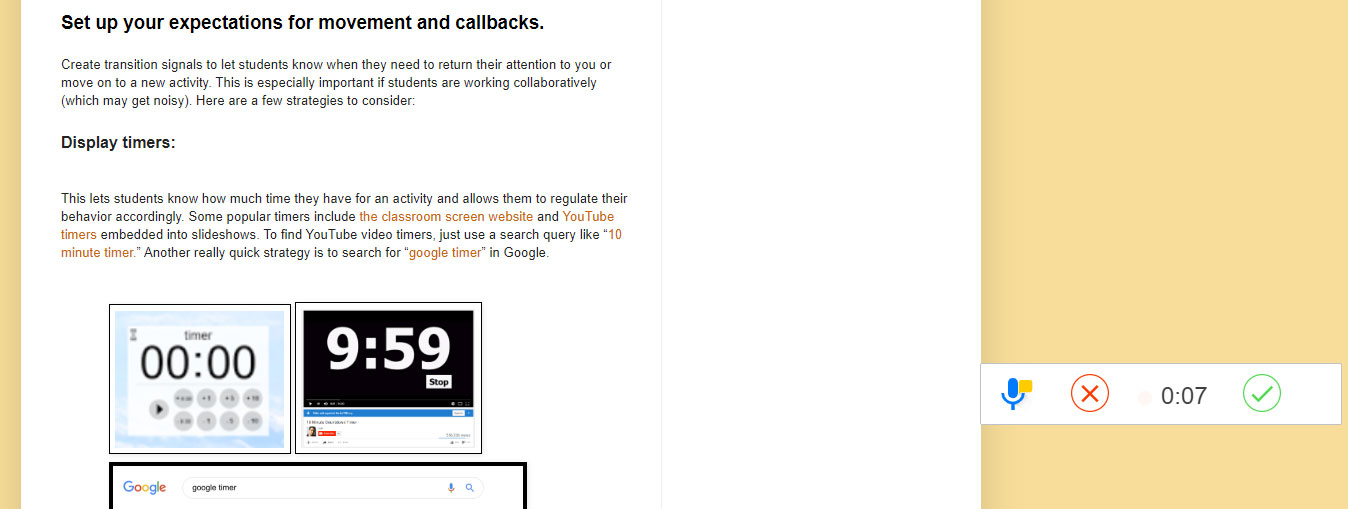
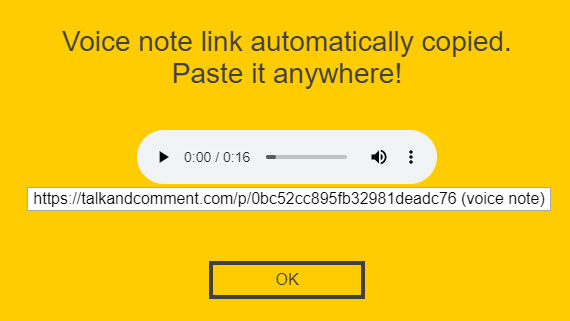
Talk and Comment is a Chrome extension to add audio notes to websites and digital documents. Access this voice recording tool from any website, or even within a Google Doc, by clicking the “Talk and Comment” icon, which will appear in the right margin of the page. Copy the link to the finished recording and paste it wherever you wish. If you paste it into a Google comment field, an integrated audio player will appear. This allows you to conveniently click the play button and listen to your audio notes.
Hypothesis
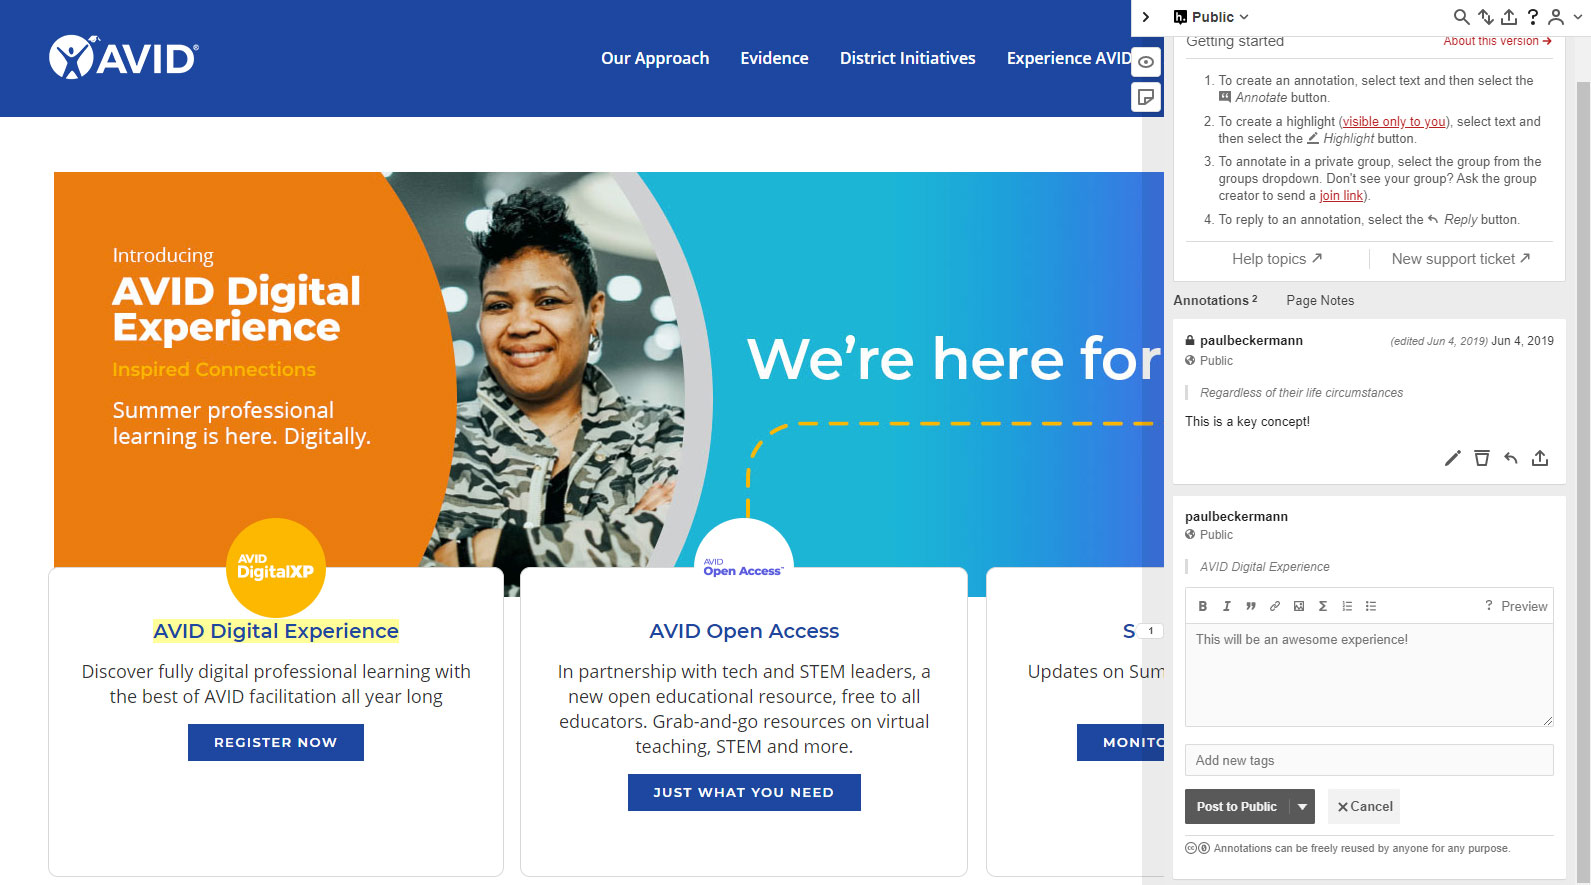
Hypothesis is a Chrome extension to annotate websites. An account is needed, and students must be 13 years of age to register. Once the extension is installed, you simply navigate to a website and click the “Hypothesis” icon. Hypothesis then opens an annotation tab on the right side of the webpage. Add comments to the page and let Hypothesis store them in your account. Annotations can be set to either private or public share settings.
Page Marker
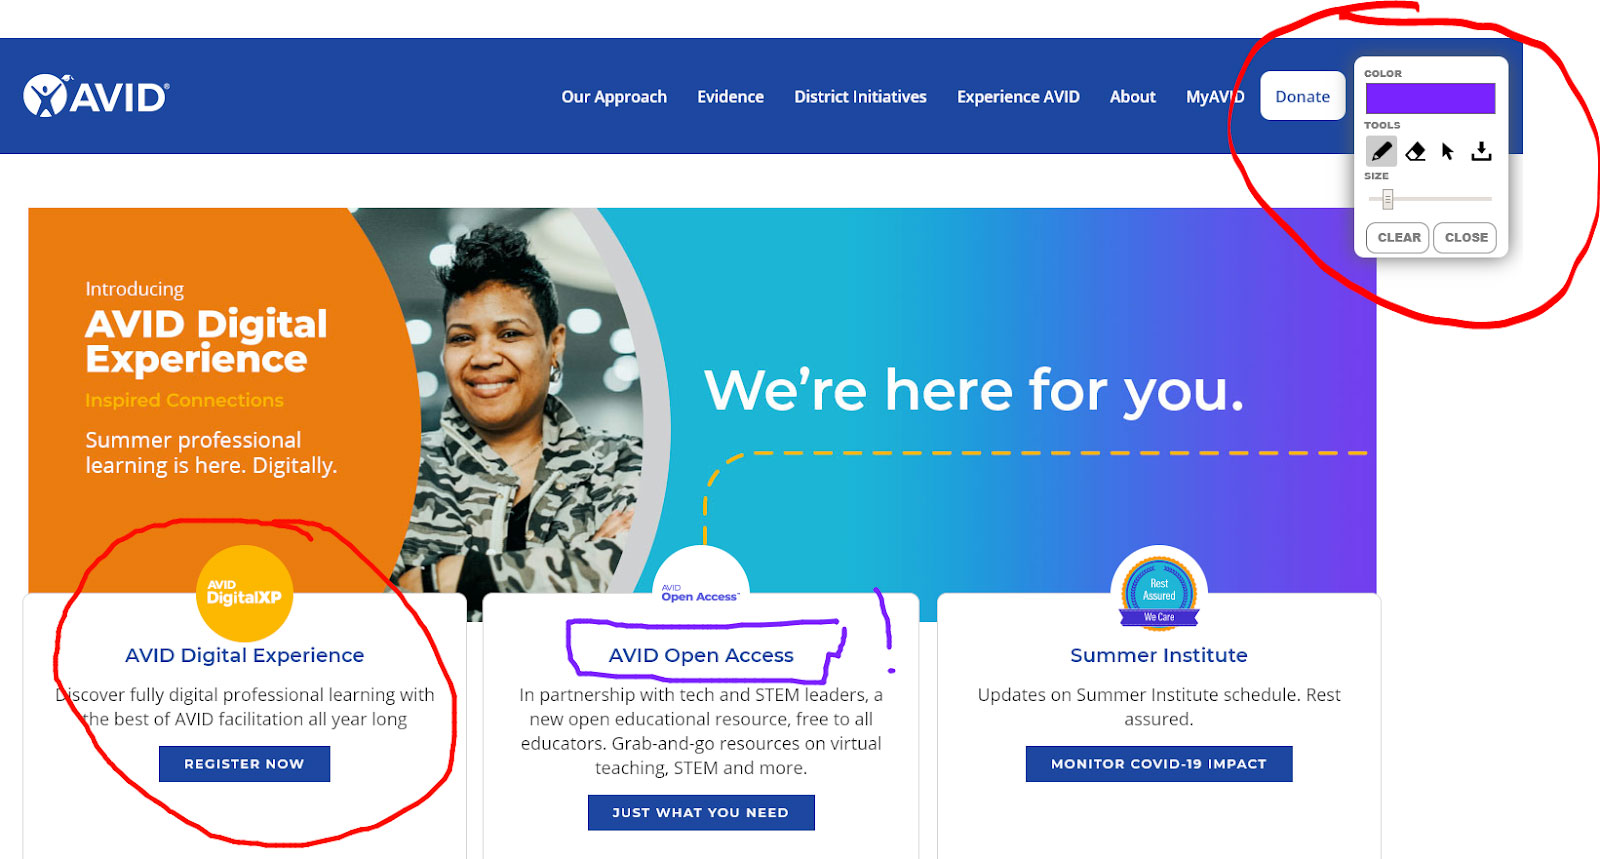
Page Marker is a Chrome extension that allows you to write on any webpage and download your annotations as an image. When you click the extension, the Page Marker tool appears in the top-right corner of the webpage. This allows you to mark up the page and download your work when you are finished.
Scrible Toolbar
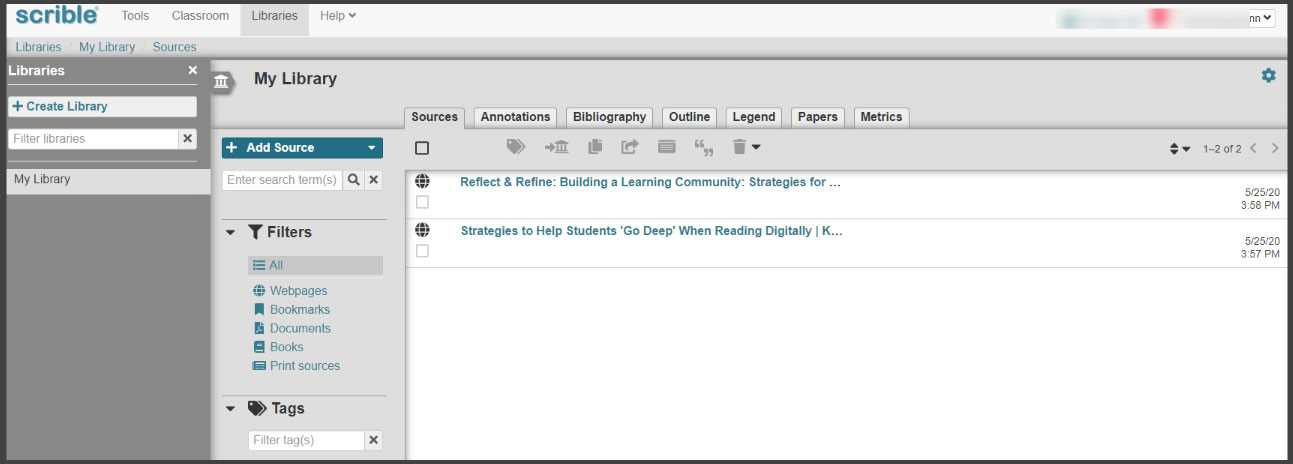
Use the Scrible Toolbar Chrome extension to annotate webpages, and then store and organize them in your personal online account. When you click the extension, the Scrible Toolbar appears at the bottom of a webpage. This allows for a variety of annotation options. There is also an available Scrible Google Docs add-on (Scrible Writer) that allows you to streamline the research process by quickly adding Scrible notes to your document from an integrated sidebar.

Collaborate
The level of collaboration available with these online tools varies. Many allow you to share notes with others. Some allow for collaborative note-taking on the same document, and others, like InsertLearning, allow the teacher to moderate and guide the collaborative process.


