Podcasting is a great way to engage students, have them internalize their learning, and give them a chance to use their own, authentic voice in the process. Adobe recently released a product called Adobe Podcast, which streamlines the podcast creation process for teachers and students.
To access Adobe Podcast, you’ll need to navigate to podcast.adobe.com and create a free account.
Both free and paid versions of this product are available. The free version is just for audio. If you want your students to be creating video podcasts, you’d need the premium version. With the free version, your students can create projects up to 30 minutes in length and download two finished projects per day, which should be sufficient for most school projects.
Three Main Tools
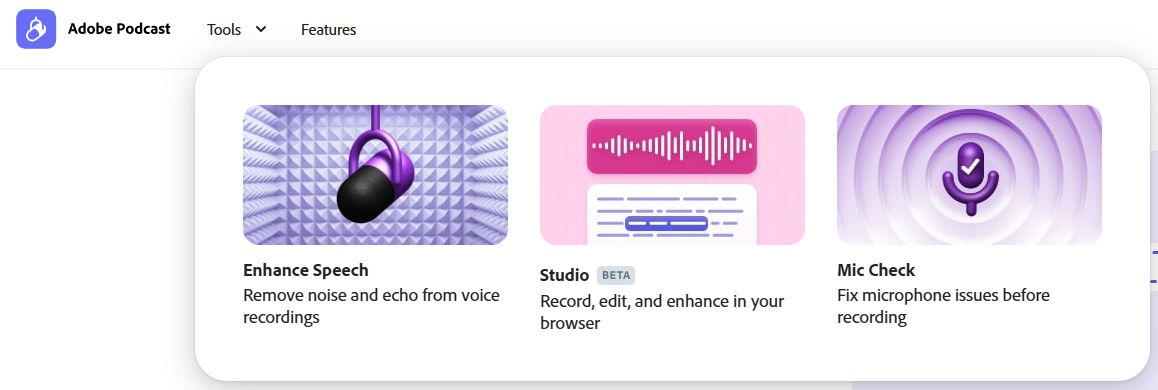
Within Adobe Podcast, you’ll find three main tools to help you create a podcast: Enhance Speech, Studio, and Mic Check. All three are available in the free version as long as you are producing audio content.
Enhance Speech
The Enhance Speech tool uses AI to improve the sound quality of an audio clip.
To use it, you need to upload an audio file, like an MP3 or WAV. Once your clip has been uploaded, you can turn on the Enhance Speech option and adjust the slider to meet your desired needs.
You’ll notice that as you move the slider to the right, more enhancement is applied, with background noise increasingly being removed and your voice standing out even further. This effect also makes the tone of your voice sound richer and fuller.
When you’ve got it the way you want it, you can download the processed clip.

Studio
The Studio tool is the heart of the program, as it’s the place where you will record and produce your podcast. As with the other features in Adobe Podcast, if you want to produce video, you’ll need the premium account. The free version should suffice for audio podcasts though, unless each student needs to produce and download more than the allowed amount of two episodes per day.
Here is a breakdown of the main features and workflows in the Studio portion of Adobe Podcast.
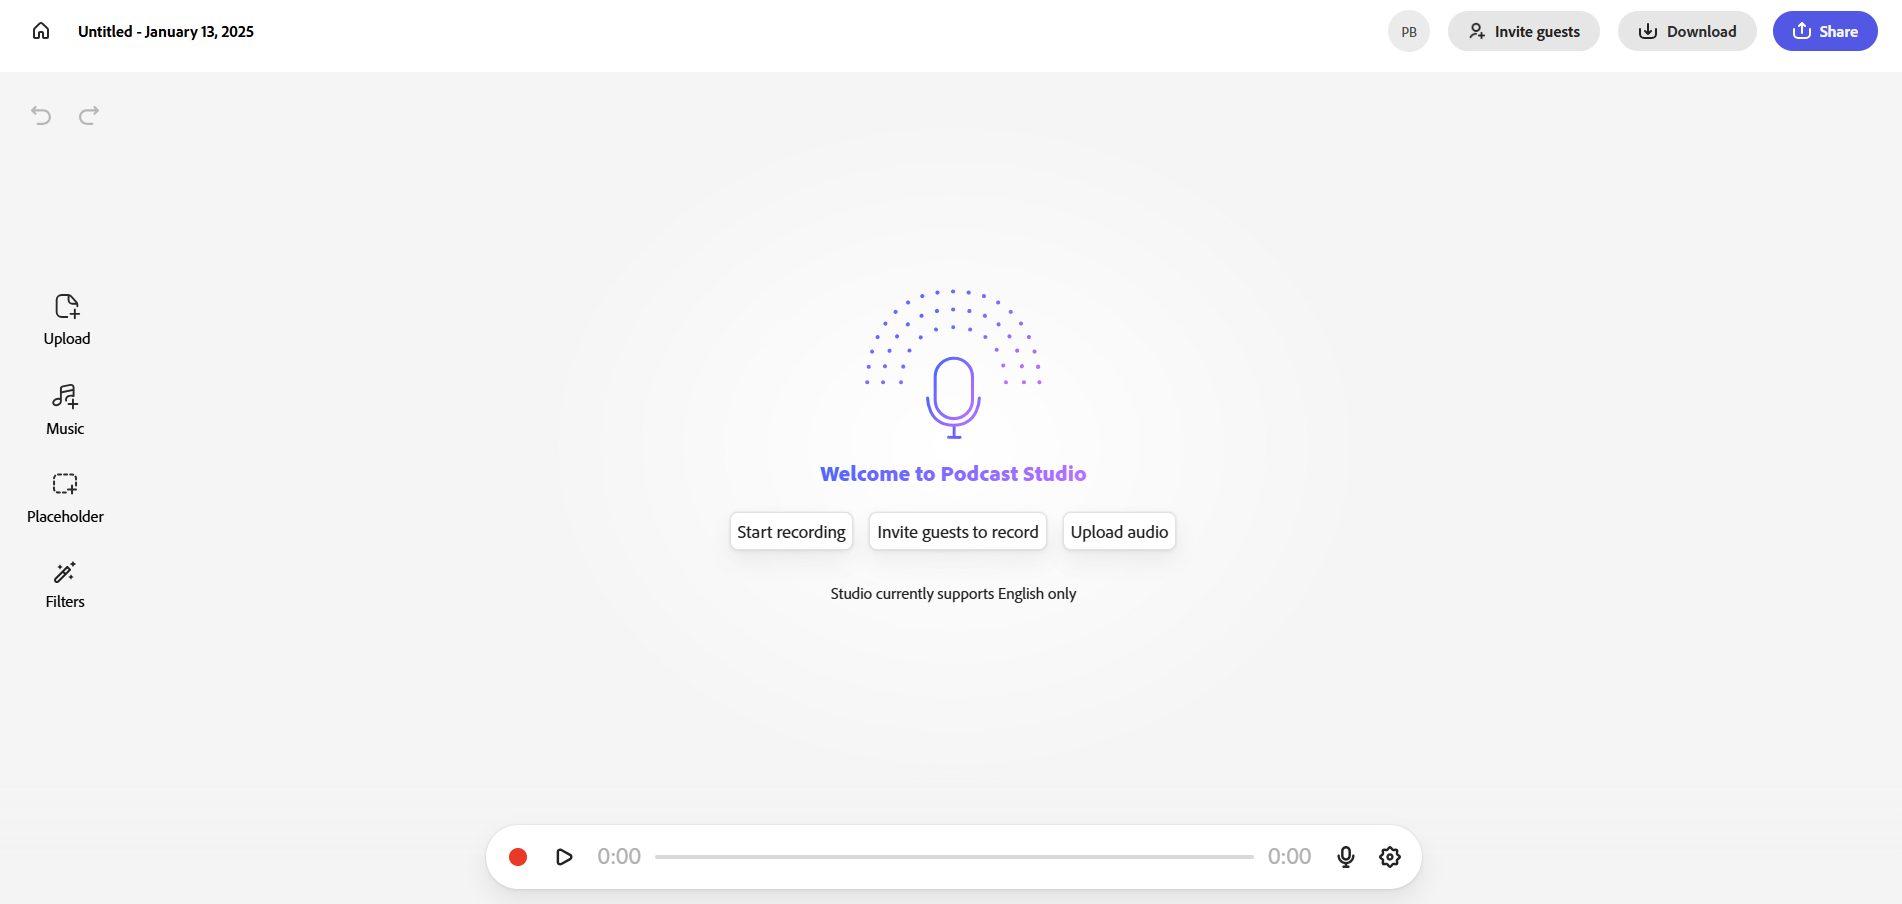
To begin, you can open an existing project or create a new one. When you create a new one, you have three main options to get started: Upload Audio, Invite Guests to Record, and Start Recording.
If you’ve already got audio files that you want to use—perhaps some music or audio you’ve recorded somewhere else that you want to add—you can use the Upload Audio option. This allows you to upload audio files into the system, so you can add them to your production.
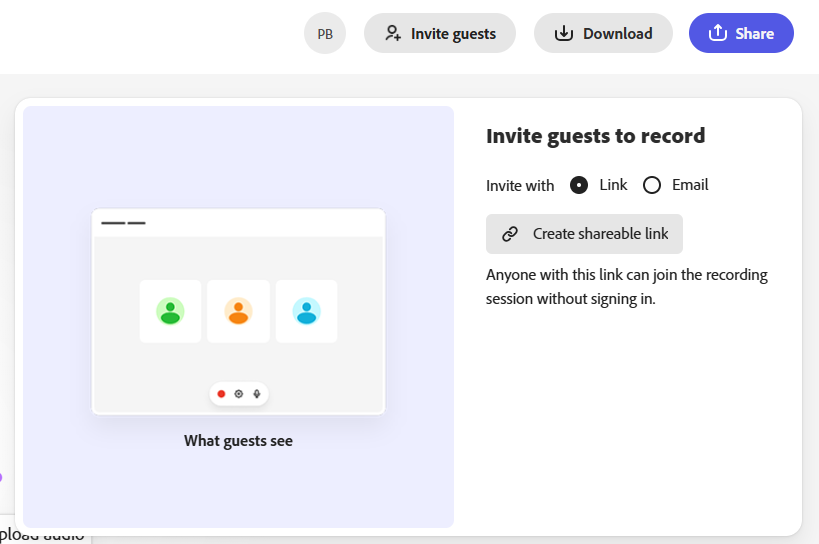
The Invite Guests to Record option is a great feature if you want to have a guest on your show. When you click this option, you can either email an invite to your guest or provide them with a shareable link. When your guest clicks the link or accepts the invite, they can engage in a conversation with you in real time without even needing to log in or create an account. It makes the process very seamless and is a great feature if you want your students to interview others.
Then, of course, you’ve got the Start Recording option. It’s a simple start-and-stop system. Press the red record button to begin and the stop button when you’re finished. You can repeat this process as many times as you’d like during your session, so if you aren’t able to get it all recorded in one take, it’s not a problem.
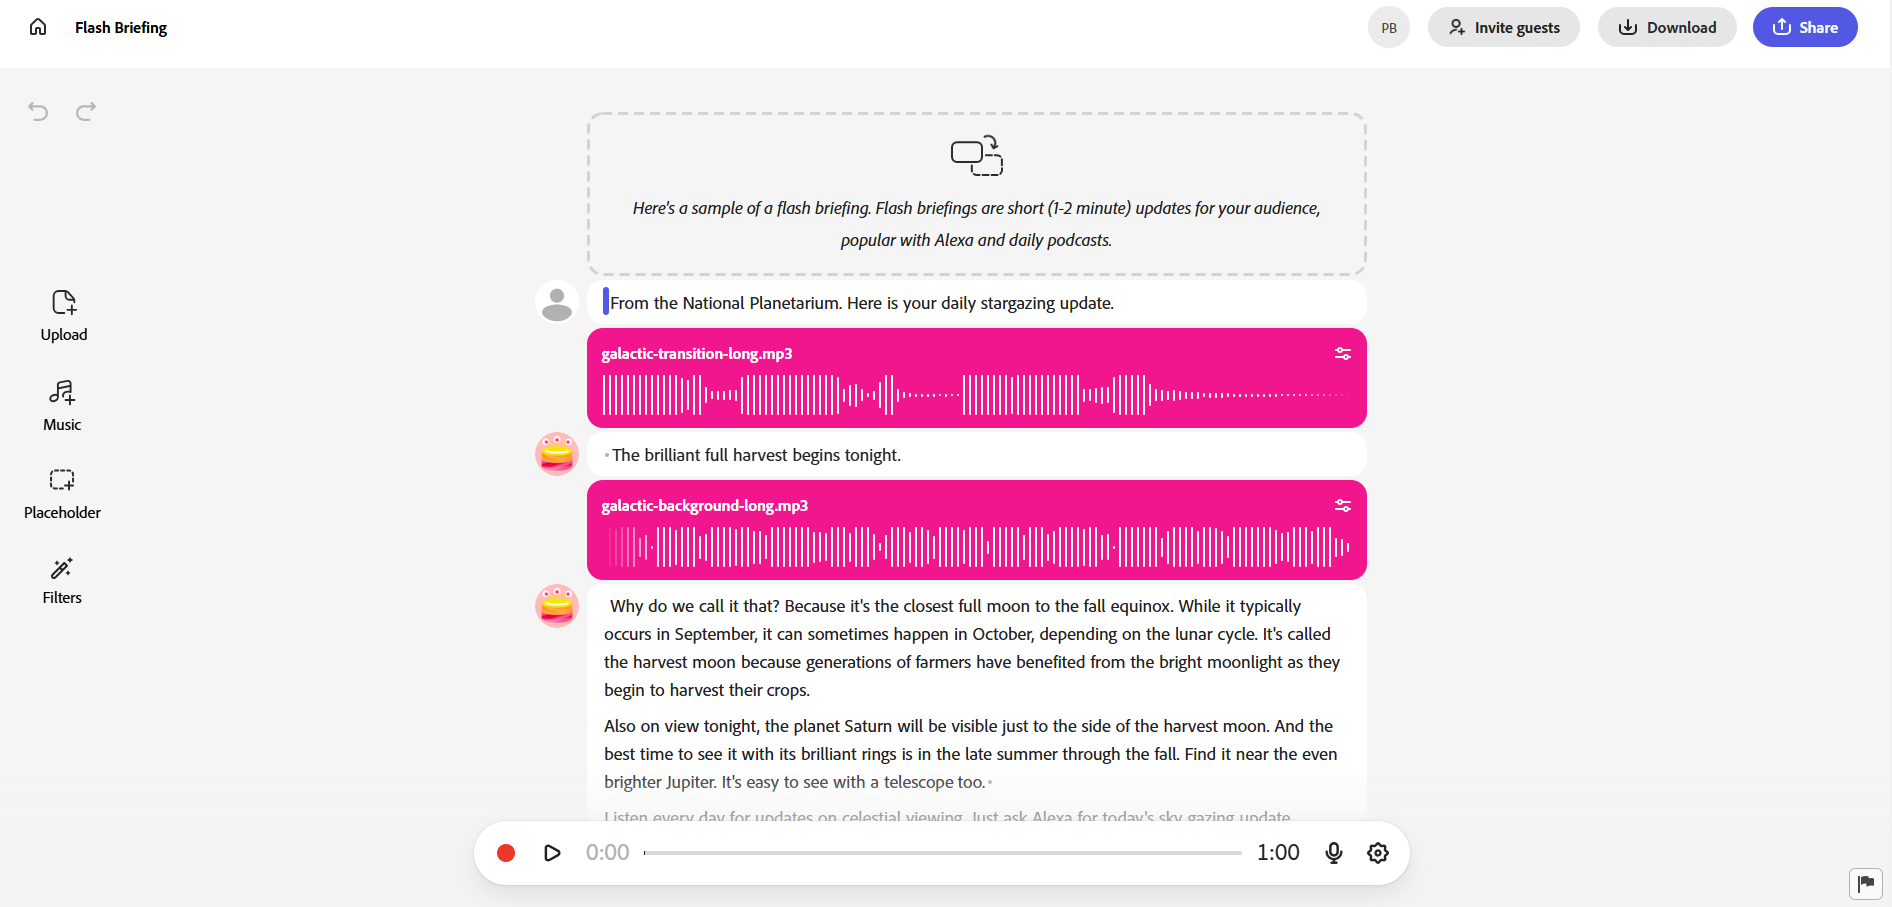
Once your main audio has been recorded, you can polish it up and add music. The platform includes a collection of royalty-free music clips that you can add into your production. Simply select one that you’d like to use and click the plus symbol next to it to add to the production. Once it’s in the project, you can split it, fade it in or out, or set it to be background music behind your voice. If you choose the Set as Background option, the Adobe Podcast program will automatically make the music quieter, so it doesn’t drown out your speaking voice.

If you want to edit the recordings of your voice, that’s also an available option. Once your audio has been recorded, a transcript appears. If you remove a word from the transcript, it automatically removes it from the recording. The same goes with ums and ahs. A little dot will appear on the transcript when you say “um.” If you delete the dot, the “um” disappears from the recording! Essentially, students can clean up the audio recording simply by editing the transcript. It makes the editing process really easy and takes the technical difficulty out of the equation.
You’ll also find a Filters option on the right-hand side. If you click this, you can enhance the audio right in the Studio section, without having to go to the Enhance Speech menu separately. It’s really convenient and can make your audio sound very professional.
A Placeholder option is also included in the right-hand menu. This feature allows you to put notes into your script. You might add notes like, “Add music here” or “Add interview clip here later.” These are essentially reminders to yourself of content that you still need to add to your project. When you add that content, you can simply drag-and-drop it on top of the placeholder.
Another option available to you when using the Placeholder feature is to create a podcast template that others can use as a starting point and then edit to complete on their own. If you click the share button, you can make a template out of your own project, or you can use one of the templates listed on the first page of the Studio portion of Adobe Podcast.
Finally, when you are finished, you can download your project. There is a download button at the top that allows you to download your final audio as a MP3 or WAV file. You can also download the transcript in three formats: Text, Docx, and PDF. With the free version, you can download two per day.
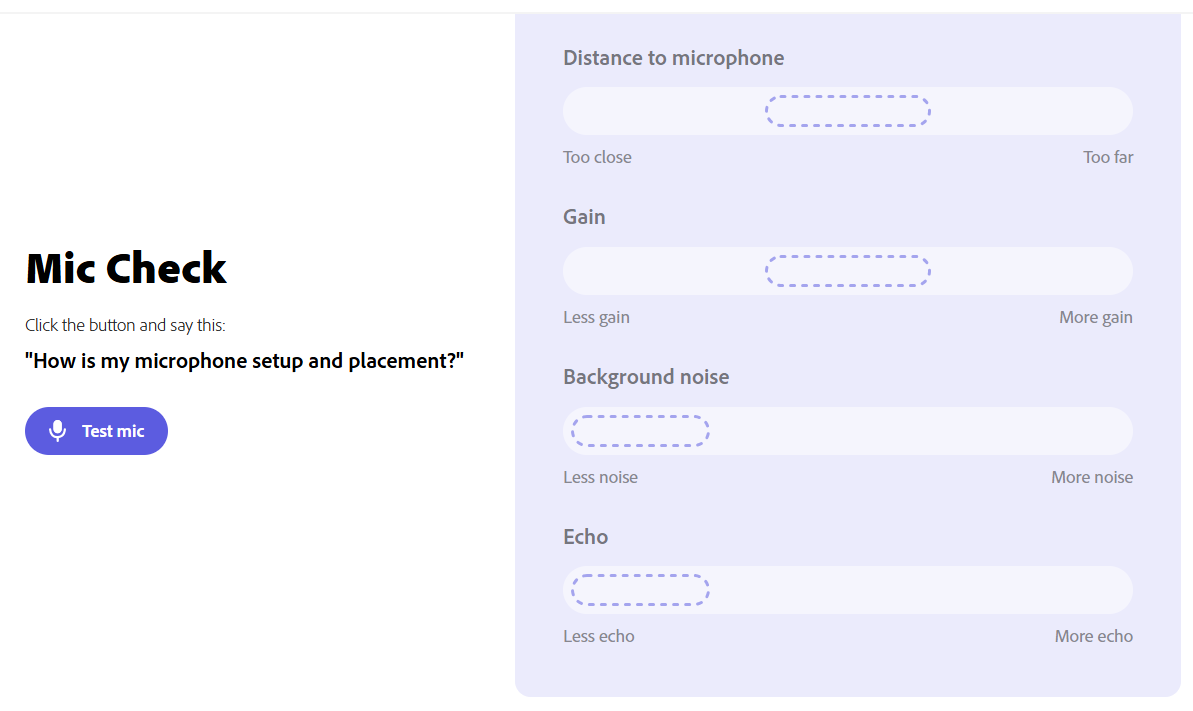
Mic Check
The Mic Check tool lets you check your microphone setup before you begin recording.
To perform the test, plug in your mic and click the Test Mic button. Say a few sentences and click stop.
Adobe Podcast will give you an analysis in four areas: distance to microphone, gain, background noise, and echo. It will offer a rating by placing a marker on a scale from excellent to poor, and it also provides information about how to adjust common devices for each of the four areas.
Adjust your microphone or device and test it again until you get the results that you feel are acceptable. This can help you or your students get higher-quality audio when recording the podcast.
This tool seems to have been designed with simplicity and functionality in mind. It’s got pretty much everything you need to plan, record, edit, and produce a podcast. The main thing that it won’t give you is a place to host it or share it with others.
For that, you’ll need to decide what works best for your classroom. First, a note that, as always, you’ll want to be sure to check and adhere to your local guidelines and restrictions for sharing student work publicly. If approved, you might put the finished files in a shared Google Drive folder or maybe upload them to your learning management system (LMS). If you have appropriate approvals to share them more broadly, you might create a classroom website to host them on or release them via social media.
When considering your classroom podcast and audio production needs, Adobe Podcast certainly has the capability to be a powerful and efficient solution.
AVID Connections
This resource connects with the following components of the AVID College and Career Readiness Framework:
- Instruction
- Systems
- Opportunity Knowledge
- Student Agency
- Break Down Barriers
Extend Your Learning
- Adobe Podcast (official website)
- Help Your Students Make Your Own DIY Podcast (NEA Today)
- Creating Podcasts With Your Students (Tony Vincent via Reading Rockets)
- Podcasting Assignments (The McGraw Center for Teaching and Learning at Princeton University)