While access to information can be extremely empowering, it can also be overwhelming. Fortunately, digital tools like document tabs in Google Docs can help us manage and organize complex documents and large collections of information.
What are document tabs?
Document tabs allow you to break longer Google Docs down into smaller sections. In a sense, they’re like creating a filter, a menu, or a table of contents within a larger document.

When you create and click on a tab, you only see that tab and the corresponding section of information. When you click on the next tab, again, you only see the next section.
It functions a bit like a website. When you click on a menu item on a website, you’re taken to a specific page, and you see only that page. The experience with document tabs is similar in that you only see the content within a tab when clicking on it, not all the other content contained in the larger document.
Why would you want to use tabs?
In simple terms, document tabs make it easier to manage and navigate through long documents by breaking the content down into more digestible sections.
By opening the tab overview on the left of a Google Doc, you can quickly view and scan the different tabs or sections of that document.
Click on a tab, and you’ll be taken directly to that section without needing to scroll through all the individual pages of your document. This makes trying to find the specific section within that longer document much easier, and you’ll save time navigating and searching because you can work with a more manageable amount of content at one time.
The longer the document, the more beneficial tabs can be.
How do tabs work?
When you open a Google Doc, you’ll see a menu on the left side of the page called “Document tabs.” The first tab appears below that and is automatically created.
Next to each document tab is an “Add tab” (+) button to add additional tabs to your document. To rename a tab, simply double-click it and then type in the new name. You can drag and drop tabs to rearrange their order.
For more options, click the vertical dots icon that appears when you hover over a tab.

The first option allows you to add a subtab, which is a tab nested underneath the main tab. Below that are options to delete, duplicate, or rename a tab.
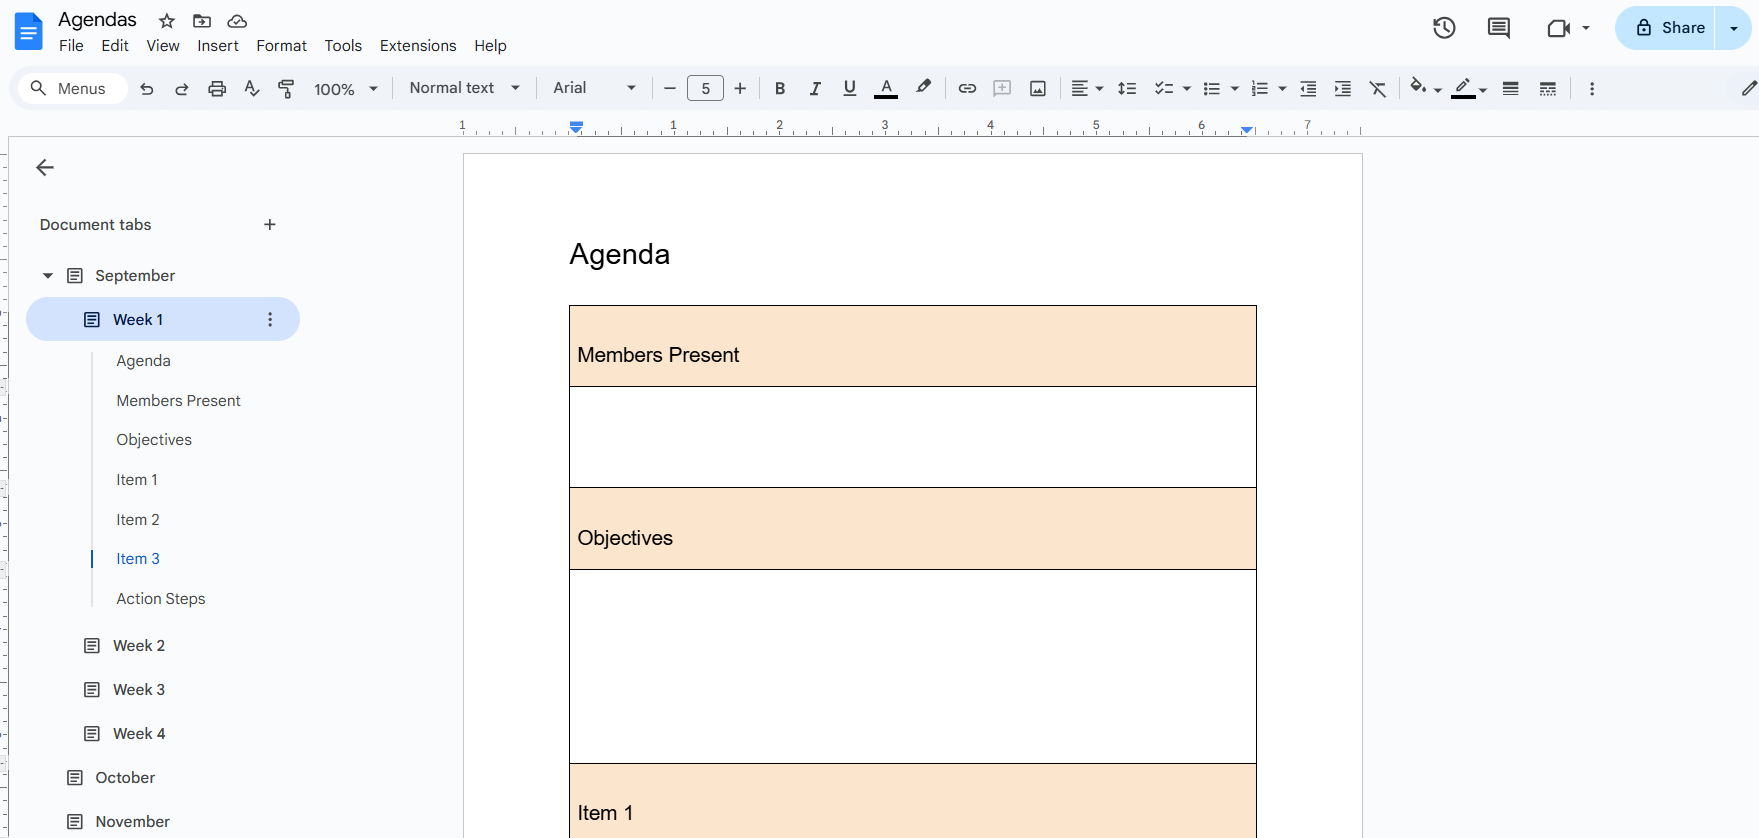
Duplicating can be helpful if you’ve created a complex structure of information in one section that you want to use in other sections. For example, you may have an agenda template that you want duplicated to each new meeting date across various tabs. You can do that quickly with the duplicate option. While you could copy and paste the content into each tab section, the duplicate option allows you to complete this action with a single click.
Another option in the submenu is to add an emoji symbol to your tab. You can use this to visually categorize and also call out individual tabs or collections of tabs. If you have a section for brainstorming, for instance, you might add a light bulb emoji. If there’s a section where you’re drafting communication, you could add a pencil or page icon. You can categorize these in the way that makes most sense to you.
Below the menu item for emojis, you’ll find an option for link copying to get a direct link to that specific tab in your document.

Below that menu item is an option to display as an outline. This choice allows you to combine the new tabs functionality with the previously existing outline feature in Google Docs. To use the outline feature, you will need to label sections in your document using a text style choice, such as title, subtitle, or one of the other heading options. If you do that, when you apply a heading option to the text in your document, an outline of that work will appear on the left navigation panel below an open tab. This gives you an even more detailed overview of your content, making it easier to find what you’re looking for.

In essence, you now have two ways to organize your content. You can outline your content using a text style that includes headings, and you can break down your longer document into distinct sections using the tabs feature. Both are great for improving organization and making long documents more manageable. It’s especially powerful when you use the two features together.
How might teachers use the document tabs feature?
- Lesson Planning: Create separate tabs for daily, weekly, or unit plans.
- Curriculum Resources: Store standards, pacing guides, and frameworks in tabs for quick reference.
- Collaboration: Use tabs for shared planning docs with grade-level or subject-area teams. Each tab could be a different lesson, unit, class, or subject area.
- Parent Communication: Draft letters, newsletters, or scripts in dedicated tabs.
- Agendas: Keep PLC or team meeting agendas and notes organized. Create a tab for each meeting date.
- Instructional Materials: Create dedicated tabs for bell work, notes for a substitute teacher, or exit tickets.
- Documentation: Maintain a tab for data tracking of things like interventions, behavior notes, and IEP goals.
- Professional Development and Reflection: Create a new tab for each professional learning experience you attend.
How might students use the document tabs feature?
- Writing Projects: Create separate tabs for each step of the writing process, like brainstorming, drafting, revising, and final copies.
- Research Projects: Create a document specifically for the research phase of a project. Then, either create one tab for each section of the project or perhaps one tab for each source document. This can help students keep their research and notes more organized, making the writing process easier and more streamlined.
- Collaborative Work: Create shared documents for group projects with distinct aspects of the work recorded in tabs. In some cases, it might make sense for each group member to have their own dedicated tab.
- Homework Tracking: Create a tab for each day or class to help keep track of homework in an organized way.
- Study Guides: Create review sheets or vocabulary lists in tabs for different subjects, courses, or units within a course.
- Project Work: Create a project management document by making a tab for each step or task that needs to be completed.
- Creative Writing: Create a writing notebook, using tabs for different types of writing, such as character sketches or plot outlines.
- Journaling: Create a tab for each new journal entry or perhaps for each week of entries.
Bonus Tips
- Printing: If you want to print the entire document without doing so tab by tab, you’ll need to download the document and then print it. Downloading it will remove the tabs and consolidate it back into one continuous document. If you don’t wish to do this, you can also go tab by tab, printing each section separately.
- Searching: Control + F on a PC or Command + F on an Apple device will bring up the “Find and replace” menu. If you click the vertical dots to open the full menu, you can toggle between searching the current tab and all tabs.
AVID Connections
This resource connects with the following components of the AVID College and Career Readiness Framework:
- Systems
- Student Agency
- Break Down Barriers
Extend Your Learning
- Use Document Tabs in Google Docs (Google Docs Editors Help)
- Google Docs Tabs: Ultimate Guide to Organising Your Documents! (Paul O’Malley via YouTube)