Grouper is an online tool designed to help you quickly and thoughtfully create customized student groups.
Initial Setup
First, set up an account at grouper.school. You can sign up with Google, Clever, or your email. If you use Google Classroom or Clever, Grouper will allow you to easily and automatically import your existing rosters. If you sign up using the email option, you’ll need to manually set up your classes.
Though it may sound more daunting, setting up classes manually is actually quite quick and easy. Simply click the “New Class” button and either copy and paste in a list of students from a roster or type them in.
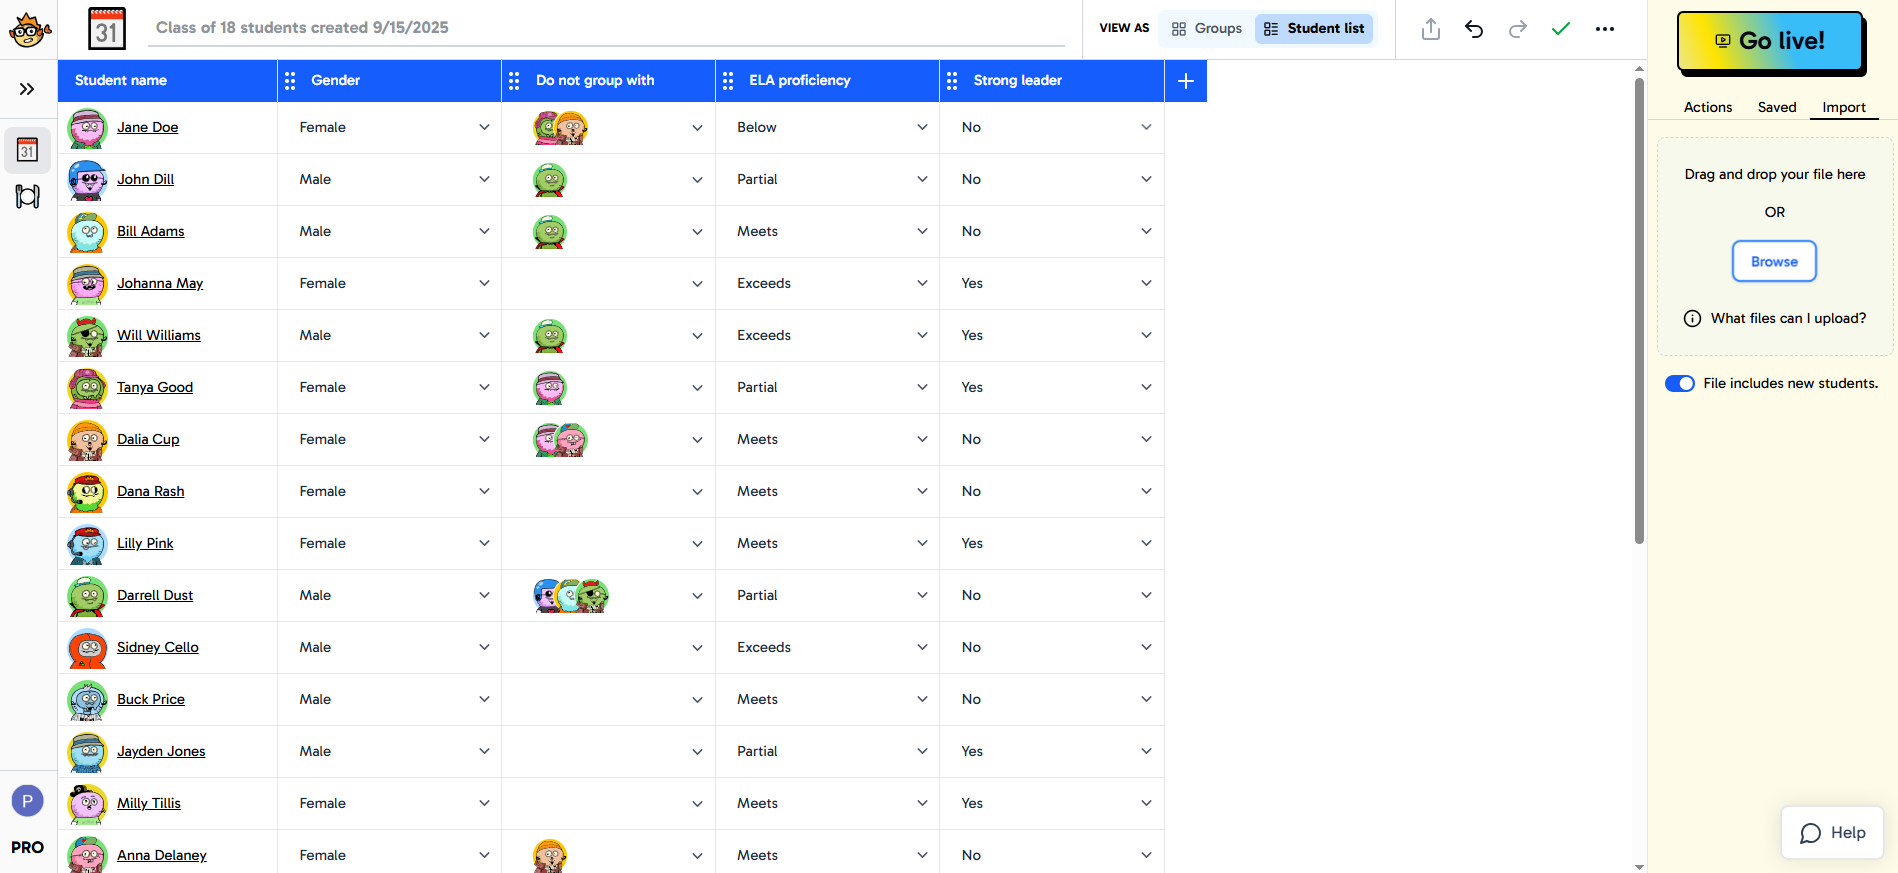
Once you have student names entered into the roster, you can add what Grouper calls “attributes.” Attributes are identifiers attached to each student. You can choose a preset from a list or create custom attributes. Some of the presets that are available include:
- Study buddies
- Strong leader
- English language proficiency
- Primary language
- Math proficiency
- Reading levels
Whether you choose to create a custom attribute or pick one of the presets, a drop-down list will appear so that you can quickly assign an attribute setting to each student. For example, under the “Do not group with” option, you’ll see a list of all the students in the class. Click the names of students who should not be grouped with the selected student, and that will be recorded in the system. Similarly, for a category like “ELA proficiency,” you’ll choose from a set of levels that you’ve entered, such as “does not meet,” “partially meets,” “meets,” or “exceeds.” Assign the appropriate level to each student.
If you have a spreadsheet of test results already created, you can import those into Grouper as long as the student names are listed on the left (rows) and the categories are listed along the top (columns). Grouper will automatically match the data on the spreadsheet to the names in your class. The integrated AI is effective at matching up the names, even if they’re not perfect matches, like Nicholas instead of Nick. When the data has been imported, you can double-check the output.
Create Groups
Once your classes and attributes have been set up, you are now ready to make your groups. You can create random groups or groups based on designated attributes.
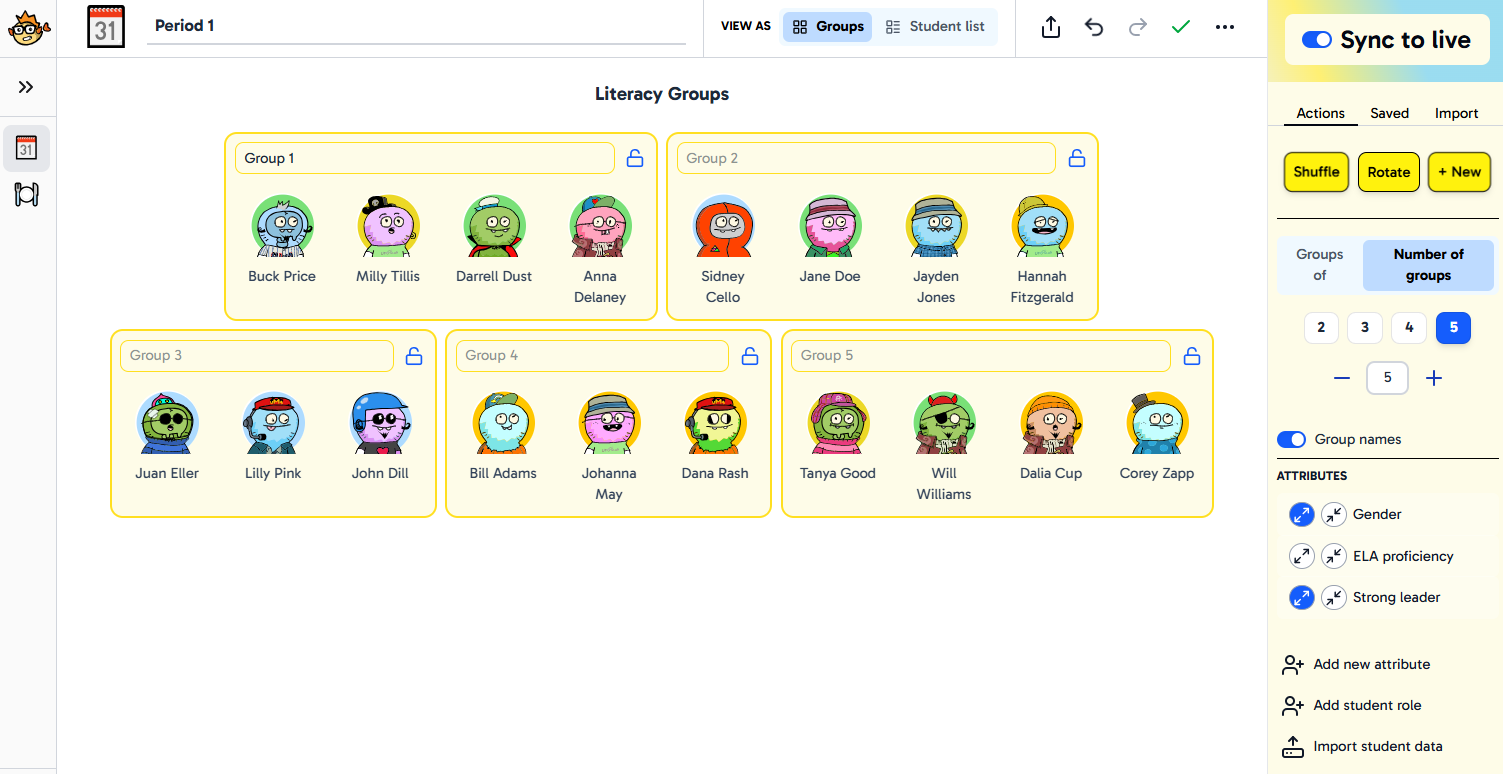
To make a quick random group, click on either the “Groups of” or “Number of groups” options. If you click on five groups, for example, it will quickly place your students into five random groups. Similarly, if you click on the four-students-per-group option, it will create pairings with no more than four students per group.
Each student is represented by a cartoon avatar, which can be changed if you wish. If you don’t like the groups that the program creates, you can either hit the “Shuffle” button to create a new random grouping, or you can manually drag and drop students from one group to another. If a student is absent, you can click the three dots by their avatar and mark the student as absent, thereby removing them from the active groups for the day.
If you want more control over the group makeup, you can manually create them, or you can have them automatically created based on the attributes that you choose. Attributes are listed on the right-side menu, and each has an option for spreading out or clustering. Spreading out makes heterogeneous groups based on that attribute, and clustering makes the groups more homogeneous. For instance, you could make the groups heterogeneous by leadership strength and homogeneous by ELA proficiency.
Even with this approach, you can still drag and drop student avatars to fine-tune the results. If you use “do not group with” designations, those students will remain in separate groups unless you override them.
Additional Features
In addition to the features above, you can also name each group, and the integrated AI will even try to help you with this. For instance, if you name the first group, Group 1, AI will automatically fill in the other groups as Group 2, Group 3, and so on. If you begin naming groups by color, the AI will assign colors to the remaining groups. Of course, any of these suggestions can be manually overridden.
You can also choose to lock groups that you like and then randomize the rest. This is a great option if you have a specific group of students you want to meet with for intervention work while the other students are randomly grouped to work on a specified project.
“Undo” and “Redo” buttons are also available if you need to negate or repeat a selection at any point.
“Go Live”
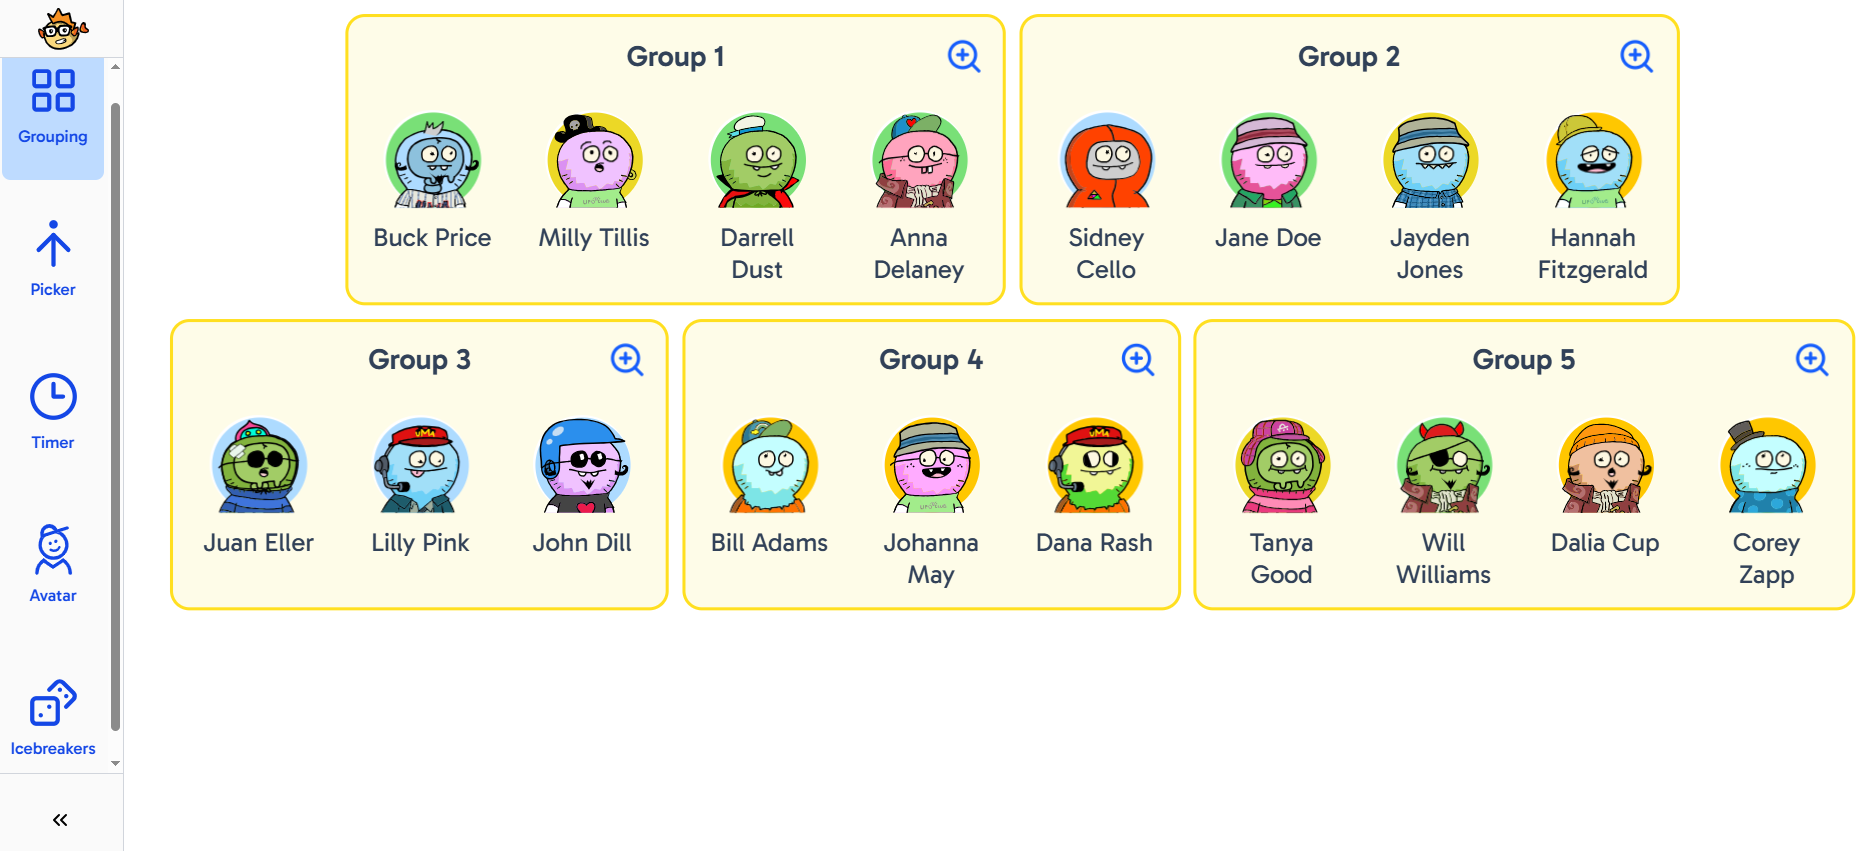
Once you have the groups set up the way you would like, click the “Go Live” button to display a student-friendly view of the groups. If you update any of the groups using the teacher dashboard, those changes will immediately show up on the “Go Live” page as well.
Another helpful feature is the “Rotate” button. Clicking this button shifts students to the next group on the list, which is great for rotating students during station rotation work.
If you’d rather display the groups in another way, there are a few additional options available. You can export the groups as text, an image, or a PDF. This allows you to use results in other formats, perhaps as an image in a slideshow.
Grouper is a “freemium” product. With the free version, you can have up to 40 students per class, and groups are saved for seven days. The free version also lets you sort by up to two student attributes. The PRO version allows for additional options like unlimited attributes, gives access to timers and virtual dice, and provides the ability to save groups forever.
AVID Connections
This resource connects with the following components of the AVID College and Career Readiness Framework:
- Instruction
- Systems
- Break Down Barriers
Extend Your Learning
- Grouper (official website)
- Cooperative Learning: 4 Steps for Effective Student Grouping in a Dynamic Classroom (Tatiana Ciccarelli via NWEA)
- What Is the Best Way to Group Students? (Lindsey Valich via University of Rochester)