Interactive whiteboards have become staples in most classrooms. Using the touchscreen capabilities, you can interact with digital files, webpages, and programs. This can be a great way to make presentations more dynamic, direct students’ attention to the specific areas on the screen that you’re referencing, facilitate collaborative experiences, and model computer work that you want students to do on their own.
Many times, these physical whiteboards come with a proprietary software package that gives you additional functionality, especially the ability to design and present professional-looking presentations very quickly. However, the addition of these premium tools may not fit within schools budgets, and there are also instances of tools being retired, which is what happened when Google discontinued its popular whiteboard tool, Jamboard.
If you don’t have access to a whiteboard program or the program that you have isn’t quite doing what you’d like it to, there is a powerful, free whiteboard tool that you may want to consider using: Canva Whiteboard.
What is Canva Whiteboard?
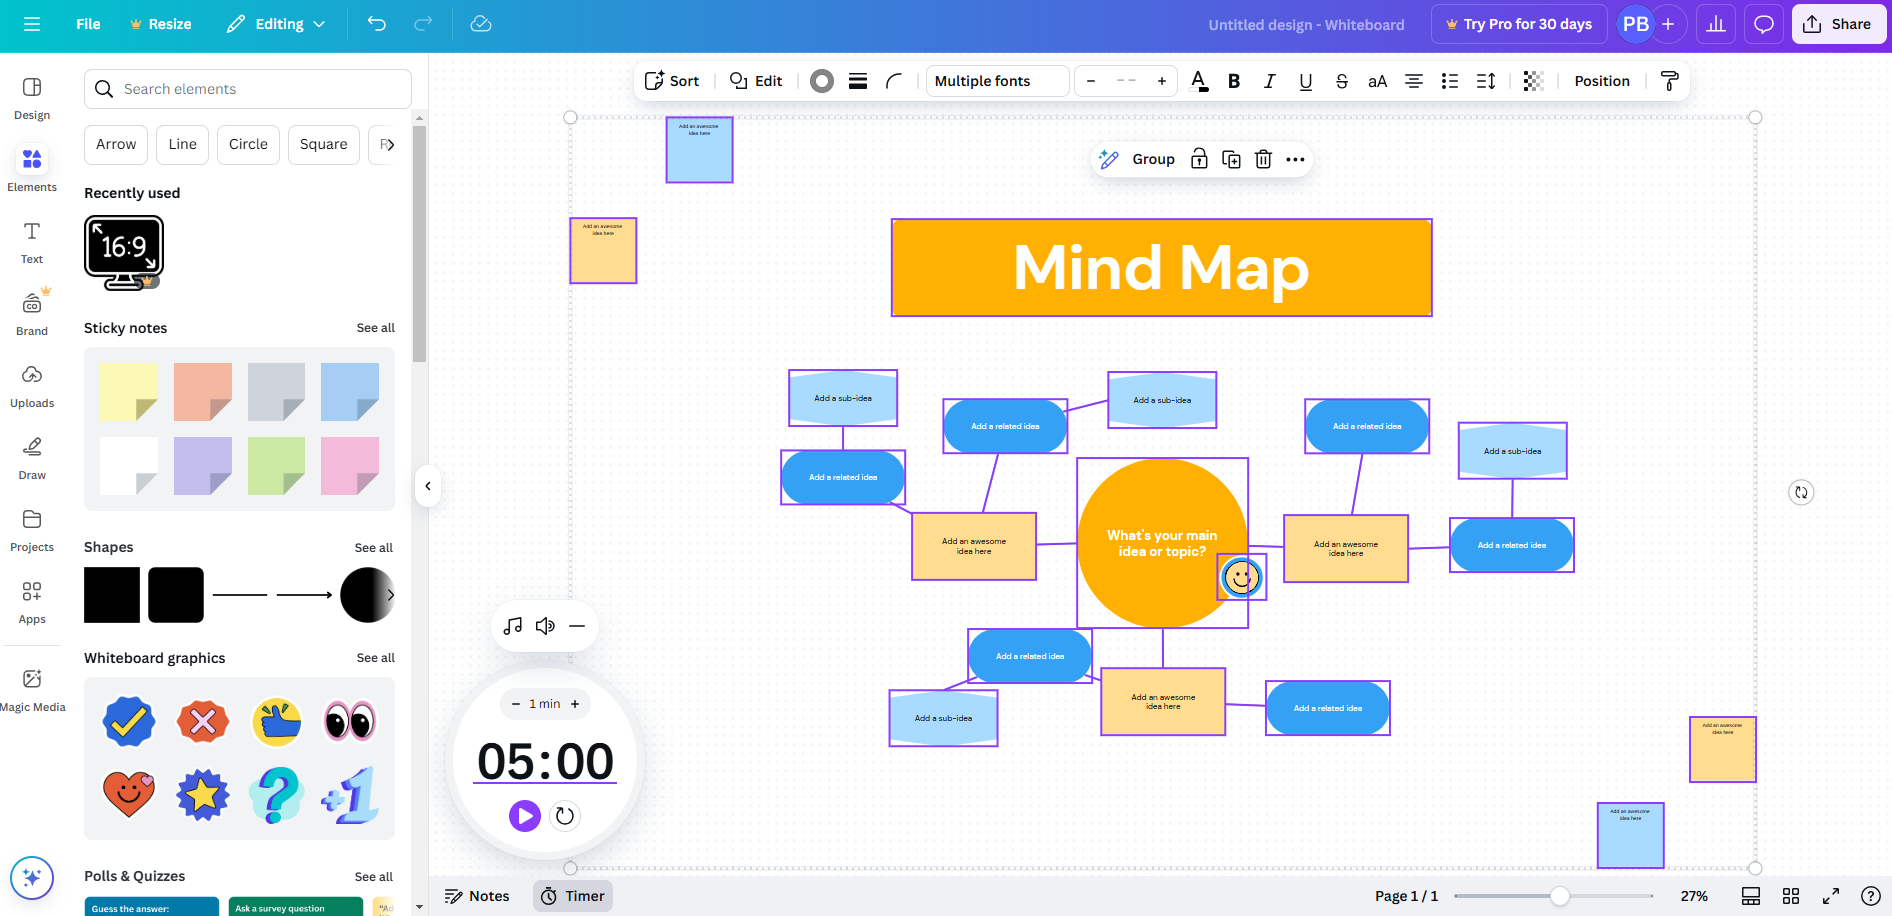
Canva Whiteboard is one of the tools available in the Canva online design platform. In simple terms, it’s a digital whiteboard that you can write on. You can also add design elements to it, and you can interact with it in real time.
The Canva Whiteboard canvas is infinite, meaning you can keep adding and expanding the canvas surface without ever running out of space. You can zoom out or pan to access more area. Various types of media and resources can be added to the Canva Whiteboard canvas: text, images, video, graphics, formative assessments, and more.
Program Features
Design
Down at the left side of the screen, you’ll find shortcuts to key features. At the top of that list, you’ll find a design menu. By clicking this, you’ll open a palette of background template options that you can insert onto your whiteboard. Choices include options like flowcharts, organizational maps, graphic organizers, brainstorm webs, workflow diagrams, and calendars.
After you’ve selected an option that meets your needs for the day, click on it to add it to the whiteboard space on your screen. You can then add content into the space holders within each of those templates. You can draw or write on it, and you can also add other media of your choice.
For example, there’s a template titled, Plus, Minus, Interesting. You could use this graphic organizer to have your students brainstorm ideas and then look at them from three different perspectives or points of view: Which ideas are pros, which are cons, and which do you want to learn more about?
Some of the templates do require a premium account, and this is noted with a crown symbol in the corner of the template, but many of them are included in the plan for free. While you can use the design templates to quickly start your process, you can also build your canvas by hand.
Elements
Below the design menu on the left, there’s an option for adding elements. Elements include objects like sticky notes, shapes, whiteboard graphics, interactive polls and quizzes, photos, videos, audio, and charts. There is also a handy search box at the top of all these menus to help you find what you’re looking for within that menu. This feature can save you a lot of time from having to scroll through each.
Text
The next menu option is for text. This allows you to add a text box where you would type your content. If you’d rather, you can use the built-in, AI-powered magic write tool to generate content for you within the whiteboard setting. There are default styles for headings, subheadings, and body text, and you will also find decorative preformatted text options that you can quickly add to your project and edit.
Uploads
This is where you can import your own images, videos, and audio clips. Anything you bring in appears under this section in a nice visual list for quick access.
Draw
This tool gives you a palette of colored pencils, markers, and highlighters. You can change the color and size of each of these and use them to mark up your canvas. This is perfect if you’re using the whiteboard as a presentation tool, but it’s also a powerful feature when your students are collaborating on a document in groups, or perhaps together with you in front of the whole class.
Magic Media
This is where you can get help generating more design elements with the help of artificial intelligence. You can create images, graphics, and videos by typing in a description of what you’d like and then clicking the Generate button. There is also an option to apply an image filter before generating the image, and when selected, the filter is applied to all of the subsequent images that are produced.
Timer
At the bottom of the canvas area, there’s an integrated timer tool, in case you want to limit the amount of time that your students spend on a whiteboard task. You won’t need to pull up a separate timer, as it’s built right in.
Notes
You can also open a notes panel on the left side if you want to jot down notes with your class as you work through a graphic.
Zoom
As you’d expect, you can zoom in and out of the canvas area as needed. This allows you to take advantage of the infinite canvas feature, expand your work area, or zoom in on a specific section.
Sharing
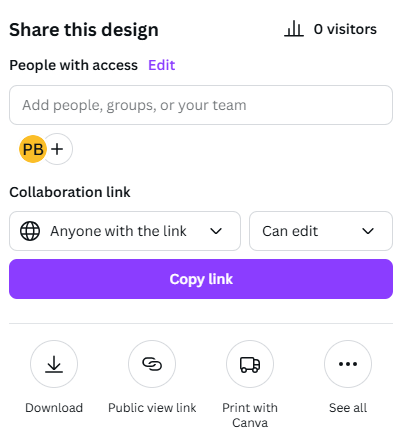
One of the most powerful tools is the sharing feature. While you’re probably used to this from other collaborative programs, it’s really important. Just like you would with a Google or Microsoft document, you can click the Share button to share the whiteboard with your students.
You can allow users to view, edit, or comment—the choice is yours. You can then share the whiteboard with your students by adding in email addresses or generating a shareable link. The shareable link option would be great for linking into your learning management system so that students can easily access it.
Integration Ideas
- Present content.
- Have students design their own presentations.
- Facilitate collaborative idea generation and brainstorming.
- Organize ideas using graphic organizers.
- Conduct quick formative checks for understanding.
- Facilitate group work.
Canva Whiteboard is not your only whiteboard option, but it can be an effective one. It’s both robust and free, so it’s probably worth checking out if you’re exploring possibilities for your classroom.
AVID Connections
This resource connects with the following components of the AVID College and Career Readiness Framework:
- Instruction
- Student Agency
Extend Your Learning
- Canva Whiteboard (Canva)
- How to Use Canva Whiteboard | Tutorial for Teachers (Pocketful of Primary via YouTube)