By using generative AI tools like Canva AI, students can now create digital applications without needing to know the specifics of a coding language. It’s important to emphasize though that in using Canva’s tool and moving through the creation process, students will still need to think critically, communicate clearly, iterate on a prototype, and interact with a chatbot until they get their desired results.
Using Canva AI
Navigate to canva.com, and log in to access the AI features. Select “Canva AI,” and then click on the “Code for me” option within the banner at the bottom of the prompt box.
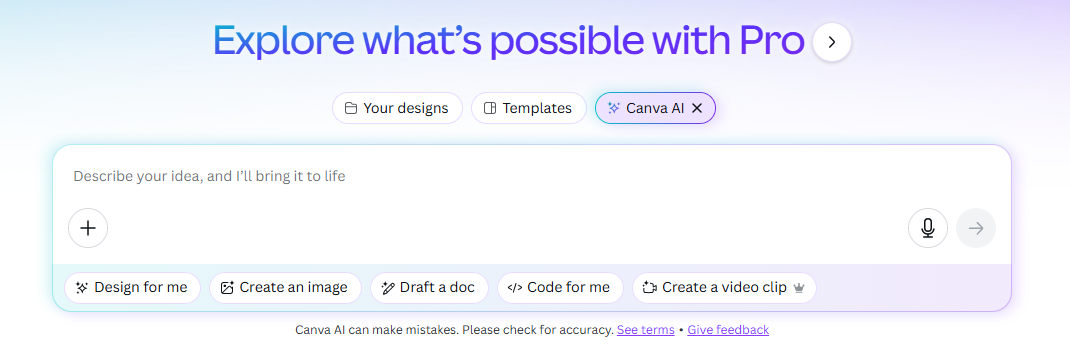
From there, you can either type in an idea or click the microphone icon and speak your idea. You’ll describe the app or web experience that you want Canva to create for you, and Canva AI will begin writing code to produce your program.
The generated product will appear on the right side of the screen and allow you to interact with it. As you test it out, you’ll likely find areas that need improvement.
To make changes, interact with the chatbot on the screen by explaining what you’d like changed. When you submit your feedback, Canva will update its code and create a new version of your app. You can repeat this process as many times as needed to get the results you’re looking for.
While you won’t need to know how to code, this iteration and creation process will require you to think critically, evaluate responses, and ask for updates until you are satisfied with the results.
Why would you want to use tabs?
In simple terms, document tabs make it easier to manage and navigate through long documents by breaking the content down into more digestible sections.
By opening the tab overview on the left of a Google Doc, you can quickly view and scan the different tabs or sections of that document.
Click on a tab, and you’ll be taken directly to that section without needing to scroll through all the individual pages of your document. This makes trying to find the specific section within that longer document much easier, and you’ll save time navigating and searching because you can work with a more manageable amount of content at one time.
The longer the document, the more beneficial tabs can be.
Problem-Solving Practice
This tool can be a great way to get your students thinking at high levels while connecting with your curricular objectives and their personal interests.
To begin designing the learning experience, identify academic standards that could inspire students to build an app or interactive website as a way to solve a related problem or achieve one of the identified standards.
As the teacher, you will set the parameters and objectives around a problem-solving challenge. Students will then identify a problem that needs to be solved within the parameters of your standards and content. They will engage in a problem-solving process to design an app or computer program to solve the problem they have identified.
To make this process manageable and structured, you’ll want to have students follow a defined problem-solving process. One such option is included below:
1. Identify a problem to be solved.
2. Generate a prompt that describes an app that would help solve the problem.
3. Review and iterate until the results meet your expectations.
4. Have someone test the app.
5. Revise and repeat, as needed.
6. Publish and share.
While there are many problem-solving sequences that you can choose from, it’s helpful to choose one and then have your students progress through that defined sequence of problem-solving steps.
A Problem-Solving Example
To illustrate the work that a student might do, consider this example from an English language arts (ELA) class. The objective is to use technical writing skills, such as clear and specific language, to communicate effectively. To demonstrate this, students will design an app to solve an identified problem of their choice. To create the app, they will need to input clear and specific descriptions and directions, and they will need to iterate their creation using targeted and detailed follow-up prompts.
Using our imaginary student, Jenny, as an example, here’s how it might look for a student to work through this six-step, problem-solving process.
Step One: Identify a problem to be solved.
Here, Jenny taps into her personal interest and identifies a problem that needs to be solved. She’s always been interested in songwriting, and she sometimes falls into a rut of using the same chord progressions over and over. She identifies this as her problem, and she decides to develop a chord progression generator to help her write more original songs.
Step Two: Generate a prompt that describes an app that would help solve the problem.
Based on her identified problem, Jenny writes a prompt to describe an app that would help solve the problem. She types the following:
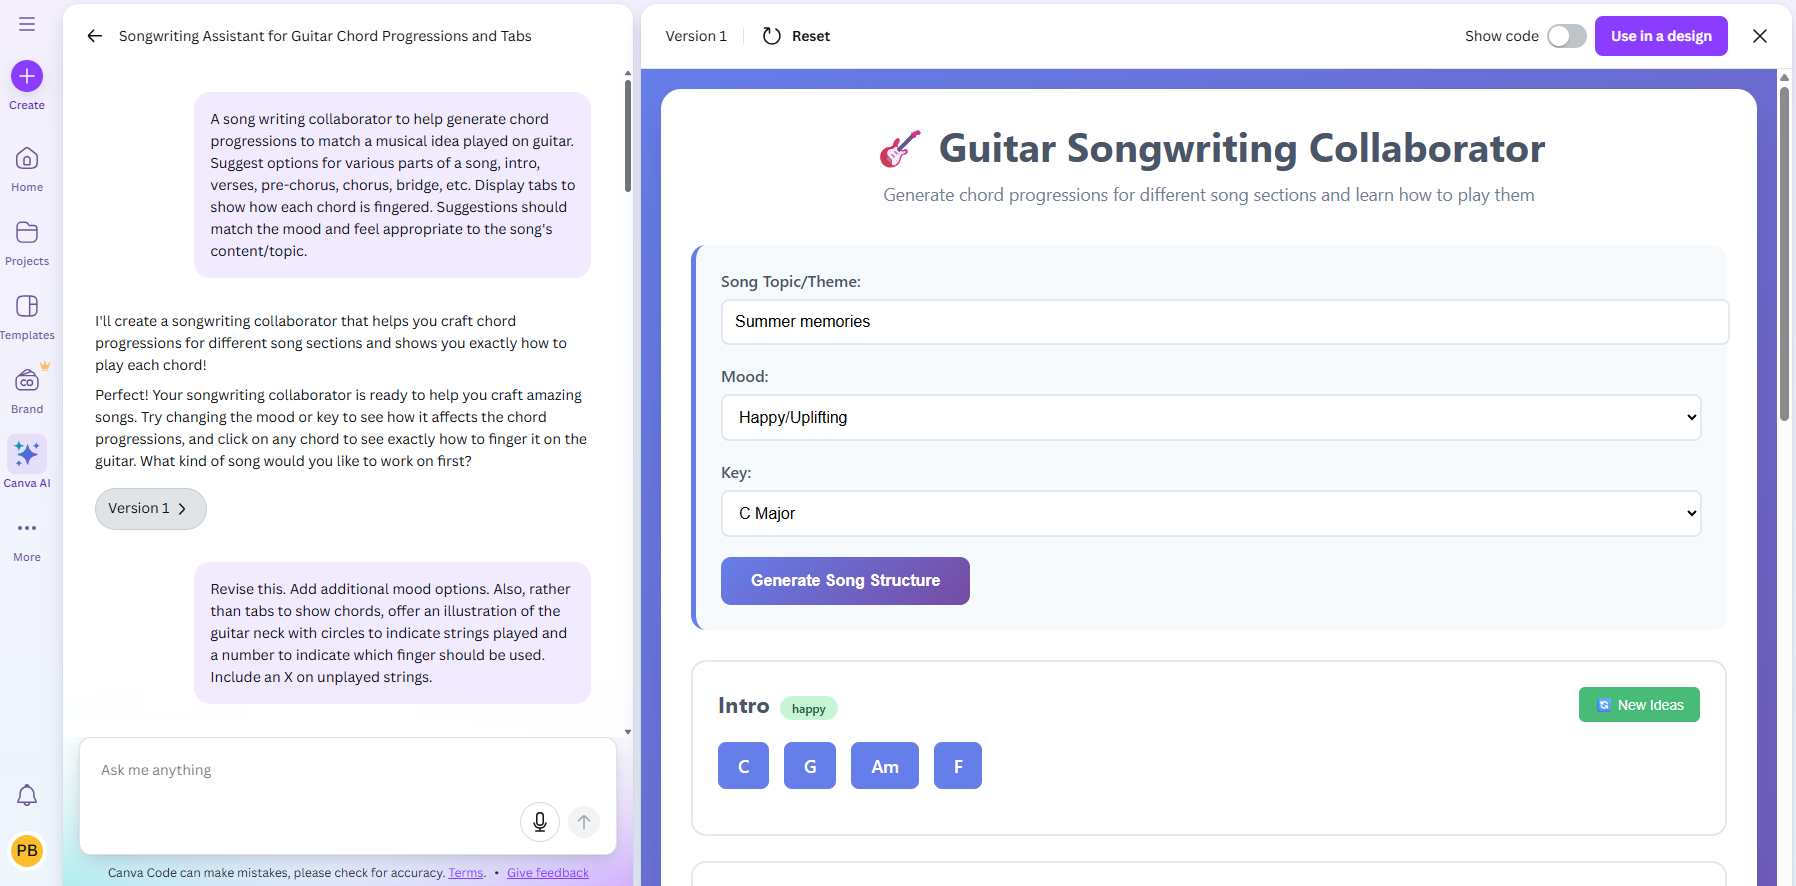
“A song writing collaborator to help generate chord progressions to match a musical idea played on guitar. Suggest options for various parts of a song, intro, verses, pre-chorus, chorus, bridge, etc. Display tabs to show how each chord is fingered. Suggestions should match the mood and feel appropriate to the song’s content/topic.”

Step Three: Review and iterate until the results meet your expectations.
Jenny’s prototype appears on the right side of her screen. In that space, she can interact with the tool that has been created and test it out to see if it works as she intended.
Jenny finds that she likes a lot of the application that has been built. It’s easy to understand, and it has a clear layout with helpful prompts at the top. There is even a “New Ideas” button that can be clicked to generate new chord options. That wasn’t part of her suggestion, but she likes it. Then at the bottom, there is an option to select a chord and view an illustration of how to play it.

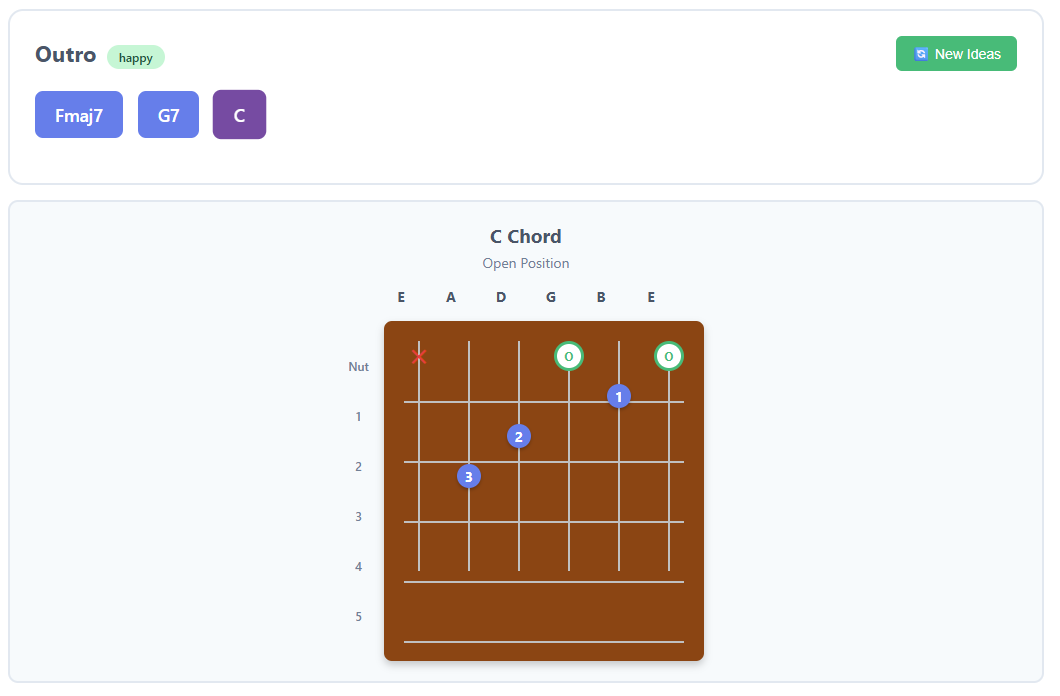
Despite liking much of the output, there are a few parts that need to be improved upon. Most noticeably, the chord illustrations are not good enough. The chord shapes are not displayed in a familiar or easily understandable format, and one of the chords, the C chord, is incorrectly displayed.
To improve the product, Jenny begins her iterations by entering follow-up prompts and instructions. She explains how she would like the chord illustrations changed. It takes about five revisions to get something that she is satisfied with.
 Original generation of chord display
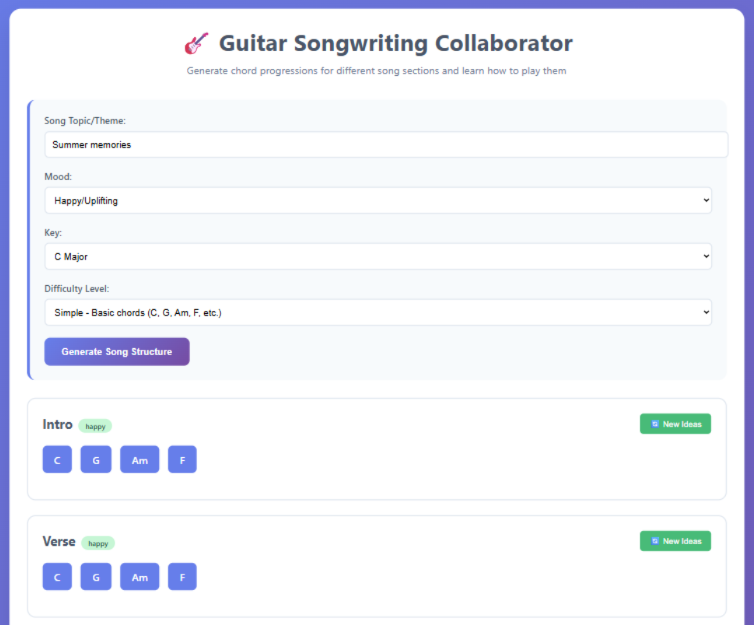
 Fifth iteration of chord display
As she reviews the tool more carefully, she also decides to ask for more musical “mood” options to choose from at the top of the form. In addition, she requests that an option be added for users to choose a level of difficulty, which would enable advanced players to be provided with advanced chord suggestions. She continues iterating until she is satisfied with the results.
Step Four: Have someone test the app.
In this step, Jenny teams up with a few of her classmates. They review each other’s creations and provide feedback about what works and what doesn’t. They ask for clarifications, and Jenny makes note of potential problems with the songwriting tool she designed. She considers improvements that she can make.
Throughout this process, Jenny applies collaboration and communication skills, which are key skills in any design thinking and problem-solving process. The authentic feedback that she receives from her classmates is also a critical part of the testing and iteration process.
Step Five: Revise and repeat, as needed.
With feedback in hand, Jenny goes back to the iteration process and revises her application until she is satisfied with the results. This step is another opportunity for Jenny to be challenged and to think both creatively and critically. It’s the problem-solving process in action, and it provides an authentic opportunity to practice a growth mindset.
Step Six: Publish and share.
For this step, Jenny has several options to consider. She thinks about her intended audience and determines how the product would best be delivered to them.
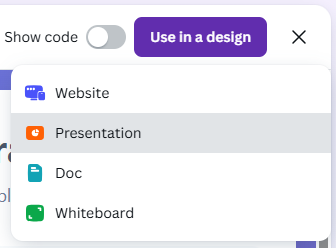
Canva provides five ways to share the final product:
- Copy the finished code into another program, such as Google Sites.
- Generate a website hosted in Canva.
- Create a presentation in which the app is embedded.
- Create a document with the app embedded.
- Create a whiteboard with the app embedded.
Whichever option is selected, Canva offers a fully functioning app embedded into that type of product. This eliminates the need for outside hosting, and each of these products can then be shared with a link. It’s easy to use and could allow Jenny to share her creation with an authentic audience as well as with her teacher, who will be grading the work.
As a reminder, be sure to check with all school, state, and federal guidelines regarding the sharing of student work and make sure that you’re in compliance with any restrictions. If you’re in doubt, it is best to err on the side of caution and keep that work within your classroom.
Bonus Step: Reflection
Ideally, Jenny also reflects on her experience. She asks herself questions like:
- Where was I successful?
- Where did I struggle, and what did I learn from those struggles?
- How did my audience respond to my product?
- How did the process work for me? Would I change how I approached anything?
Questions like these help Jenny process her experience, grow from it, and then improve the next time she encounters something similar. It is also rewarding for Jenny to look back on all the successes she had along the way and admire her final product.
Using tools like Canva AI offer a motivating way to not only introduce students to the world of AI and coding, but more importantly, it can be a great way to help them develop transferable skills—like communication, collaboration, problem-solving, and creativity—that will benefit them throughout life.
AVID Connections
This resource connects with the following components of the AVID College and Career Readiness Framework:
- Instruction
- Relational Capacity
- Rigorous Academic Preparedness
- Opportunity Knowledge
- Student Agency
- Insist on Rigor
Extend Your Learning
- Canva (official website)
- Canva AI Just Changed the Game (How to Use Canva AI – Complete Tutorial) (Kate Hayes via YouTube)
- PBLWorks (Buck Institute for Education)