In many ways, Dimension 4 of the C3 Framework is the action step. This is where students do something with their learning. If they have completed an inquiry project, this may be the point where they share that information with an audience. If they have completed a project-based learning activity, this is the time for them to put their solution into effect or report on their plans. If students have completed a research process, they may now create a product that applies new information or shares what they’ve learned in a creative and effective way. Ultimately, this step requires learning to be communicated effectively to others in some form. That shifts the motivation and level of concern from an artificial score on a test or assignment to the authentic reaction from other humans to our work and message. This is a valuable experience for students to have and develops important life skills. Because of this focus on the communication process, it makes sense that Dimension 4 is significantly embedded into the English Language Arts (ELA) Common Core Standards, which focus heavily on communication skills. These five standards from ELA align closely to this social studies dimension:
- Describe how a text presents information (e.g., sequentially, comparatively, causally). CCSS.ELA-LITERACY.RH.6-8.5
- Identify aspects of a text that reveal an author’s point of view or purpose (e.g., loaded language, inclusion or avoidance of particular facts). CCSS.ELA-LITERACY.RH.6-8.6
- Integrate visual information (e.g., in charts, graphs, photographs, videos, or maps) with other information in print and digital texts. CCSS.ELA-LITERACY.RH.6-8.7
- Evaluate an author’s premises, claims, and evidence by corroborating or challenging them with other information. CCSS.ELA-LITERACY.RH.11-12.8
- Integrate information from diverse sources, both primary and secondary, into a coherent understanding of an idea or event, noting discrepancies among sources. CCSS.ELA-LITERACY.RH.11-12.9
These ELA skills are foundational and very flexible, allowing you and your students to apply them in many different ways. In fact, technology tools and strategies have significantly expanded options for communication. This opens up many new creative avenues that students can explore. As you help your students consider their options, review the resources in the AVID Open Access collection, Empower Students Through Creativity and Choice. You will find detailed options broken down into the following articles:
- Empower Students Through Creativity and Choice
- Imagine, Record, Create: The Power of Video in Student Creation
- Hear It, Say It, Play It: The Power of Audio in Student Creation
- Picture This: The Power of Images in Student Creation
- Think It, Write It: Creative Writing Across the Curriculum
- Enter the Magical World of Animation
- Mash It Up With Multimedia

This wide pallet of choices allows for students to be inventive and lean into the tools and strategies that maximize their personal strengths. Whenever possible, allow your students to choose how they wish to communicate their message. This can be extremely motivating and empowering.
In addition to the extensive lists of resources in the creativity and choice collection, the following lists of resources may also trigger ideas and options that you wish to share with your students. Of course, there is no single right way to approach this, and you don’t need to offer all of the choices. Too many choices can lead to cognitive paralysis. Draw upon your experience and training to make your decisions. Ultimately, you have the flexibility to use the approach and resources that will work best for you and your students. In any approach, however, the key to success often comes down to offering students some degree of choice as well as an opportunity to create something meaningful. Even when this creation is an implementation plan, these tools can be an integral part of the communication and documentation process.
Organization is one of the foundations for effective communication, and creating a timeline is one effective way to organize content. By arranging content sequentially, it makes more sense to an audience, and it requires the author to carefully think through the order of things. There are a number of versatile timeline creation tools available to students.
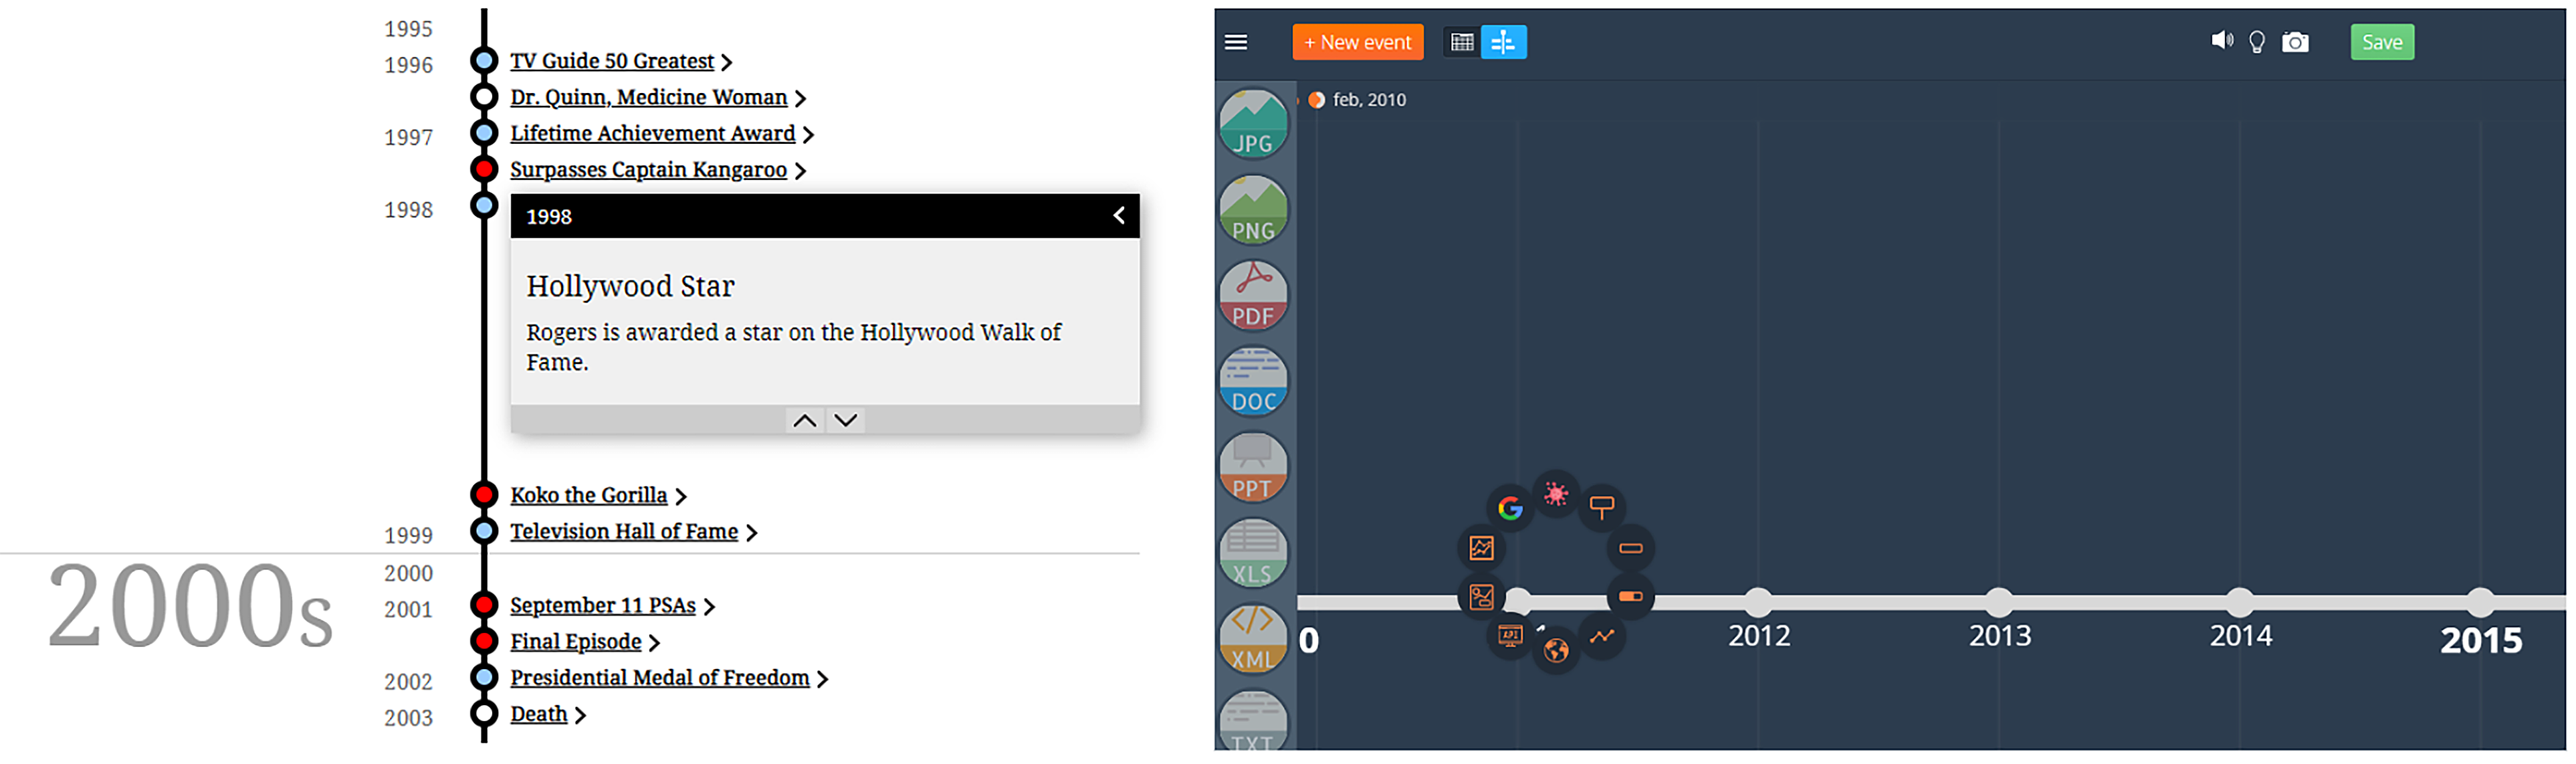
- AVID Open Access Graphic Organizers: Find nine different templates that students can use to create timelines or sequences of events using either Microsoft PowerPoint or Google Slides. Templates can include multimedia, such as images, video, web links, and audio.
- Classtools.net: Convert Wikipedia pages into a timeline. Search, view, edit, and share with a link, embed code, or QR code. This can be an effective tool for both sharing and general research. Wikipedia content, like most web content, should be cross-referenced with other sites to ensure accuracy.
- Deeper Thinking With Timeline Projects: This blog post from Ditch That Textbook offers timeline project ideas. Explore this post for ideas to deepen student thinking through the use of timelines.
- Flippity (Tips): This collection of Google Sheets templates includes a timeline option. Choose the timeline tool and modify the placeholder content on the accompanying spreadsheet with your own information.
- Google Drawings (Tips): Create timelines from scratch using lines, shapes, text, and images. There are no templates for this, but you can use easily accessible tools to create a custom timeline.
- Google Slides: Create timelines using one of eight templates. Click the “Insert” menu and select the “Diagram” option to access timeline templates.
- Microsoft PowerPoint: Use one of seven timeline templates or create your own using shapes, lines, text, and image tools. To access the templates, create a new slideshow, choose “Smart Art,” and select from one of the available timeline templates.
- Sutori: Create a presentation with a timeline feel to it. Insert text and images with the free version. Sharing and collaboration options are available in all versions.
- Time.Graphics: This free online timeline maker is used by top corporations and endorsed by the American Association of School Librarians. Create timelines with images, video, maps, docs, and more. This is a powerful and sophisticated timeline tool more suitable for secondary students.
- Tiki-Toki: Create interactive timelines that can be shared. Create one fully functional timeline for free. Multiple timeline views are available.
- Timelinely: This free tool allows users to quickly and easily insert images, text, audio, and video at any point on a YouTube video. Share your creation with an embed code or link. Watch this video overview for a quick introduction.
Graphic organizers are powerful tools for both processing and sharing information. Students can use them to make sense out of lecture notes, reading selections, and video content. They can also use them to present information to others in an organized, visual format. Students can create their own organizers from scratch or use one of our premade templates at AVID Open Access. If students decide to create their own, they can use familiar tools and create organizers by adding shapes, text boxes, and lines.
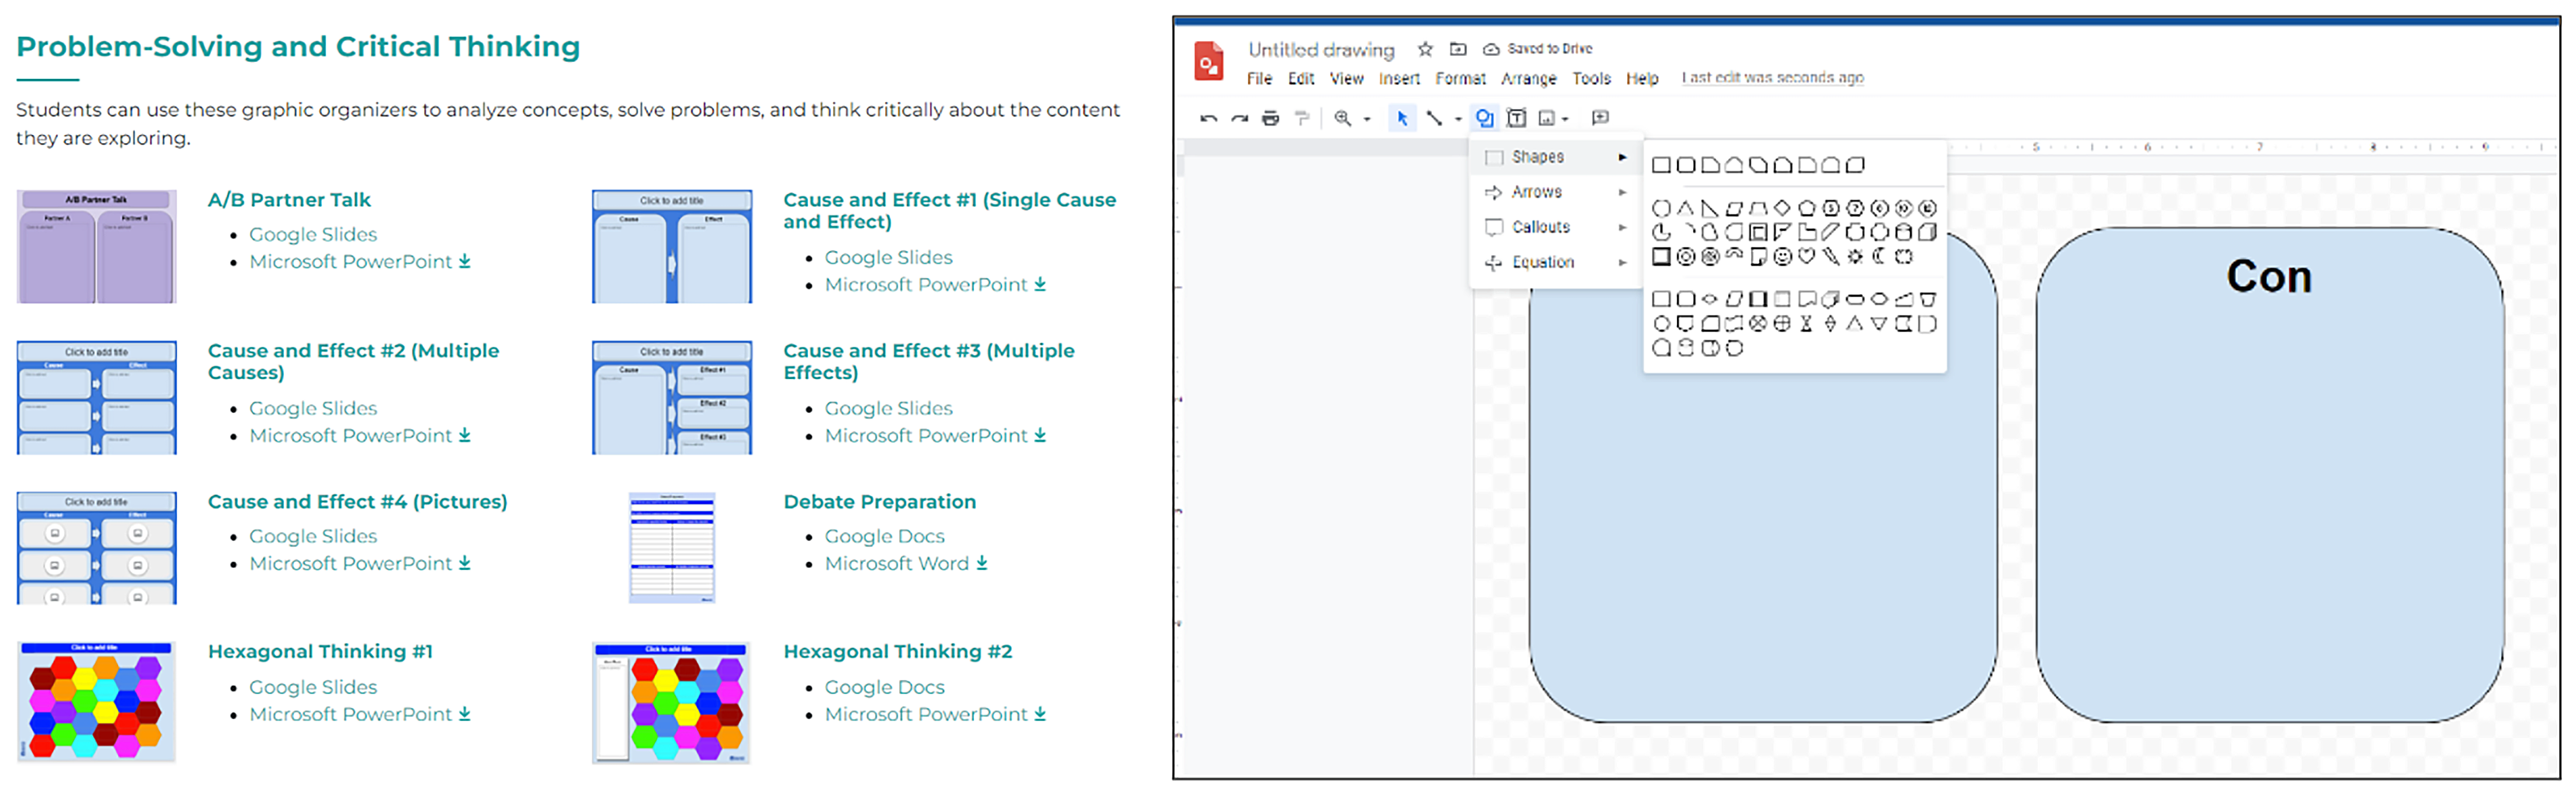
- AVID Open Access Graphic Organizers: Make copies of these templates and customize as needed. Share specific options with students or direct them to this page and let them select.
- Google Docs: While offering less flexible formatting options, Google Docs can be an effective choice for quick and simple organizers. Students may have the most success using tables to organize content on the page into rows and columns.
- Google Drawings (Tips): This option is great for Google users who wish to either keep all of their content on one page or export the final product as an image. Exporting as a PNG file will maintain a transparent background. Add images, text, lines, shapes, and more. Resize the page to 8½ x 11 if you want to print these, or display in digital format.
- Google Slides: This is a great starting point for Google users since most students are familiar with slides. Add images, text, lines, shapes, and more. Resize the page to 8½ x 11 if you want to print these, or display in slide format.
- Microsoft OneNote: This is a good option if students are already using OneNote to organize their notes and class materials. It offers flexible formatting while keeping the information in one consistent space. The notebook can be shared with others.
- Microsoft PowerPoint: Similar to Google Slides, this is a great option for Microsoft users. Add images, text, lines, shapes, and more. Resize the page to 8½ x 11 if you want to print these, or display in slide format.
- Microsoft Word: Create graphic organizer documents by adding tables, shapes, lines, text boxes, and images. Word is especially conducive to graphic organizers you intend to print.
Live presentations are common options for having students share what they’ve learned. However, these presentations don’t need to be delivered live and in person. Students may design presentations and then screen record their presentation for sharing asynchronously, or presentations can be packaged in a self-contained way that allows the audience to scroll through on their own. These stand-alone options can even be turned into interactive kiosks by integrating hyperlinked buttons that take the audience on a customized path. Consider one or more of these popular presentation tools.
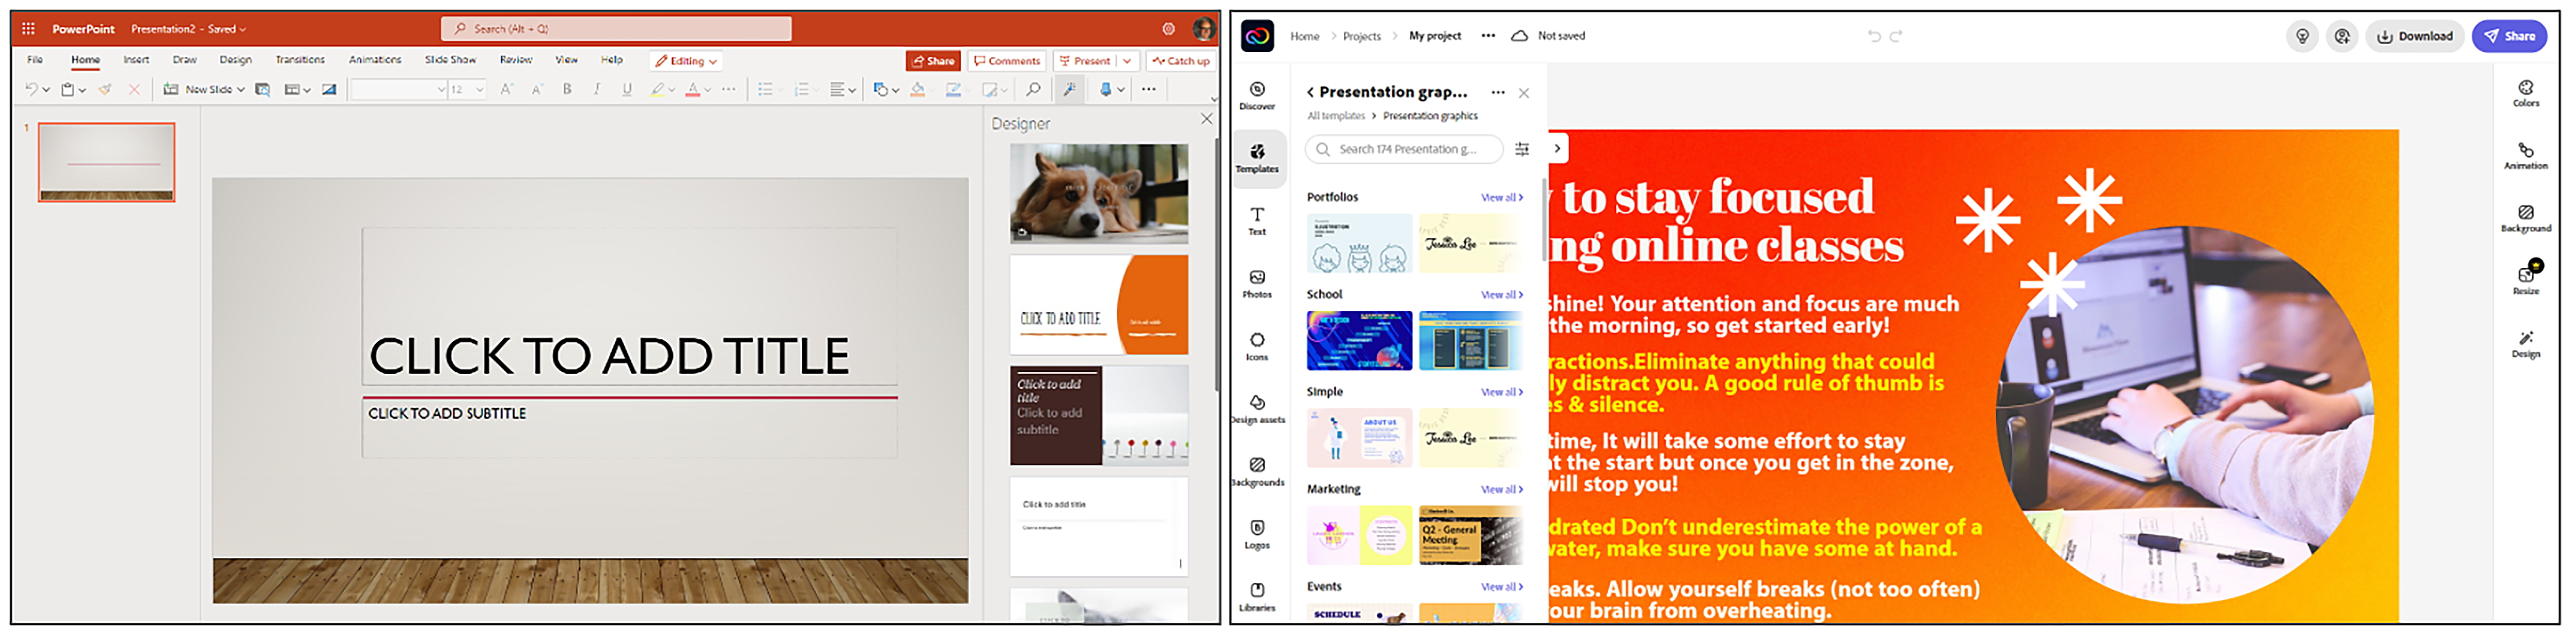
- Adobe Creative Cloud Express: This offering from Adobe focuses on attractive design. Choose from a variety of templates and creative options: graphics, collage, webpage, slideshow, and presentation, among others.
- Google Slides: This popular and versatile tool is free for Google users. Collaborate, create, and share.
- Microsoft PowerPoint: This flexible tool is available to Microsoft users and allows students to collaborate, create, and share their work.
- Microsoft Sway: Create visually appealing presentations that differ from traditional slideshows. First create information cards. Then, add text, images, videos, and Microsoft Office documents. Share or present live.
- Prezi: Create a visually interesting presentation by zooming around your canvas. This format is ideal for presentations that feature a big picture concept that can be communicated well with an overview image. Create up to five projects with the free version.
- Shadow Puppet Edu: This iOS app is not useful for live presentations. However, it allows students to record themselves over visuals and then export the final product as a video. It’s much like screen capture software with built-in tools. This is great for younger learners and can be exported directly to Seesaw if enabled.
One way to make information more accessible is to make it visual. Infographics are an effective and popular way to achieve this goal. While students can create infographics using familiar tools like Google Slides and Microsoft PowerPoint, there are increasingly more options available online that are dedicated specifically to graphic design and the creation of infographics. Here are some of the most popular options.
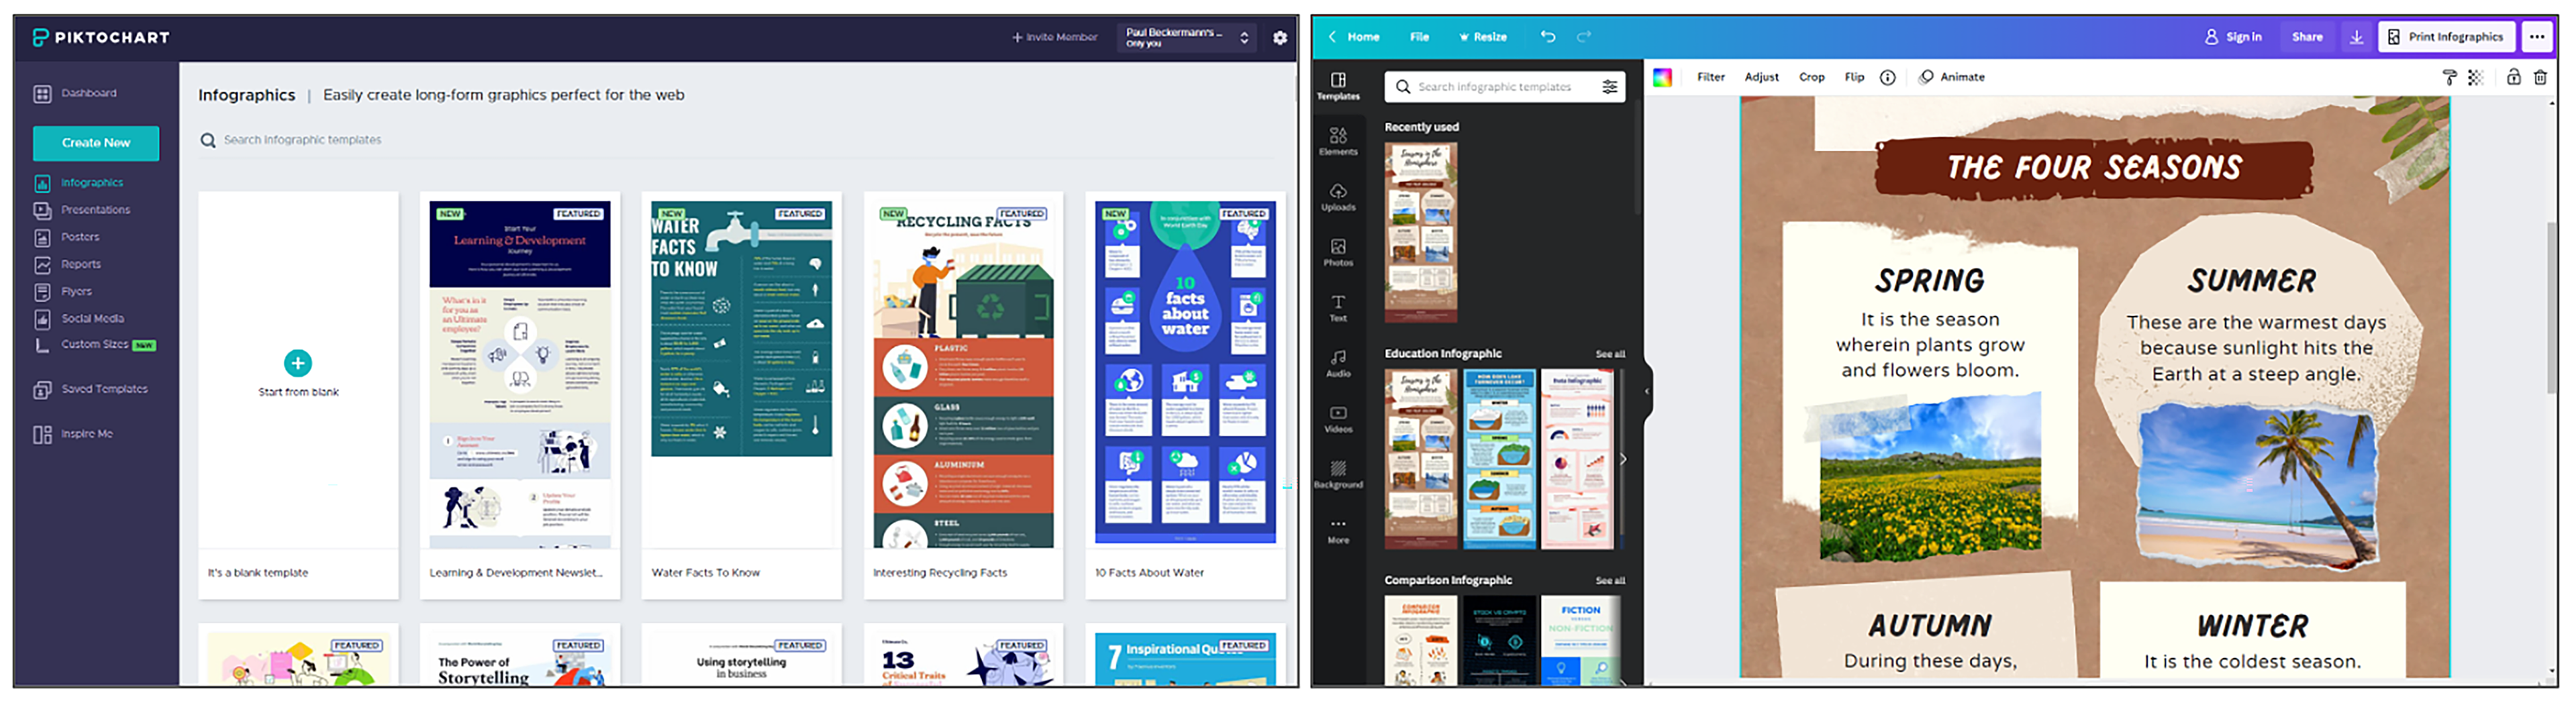
- Canva: Canva focuses on making the creation of infographics fast and easy. Use it to create infographics, posters, presentations, flyers, resumes, and more. Choose from templates or start from scratch.
- DesignCap: Create a design in three steps: Choose a template, customize, and export. Create infographics, charts, posters, flyers, logos, brochures, menus, and more.
- Easelly: This free graphic design tool includes thousands of templates to get you started. Use one of these or start from scratch. Upgrade to a paid account for more features and media selections.
- Genially: Create infographics, presentations, interactive images, video presentations, and more. This tool is useful for creating interactive presentations with internal linking. Students must be 13 or older to create an account.
- Google Drawings: Design anything that can fit on one canvas page. Create custom page sizes under “File” and then “Page setup.” Use your imagination and add images, shapes, text, lines, and more as needed.
- Piktochart: This tool describes itself as “the most intuitive and affordable way to tell visual stories with infographics, reports, presentations, and prints.” Choose a template or start from scratch. Start for free, though some features may require a subscription.
- PixTeller: Get started for free and upgrade for more features. Create posters, video, animated posts, cards, and social media images. Add shapes, text, images, drawings, and animations. PixTeller includes a photo editor and animation creator to make images come to life.
- PosterMyWall: Create multimedia infographics and posters for social media, print, email, or digital signage. Share with an embed code, by email, or via download. Stock photos are included. Add photos, shapes, text, media, layouts, and background. Unlimited downloads of social media posts are available with the free version.
- Prezi Design: Prezi has expanded its platform to become more than a slideshow tool. Now, use it to create infographics and posters, as well. Choose from templates, create your product, and share online or download as an image or document file.
- Smore: Smore is primarily designed for creating visually appealing newsletters. While not specifically an infographic, a newsletter design can often achieve the same results. Create three newsletters with the free version.
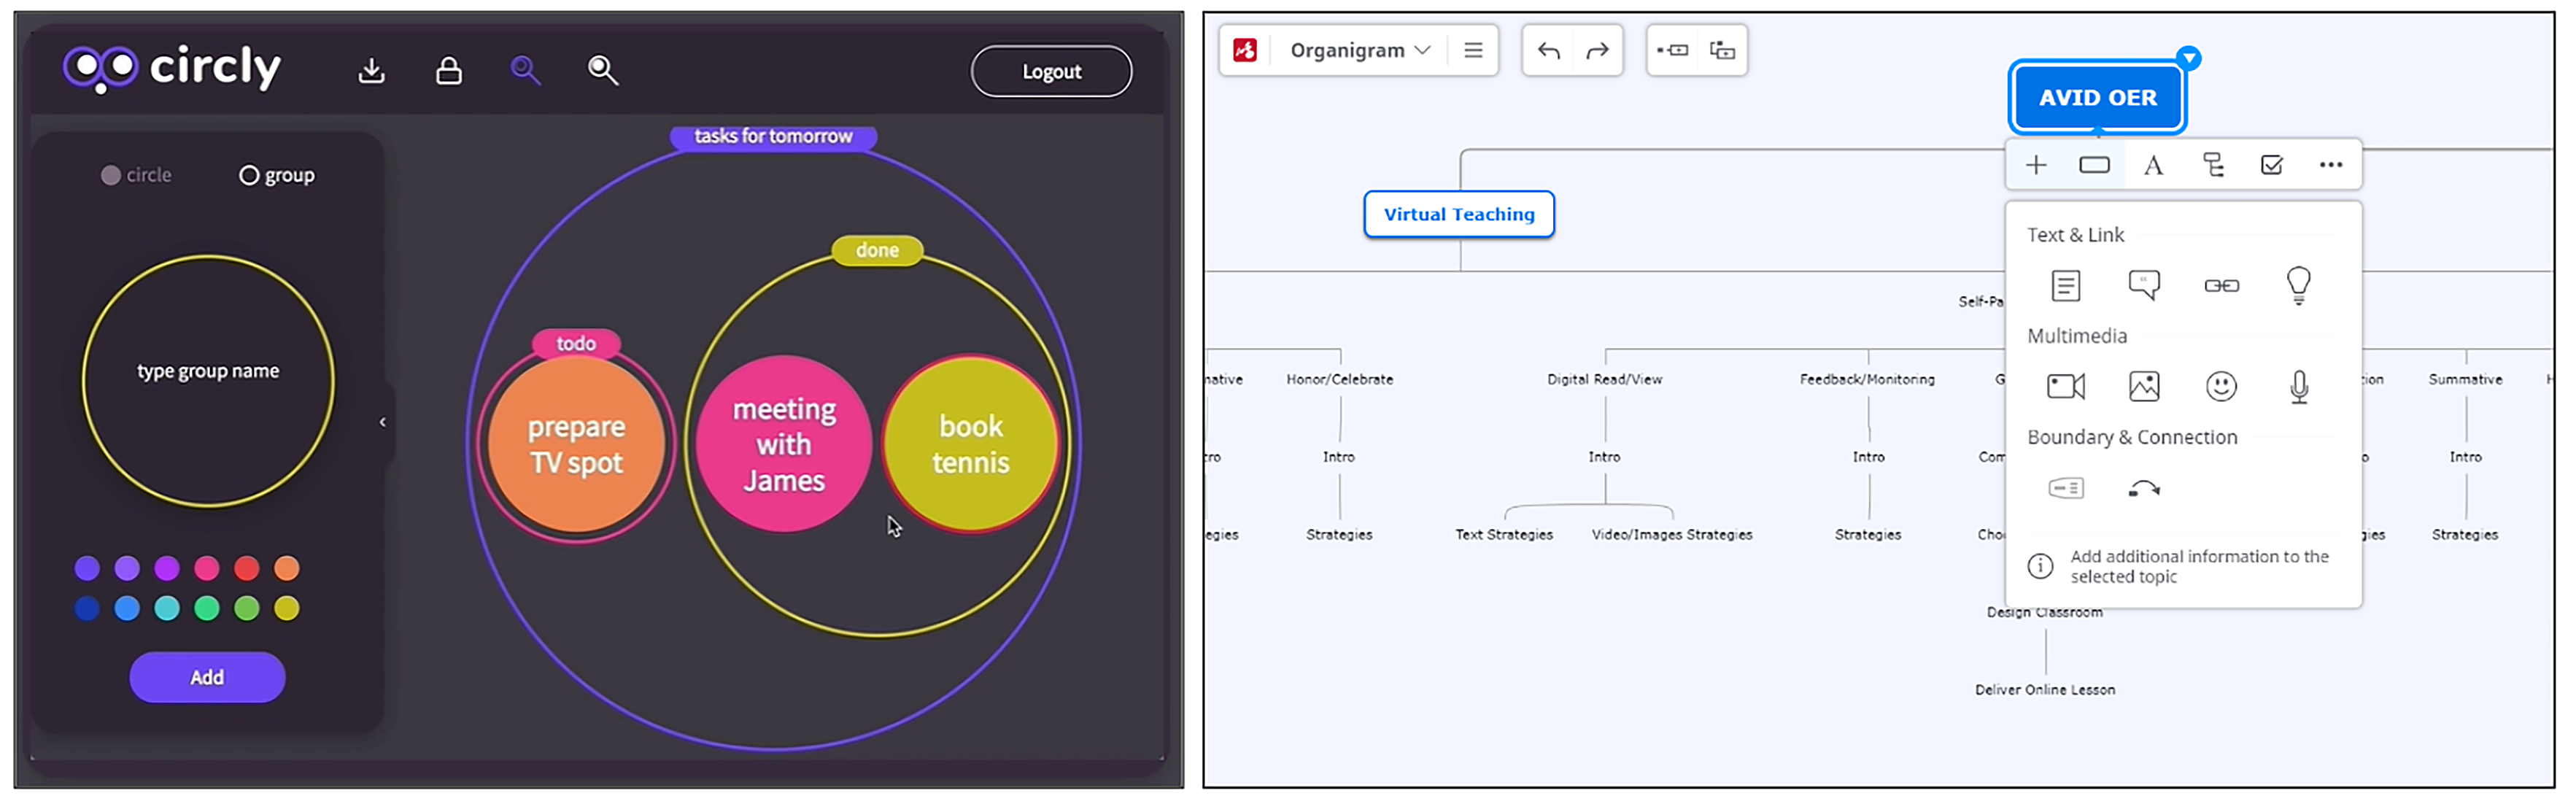
Mind mapping tools—sometimes called webbing or spider tools—are great for visually organizing information. They help illustrate the relationships between content. By creating mind maps, students must think critically about these interconnections and develop a clear way to visually represent those relationships. Mind maps can also be used to create timelines and flowcharts. The final products can be integrated into a presentation tool or another creation, or they can be used as visual aids during a live presentation. While there are many different mind mapping tools available (many for free), most offer similar features, such as the ability to link content together with dynamic lines and connectors. Most platforms allow users to add both text and images. Some also integrate other media.
- Canva: This is a visual design tool that includes an integrated mind map maker option.
- Circly: Create with this collaborative graphic organization tool. Make your own from scratch or use a template. Drag and drop ideas into groups. Use text and images. Invite collaborators with email.
- Coggle: Use this mind mapping tool to create, structure, and edit. Customize and collaborate as desired. Create three private diagrams and unlimited public ones with the free version.
- Creately: Create three collaborative mind maps for free. This is a great tool for creating flowcharts and processing brainstorms.
- Draw.io: Create diagrams, flowcharts, process maps, and more. Work saves to Google Drive.
- Google Drawings: Design anything that can fit on one canvas page. Insert a diagram or create from scratch using shapes and lines. Create custom page sizes under “File” and then “Page setup.”
- Mindomo (Tips): Create visual webs and mind maps. Features include collaborative mind mapping, presentation mode, text, video, images, and more.
- MindMeister: Create three visual webs and mind maps for free. Add icons, notes, and links. The add-on tool transforms bulleted lists into mind maps.
- MindMup: Create unlimited mind maps for free. Store them in the cloud.
- Sketchboard: This is a virtual collaborative whiteboard with icons and connectors. It’s convenient for collaborative planning and mind mapping.
Share your learning by becoming a character or historical figure with these talking picture tools. Choose a picture, upload it, and then record an audio message. When the project is rendered and played back, it will appear as if the image is talking with your voice. There are two popular options for this activity.
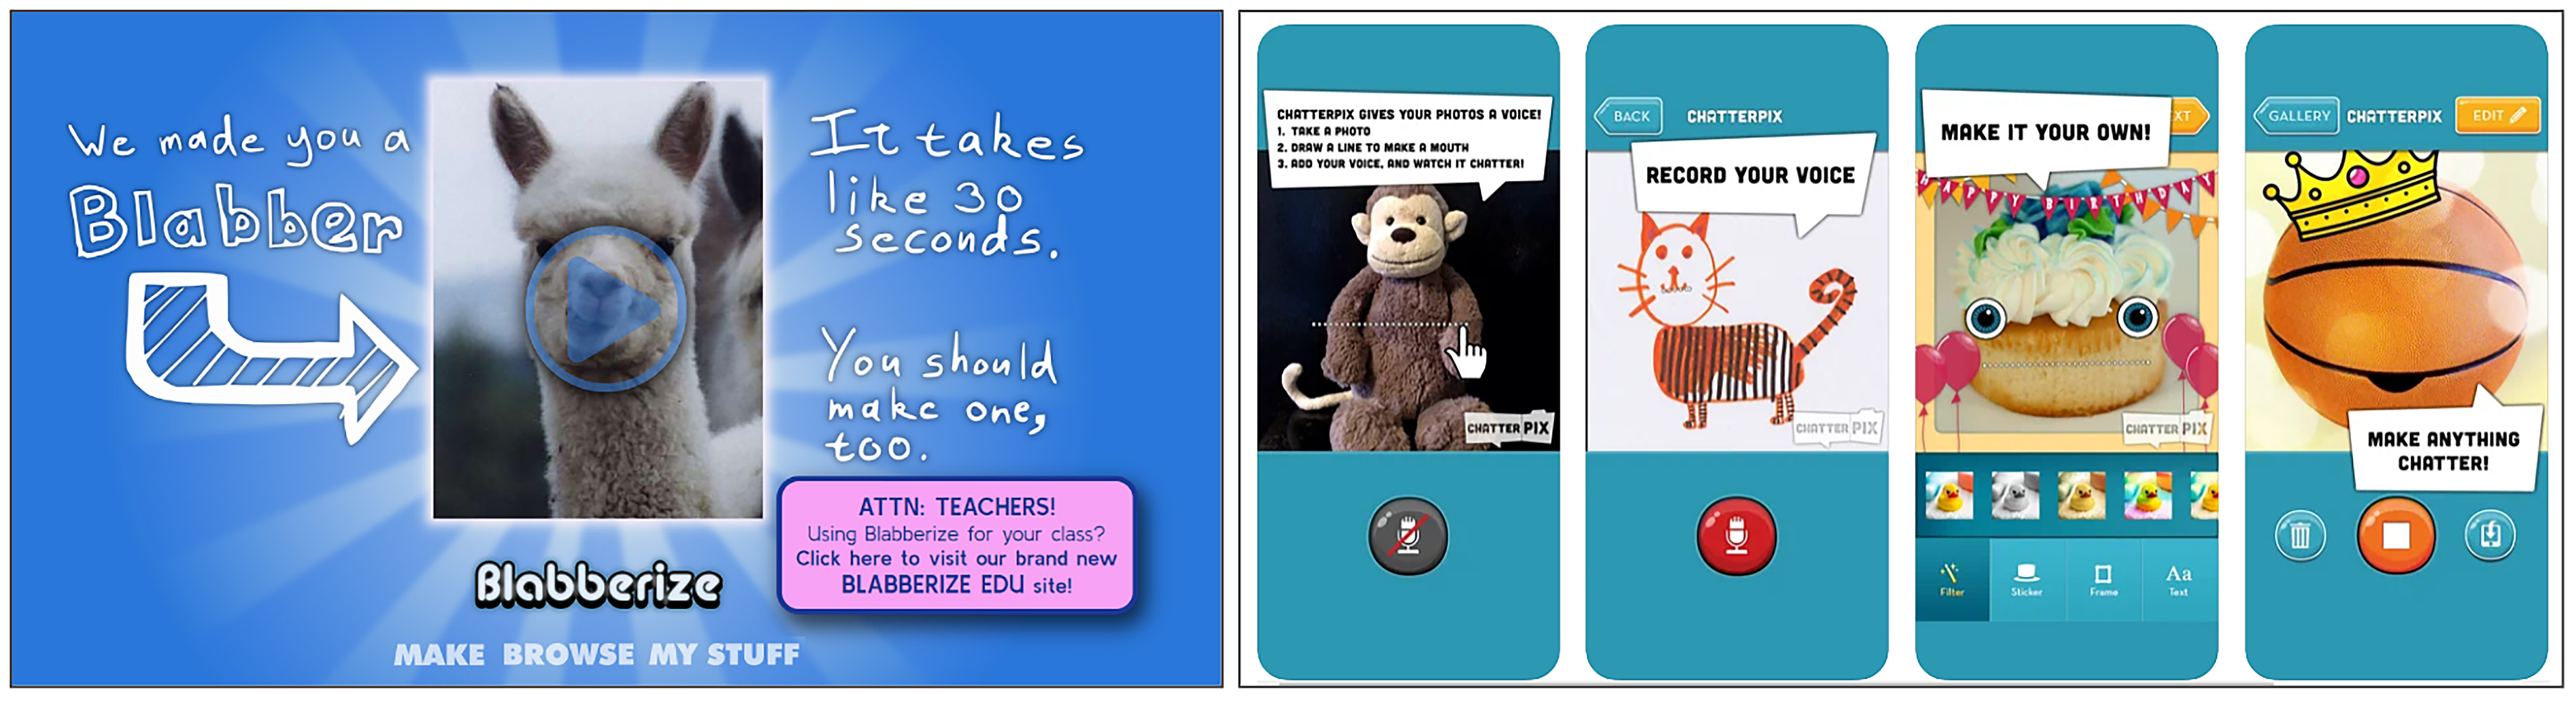
- Blabberize: This is a free web-based product. Upload an image. Record your voice. Get the link or embed code to share. Blabberize also offers a paid educator version that offers student management options without advertising.
- ChatterPix Kids: This simple app by Duck Duck Moose for iOS and Android allows students to make pictures talk. Choose an image. Draw a line where you want the moving mouth to be located. Record your voice and share. Simple!
If you’d like to do more with images in your classroom, dive into the AVID Open Access article, Picture This: The Power of Images in Student Creation.
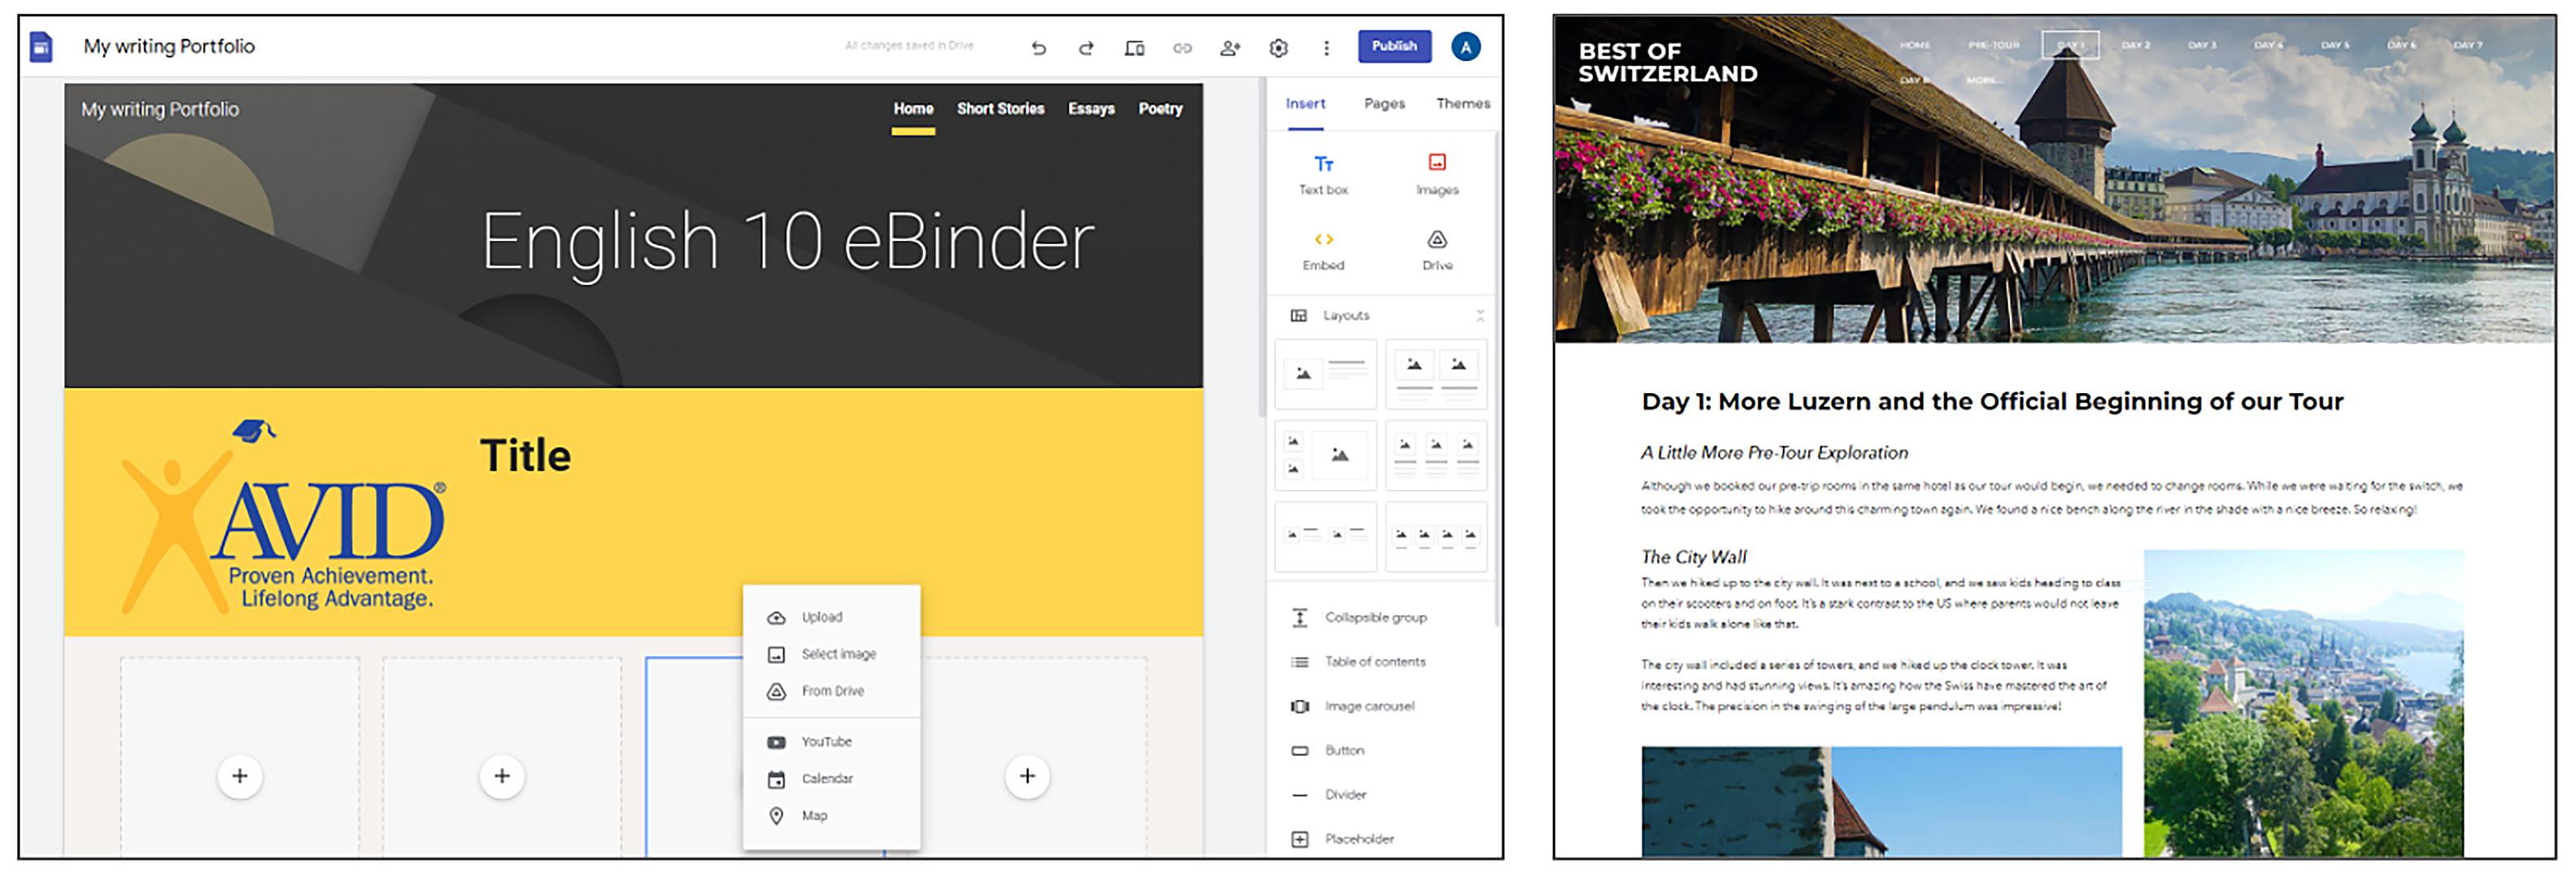
Creating a website or blog is an authentic way for students to communicate with a wide audience. These versatile platforms allow students to embed many types of multimedia in one convenient place. Websites are a great choice for sharing information in general, while blogs more easily allow for audience comments and input.
- Blogger: Create a blog with this free Google tool designed specifically for this purpose. Control settings allow you to share with the world or only certain people.
- Edublogs: This site has been created for educators by educators. Create a blog for free and get additional features with a paid upgrade. Students need to be at least 13 years old to sign up without parent consent.
- Google Sites (Tips): This free website builder is simple and versatile. Teachers in Google schools can choose to publish the site internally or globally, providing security options, especially with younger learners.
- Weebly: Build a free website using one of their templates or start from scratch. The site is robust and offers multiple design options. This option is better suited to older students. It is very similar to Wix.
- Wix: Build a free website using one of their templates or start from scratch. The site is robust and offers multiple design options. This option is also better suited to older students.
- Seesaw (Tips): Create a class blog within the Seesaw ecosystem. This shared space is moderated by the teacher, who determines who can see it. Share it exclusively with trusted partners or publish openly on the web. This is a great tool for introducing the concept of blogs to younger students in a very safe and controlled environment.
With the explosion in popularity of podcasts and online streaming sites, audio production has become a hit with students. With readily available and free audio tools, students can create their own podcast episode, musical composition, or radio program. Browse the options below to get started or dig deeper with the AVID Open Access collection, Hear It, Say It, Play It: The Power of Audio in Student Creation.
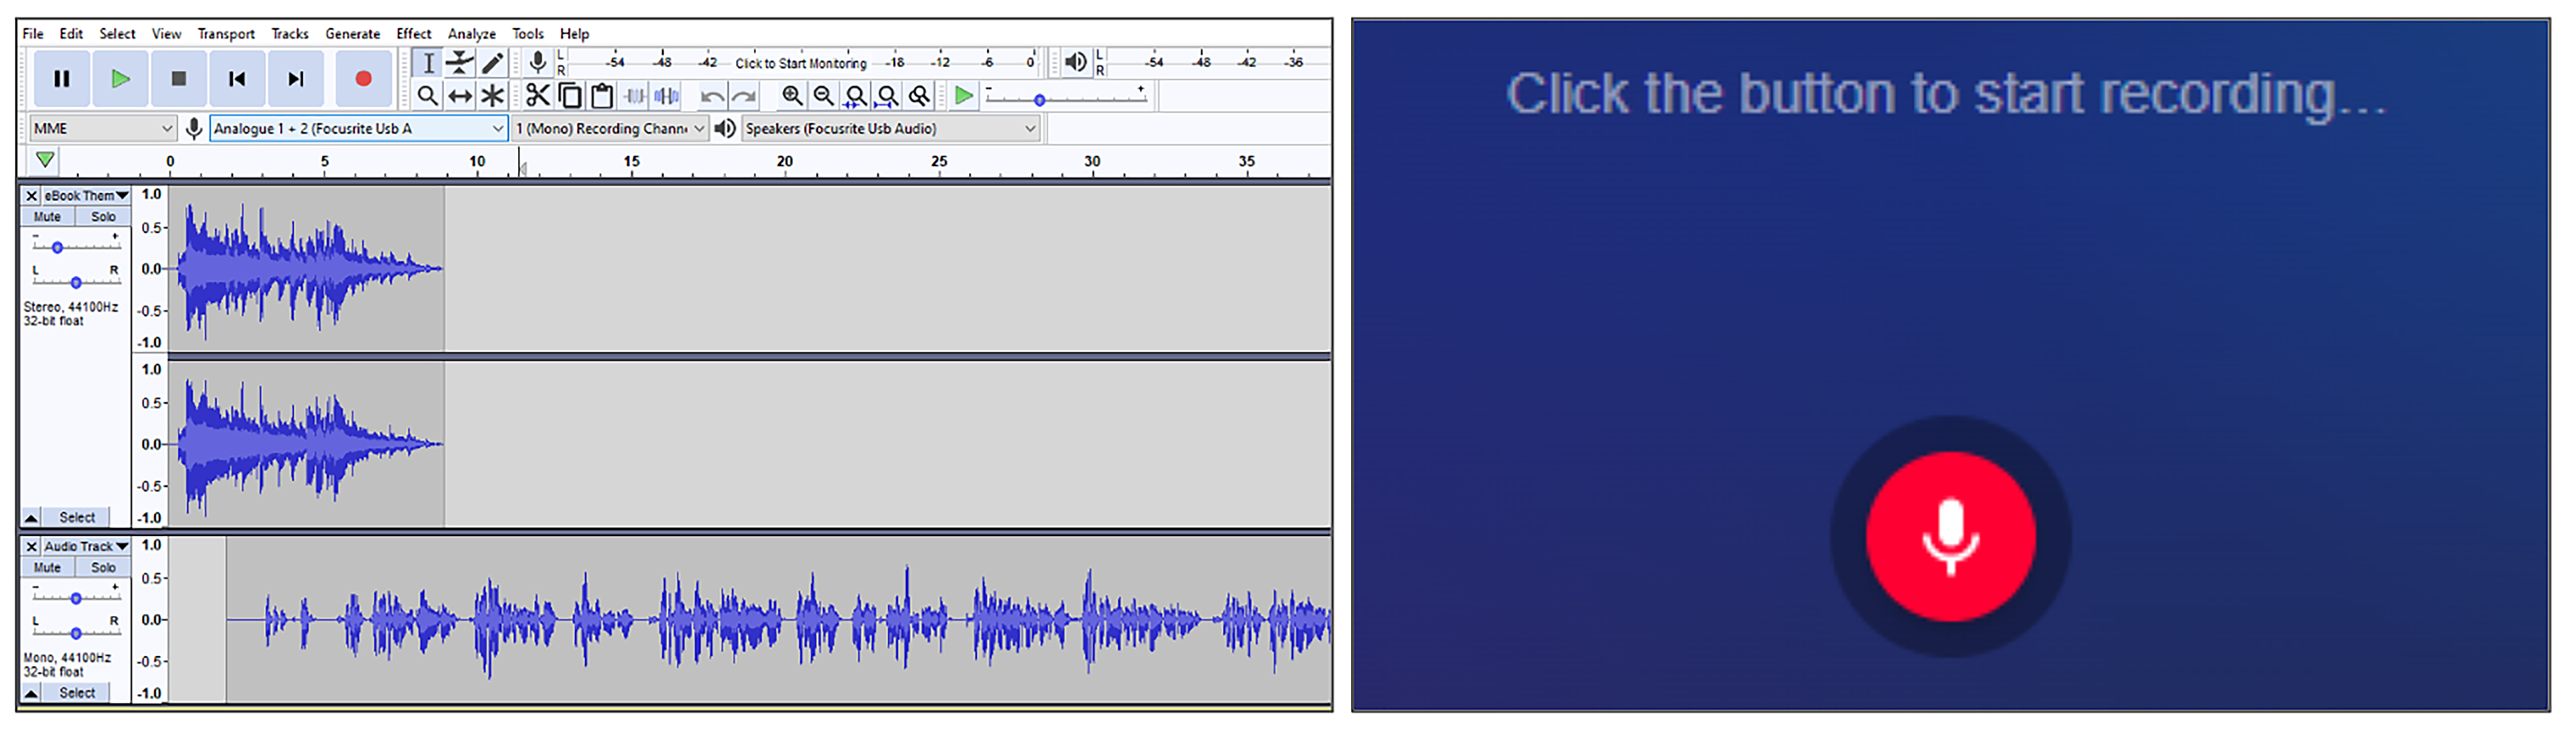
- Audacity: This is a top choice if you are working on a Windows device. It is a free, easy-to-use, multi-track audio editing suite that offers advanced features, such as recording, import/export, editing, plug-ins, and effects. Downloads are available for Windows, Mac, and Linux. There is a Google Chrome extension of Audacity that can be used on Chromebooks.
- GarageBand: This is likely your best choice if you have an Apple computer, iPad, or iPhone, since it comes free with iOS devices. It features robust creative tools, effects, virtual instruments, and advanced mixing capabilities.
- Your Learning Management System (LMS): Most learning management systems have audio recording options built into the platform. These are usually very simple (start and stop), and they save directly into the LMS. If you are looking for a quick and easy way for students to share audio recordings, this is a great option. Look for audio in discussions, assignments, and assessments. Options vary by LMS.
- Vocaroo: This is another simple, one-take recorder. You can record, pause, restart, and stop. There is no editing feature, but you can choose to remove background noise. Finished recordings can be shared with a link, email, QR code, or embed code. Recordings are stored on the Vocaroo site for about 3 months, but you can also download your file if you wish to keep it longer.
- Online Voice Recorder: This is a very simple, browser-based recording tool that does not require an account. Its appeal is its simplicity, and it’s great for quick projects. Click the button to start the recording and begin speaking. You can pause and restart as needed, trim the beginning and end, and download the finished track as an MP3 file.
- Soundtrap (Tips): This is a great choice if you are looking for a web-based recording suite to use on a Chromebook. While it’s a freemium product, the free version offers unlimited projects, multiple tracks, 900 loops, 210 instruments and sounds, and over 150,000 sound effects from Freesound.org. There is a collaboration feature and the ability to interview a virtual guest in podcast mode.
Video is an excellent and engaging medium for both sharing ideas and capturing history. Screen capturing tools are powerful for sharing a message while showing images from a computer screen. Students can go even further and become movie producers. With a cell phone and a free video editor, students can create their own documentary. We’ve broken the list of video tools into two separate lists: one for screen capture and recording and the other for more full-featured editing. You do not need to use these options in tandem, but some students may wish to do so.
Screen Capture and Recording: These tools work equally well for students as they do for teachers. Teachers can use them to create instructional videos or annotated screenshots. These are perfect for flipped lessons or for providing video feedback. You can also give the power to your students and have them create recordings. This is a great way to check for understanding. It’s also an effective way for students to practice their metacognitive skills and use of academic language. By recording a video and explaining how they are solving problems, students must think deeply about their process and find ways to articulate it clearly to an audience.
- Awesome Screenshot and Screen Recorder: You can use this free tool to capture an image of your screen and mark it up with built-in annotation tools (e.g., text, blur, shapes, arrows). A screen video recorder is also included. This tool is accessed via a Google Chrome extension.
- Loom (Tips): The premium version of this versatile screen capture software is free for students and educators who complete the verification process. Record your screen, webcam, or both. A handy Google Chrome extension is also available. Recordings are automatically saved to your Loom account and can be downloaded, shared with a link, or embedded with an embed code.
- Nimbus Screenshot (Tips): You can use this free tool to capture an image of your screen and mark it up with built-in annotation tools (e.g., text, blur, shapes, arrows). A screen video recorder is also included. This tool is accessed via a Google Chrome extension.
- Screencastify: Create screencasts by recording and editing your screen, webcam, or both with this Google Chrome extension. The full version can be installed on a PC or Mac. Teachers can collect video submissions as an assignment by sending students “magic links.” One active assignment is available with the free version. Free videos are limited to 5 minutes. Recordings save to Google Drive.
- Screencast-O-Matic: This free screen recorder is available for all platforms and allows for recording and editing of screen, webcam, or both. This product also allows you to select and record a portion of your screen rather than the entire window or tab. Record up to 15 minutes with the free account. Recordings can be stored in your Screencast-O-Matic account, saved in Google Drive, or published to YouTube.
- Seesaw (Tips): You can use several of the creative features in this digital portfolio and assignment tool to capture recordings. The video option is great for recordings of a student saying or doing something while the drawing tool allows students to record themselves interacting with images and drawings or explaining on a full digital canvas. Videos are limited to 5 minutes and are stored within the Seesaw platform.
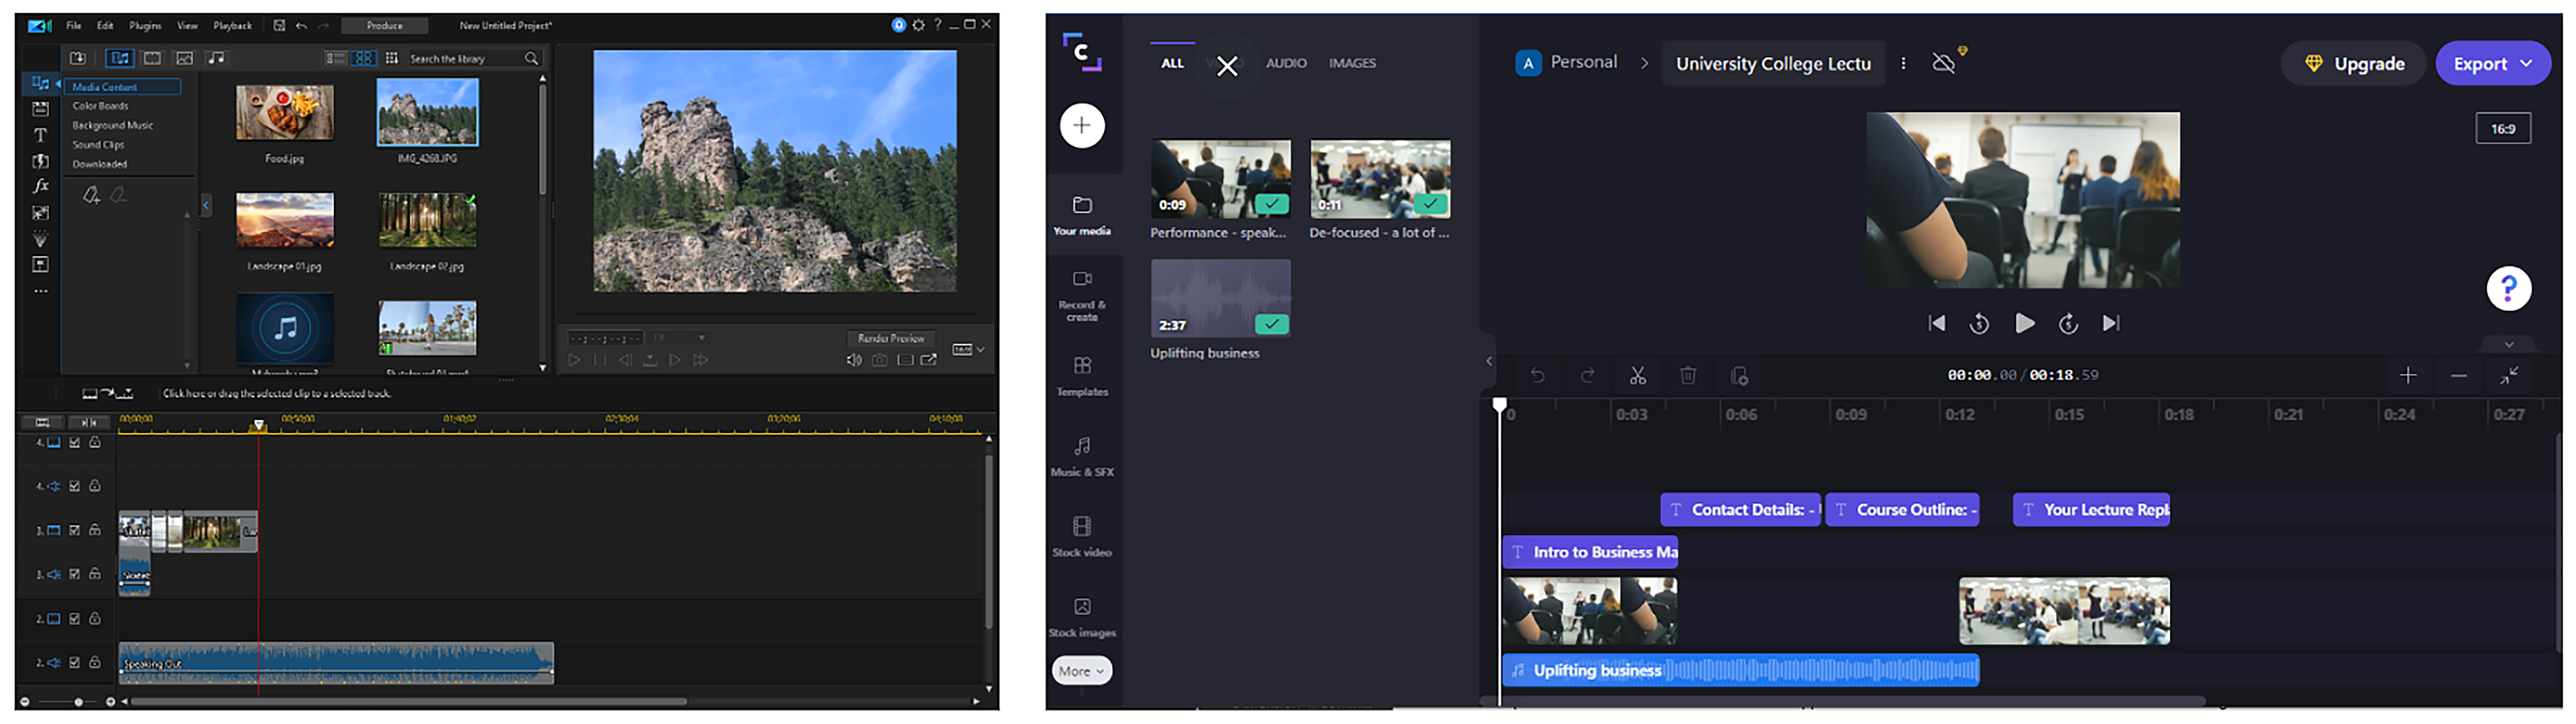
Video Production: While most video production software offers a premium version, you can usually achieve your goals with a free version or trial membership. Many of these options are now cloud-based, so students can produce on nearly any device, including Chromebooks. As with any free service, you’ll want to review the available features, as well as limitations on maximum length for each video, storage limits, and export formats. Here are a few popular options to get you and your students started. To explore even more options, visit the AVID Open Access article, Imagine, Record, Create: The Power of Video in Student Creation.
- Clipchamp (Tips): The free version of this editor is quite robust, as it allows editing of video, image, and audio files, with the ability to add subtitles, filters, and visual effects (like slow motion). With the free version, you can record webcam videos up to 5 minutes in length and export videos up to 480p (standard definition).
- iMotion: iMotion is a time-lapse and stop-motion app for iOS devices. It’s a free download with in-app purchases. There are numerous other apps available for both Android and iOS devices for creating videos with special effects, like stop-motion or green screen production. Search the App Store for ideas.
- iMovie: iMovie is the full-featured video editing program from Apple. There are versions for both Mac and mobile iOS devices. If you have an Apple device, this is likely your best option, since it is both powerful and free to Apple users.
- Kapwing: The free Kapwing editor allows access to all Kapwing tools and projects up to 7 minutes long. Content stores on the site for 2 days, so this is best for quick projects. Final videos are public and can be downloaded. Kapwing offers a wide gallery of video tools (e.g., meme generator, subtitler, video resizer) beyond their editing studio.
- WeVideo (Tips): WeVideo is a powerful online video editing solution, and it’s one of the most popular options for students using Chromebooks. With the free plan, you can export up to 5 minutes of video per month. Free videos include a WeVideo watermark when exported.
Collaborative spaces can be both a final canvas as well as a means to an end. Additionally, students can use shared digital spaces to capture and process their work, either in person or virtually. They might use these spaces to design ways to communicate their final message or action plan, or they may limit their use to that of a processing canvas, with the final product being created elsewhere. Both uses are valid and have their place in a collaborative creative process. The following spaces are versatile and accessible to students for their collaborative efforts.
- Dotstorming: This site describes itself as a collection of tools for enabling “collaborative brainstorming, planning and decision making.” Create one board with the free version. Insert idea cards, text, images, links, videos, and more. This product is unique in that collaborators can vote on ideas presented on the board. The board creator can determine how many votes each member receives. Dotstorming provides this quick introduction video to get you started.
- Flip (Tips): Flip brings collaboration to video with these managed video discussion boards. They can be used by students or teachers to provide feedback, engage in discussions, or share back final video projects.
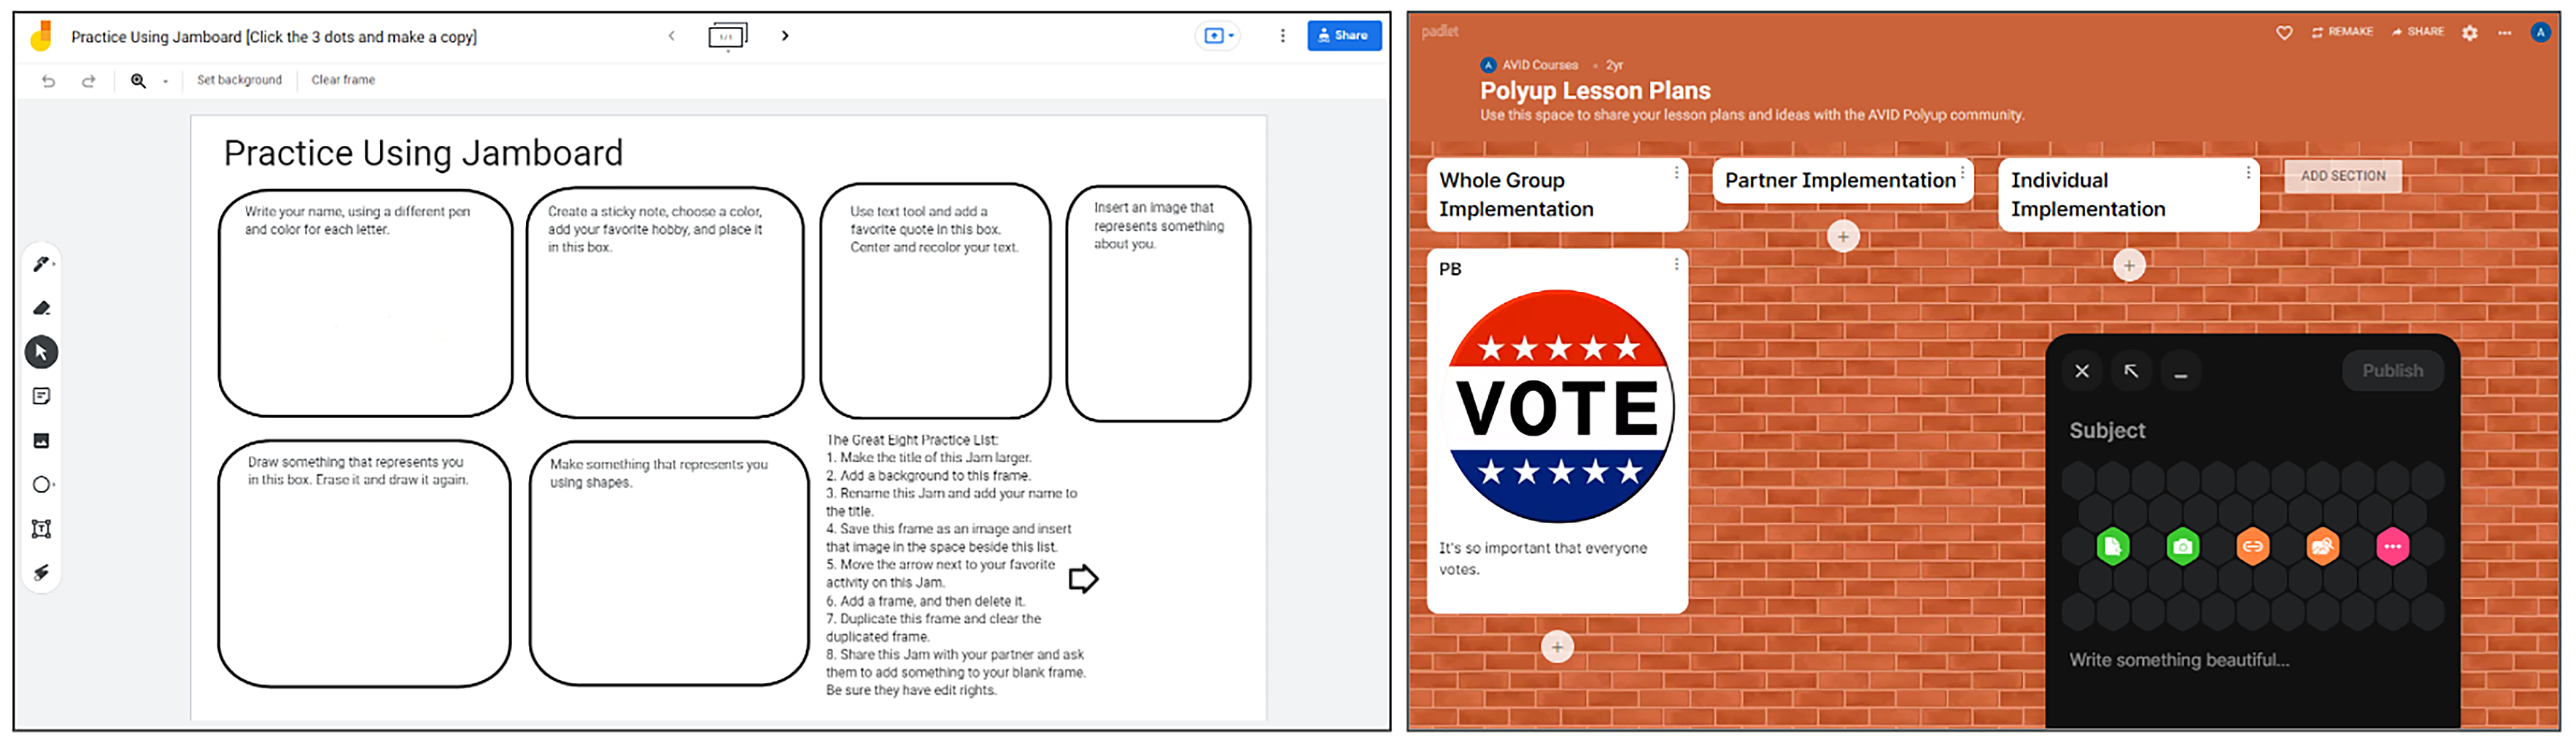
- Google Jamboard (Tips): This product is a free, collaborative whiteboard tool from Google. It allows you to create up to 20 frames (pages) and insert text, images, backgrounds, shapes, sticky notes, and drawings. Jamboard also integrates into Google Meet. A version history option is available to track who added content to the board. Files are shared with the “Share” button, just like with other Google products.
- Google Workspace: One of the most powerful aspects of the Google platform is the ease of sharing and collaborating with others. Regardless of the tool (Docs, Slides, Drawings, Sites, Sheets), students can collaboratively construct and share out their final products.
- Microsoft 365: Like Google, sharing and collaboration are key features of the Microsoft 365 suite. Students can construct and share using Word, PowerPoint, Excel, and more.
- Padlet (Tips): Padlet is an online bulletin board that’s designed to easily display information on any topic using text, images, links to websites, videos, and more. Teachers can choose to turn on comments, voting features, and profanity filters to ensure that students can easily collaborate without having to worry about inappropriate language. You can have up to three active Padlet boards at a time with the free version.
- Whiteboard.chat (Tips): This free, collaborative whiteboard might be the most full-featured digital whiteboard available. The board includes an extensive pallet of tools, and users can embed websites, YouTube videos, images, PDFs, widgets, and more. This tool allows the teacher to push out a copy of the board to each student in the class with a code or link. Teachers can observe each student’s whiteboard in real time, and they can even interact with and annotate each student’s board.
Students spend a lot of time engaging in pop culture and social media. The tools on this list are quick ways to bring this interest into your classroom. The available templates and simulation generators allow your students to safely share ideas and information in popular formats, including many that mimic social media platforms.
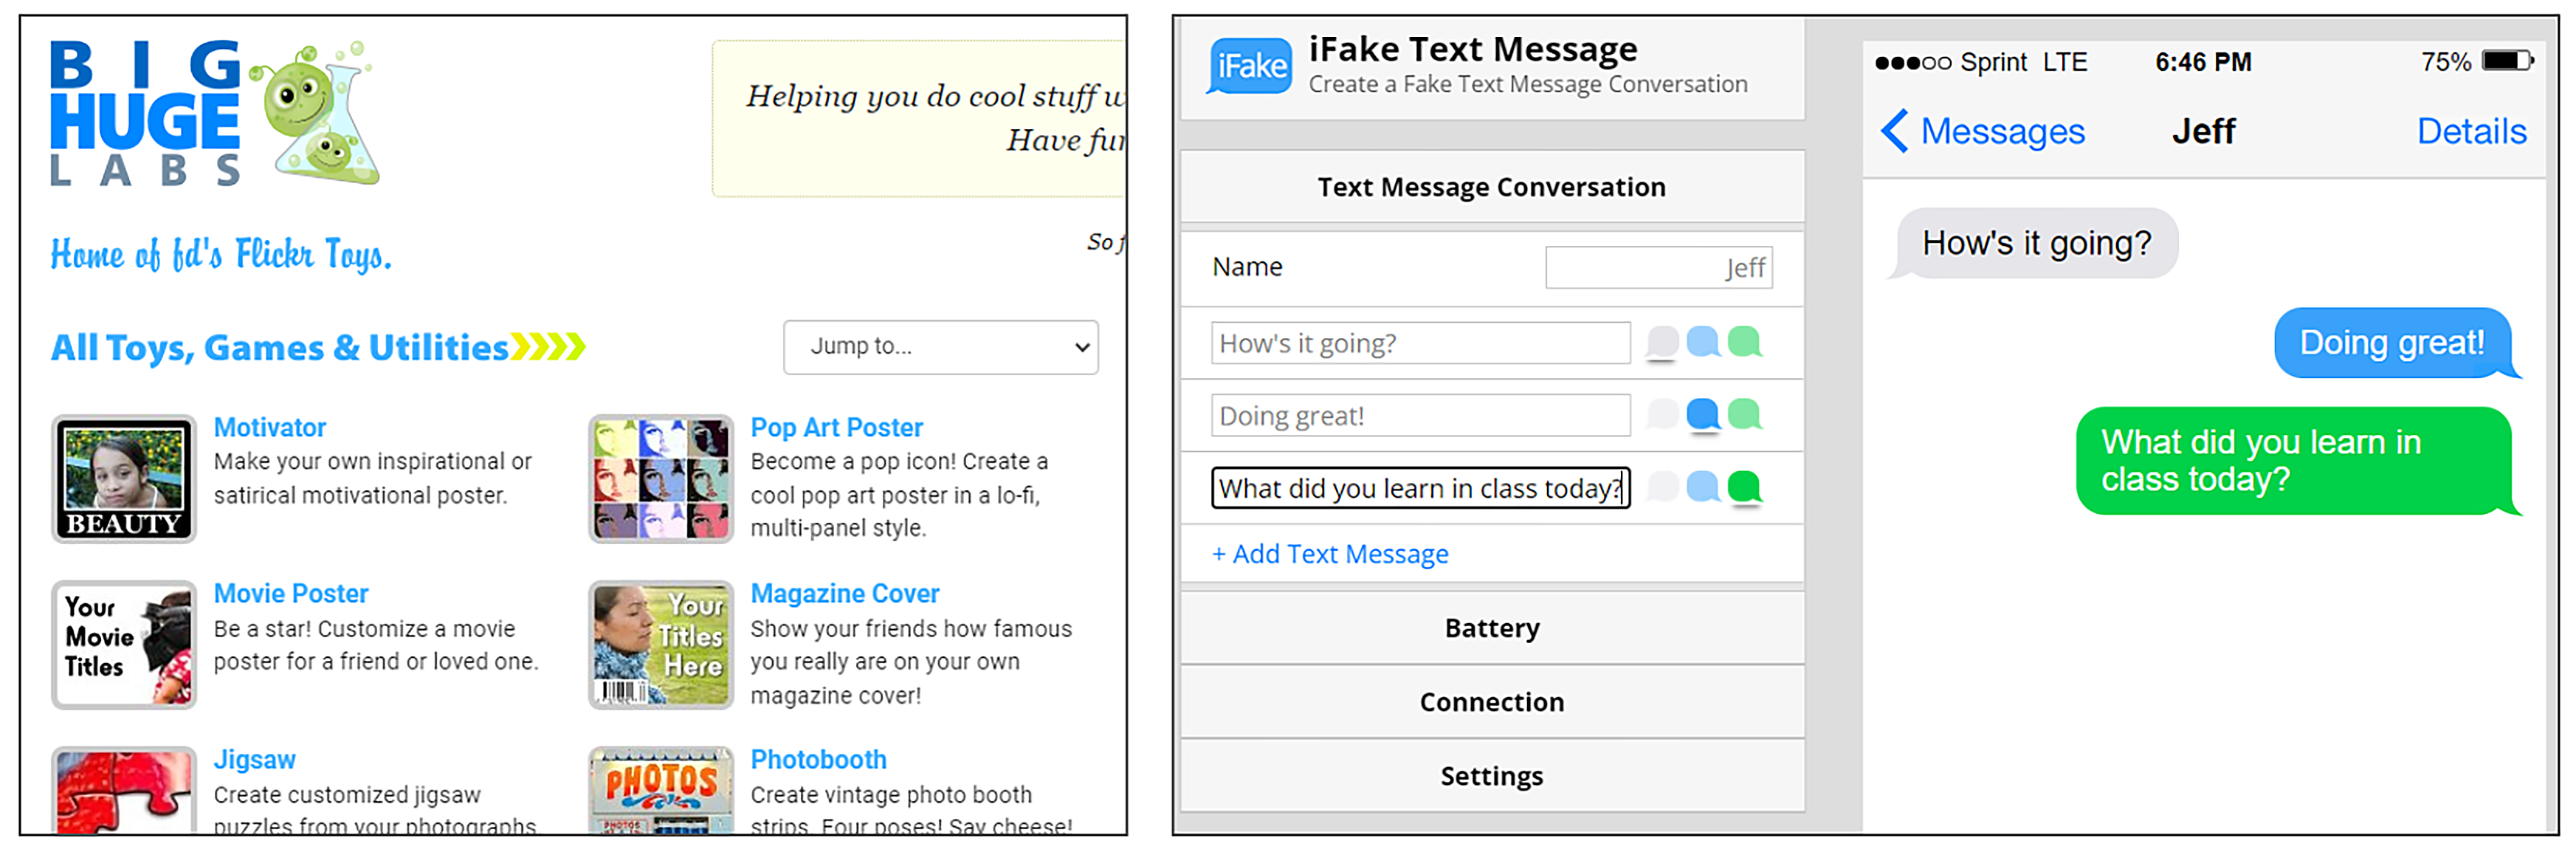
- BigHugeLabs: Create fun things with photos. Make movie posters, jigsaw puzzles, badges, trading cards, cubes, calendars, magazine covers, and more. This site is free and contains significant advertising.
- Instagram Template: Make a copy of this Google Slides template to create an Instagram-like post.
- Facebook Template: Make a copy of this Google Slides template to create a Facebook-like post.
- Fake Tweet Template: Make a copy of this Google Slides template to create a Twitter-style post. There is one tweet per slide.
- MTG Cardsmith: Create Magic-style trading cards. Upload an image and follow the prompts. Right-click to save the final image or log in to save it to an account.
- Newspaper Clipping Generator: Enter text and save it in a newspaper format.
- Text Message Generator: Create a simulated text message. Enter information into form fields to create a fake text message.
- TikTok Template: Make a copy of this Google Slides template to create a TikTok-like post.
- Twitter Template: Make a copy of this Google Slides template to create a Twitter-like post. This version allows for multiple tweets per slide.
- Twitter Tweet Generator: Create a simulated Twitter post. Enter information into form fields to create a fake tweet.
There are many ways to tell a story. You could recite it aloud, write it down, record it with audio or video, or even format it as a website. Stories are flexible, and that is part of their power. They also provide a pathway for sharing the human experience and integrating personal experiences into academic content. This is something that can bring social studies and history to life for students. One powerful option is to have students tell their stories in the context of new learning. This requires them to make sense of it and make a personal connection. When they use technology to tell these stories, we call it digital storytelling. While the other lists on this page contain tools you should consider for this purpose, a few additional ones are included below.
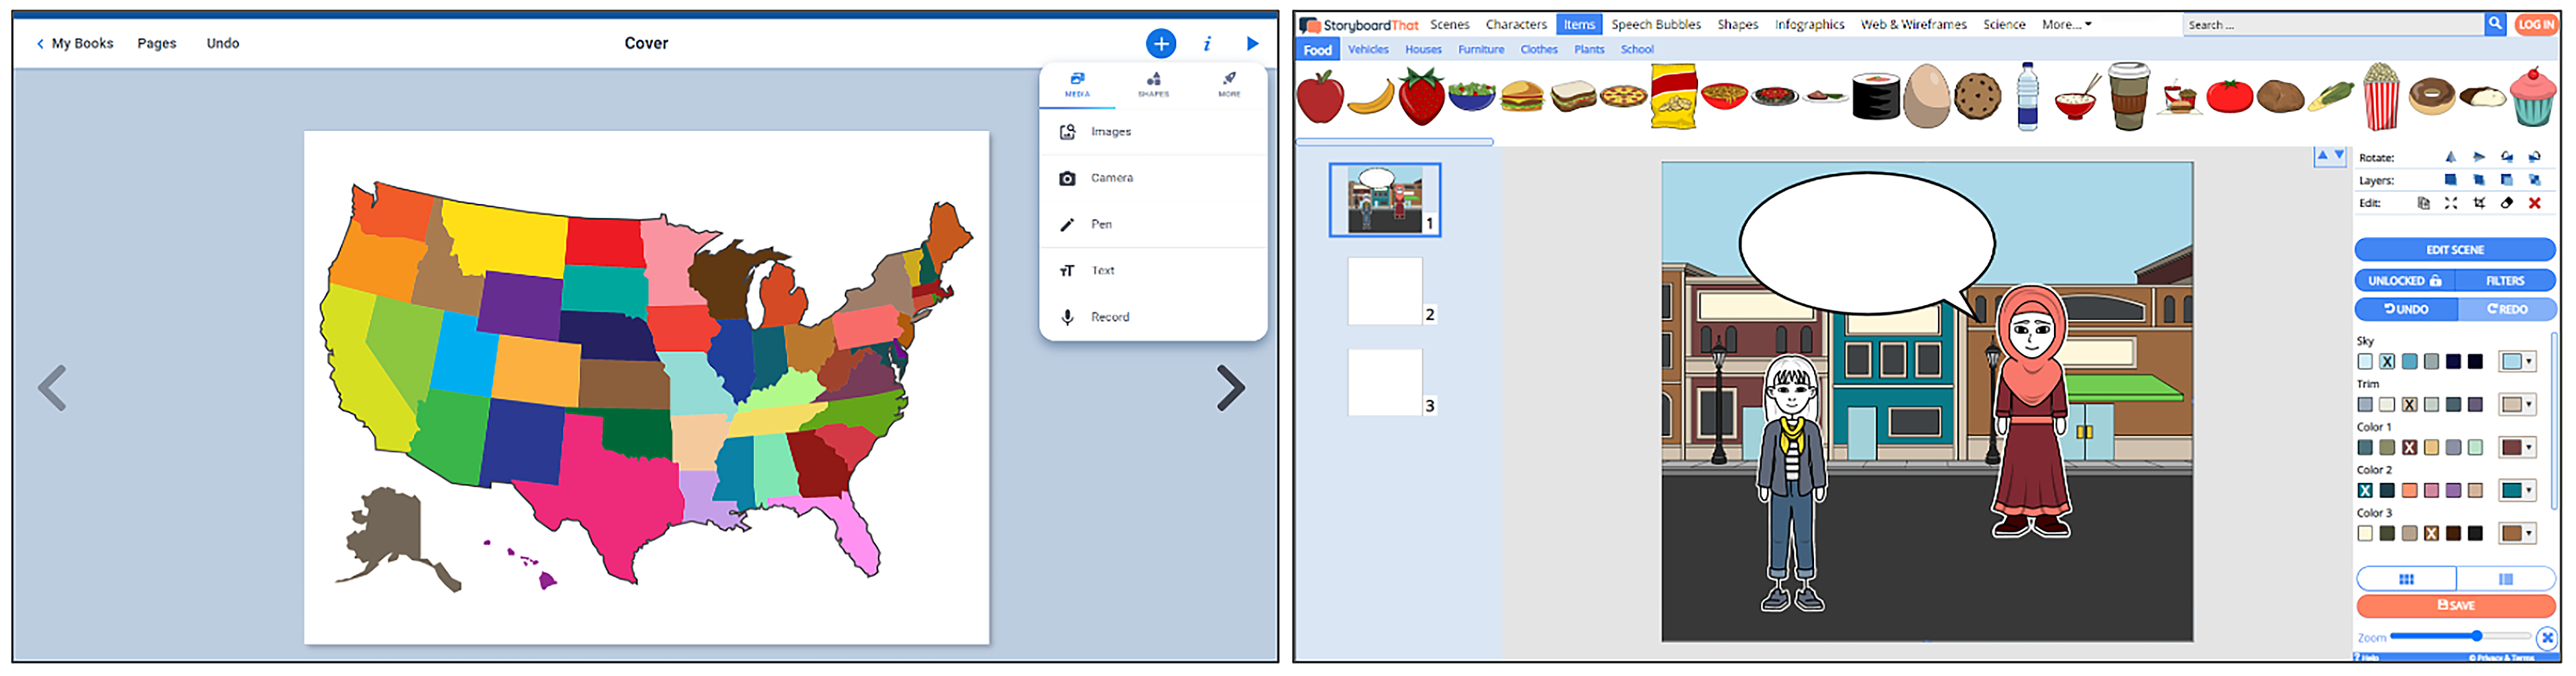
- Book Creator (Tips): This is a free, user-friendly platform for writing and publishing an online book. Because it’s digital, students can embed multimedia, like video, images, and audio. They can even use the integrated voice recorder to include an audio recording of themselves on each page.
- Flipsnack: Create an online flipbook. With the free plan, you can create up to three books of 30 pages each. The site provides tools for creating magazines, newspapers, digital books, booklets, and e-books.
- MakeBeliefsComix: Create a comic strip by selecting content to add to each blank frame. Add audio if desired. Save, print, or digitally share your finished comic. A free account is required to use the educational site.
- Storyboard That: Create comics from the character, animal, speech balloon, object, and word collections provided. This tool is also useful for creating storyboards to help plan video productions.
- StoryJumper: Add pages, text, images, props, scenes, multimedia, and voice-over to create a picture book. Publish the finished book online.
Writing is not only a core ELA skill, but it’s also a powerful tool in the social studies and history classroom. Students can write about what they have learned and, perhaps more importantly, they are able to write to learn. The process of writing requires students to synthesize multiple pieces of information into a cohesive message. This requires a deep and informed understanding of the content. Writing can also be used as a metacognitive exercise when students are asked to reflect on their learning. This can be especially powerful while they are engaged in inquiry or project-based learning.
At AVID Open Access, we’ve developed a collection of articles called, Power Up and Enhance the Writing Process With Technology. The content in this collection can be applied to any social studies or history classroom. The writing skills and processes also relate to nearly all of the other creative multimedia and communication options on this page. In order to communicate, students must essentially go through the stages of the writing process, even if their final product is not exclusively made up of written text. The following articles are included in this collection:
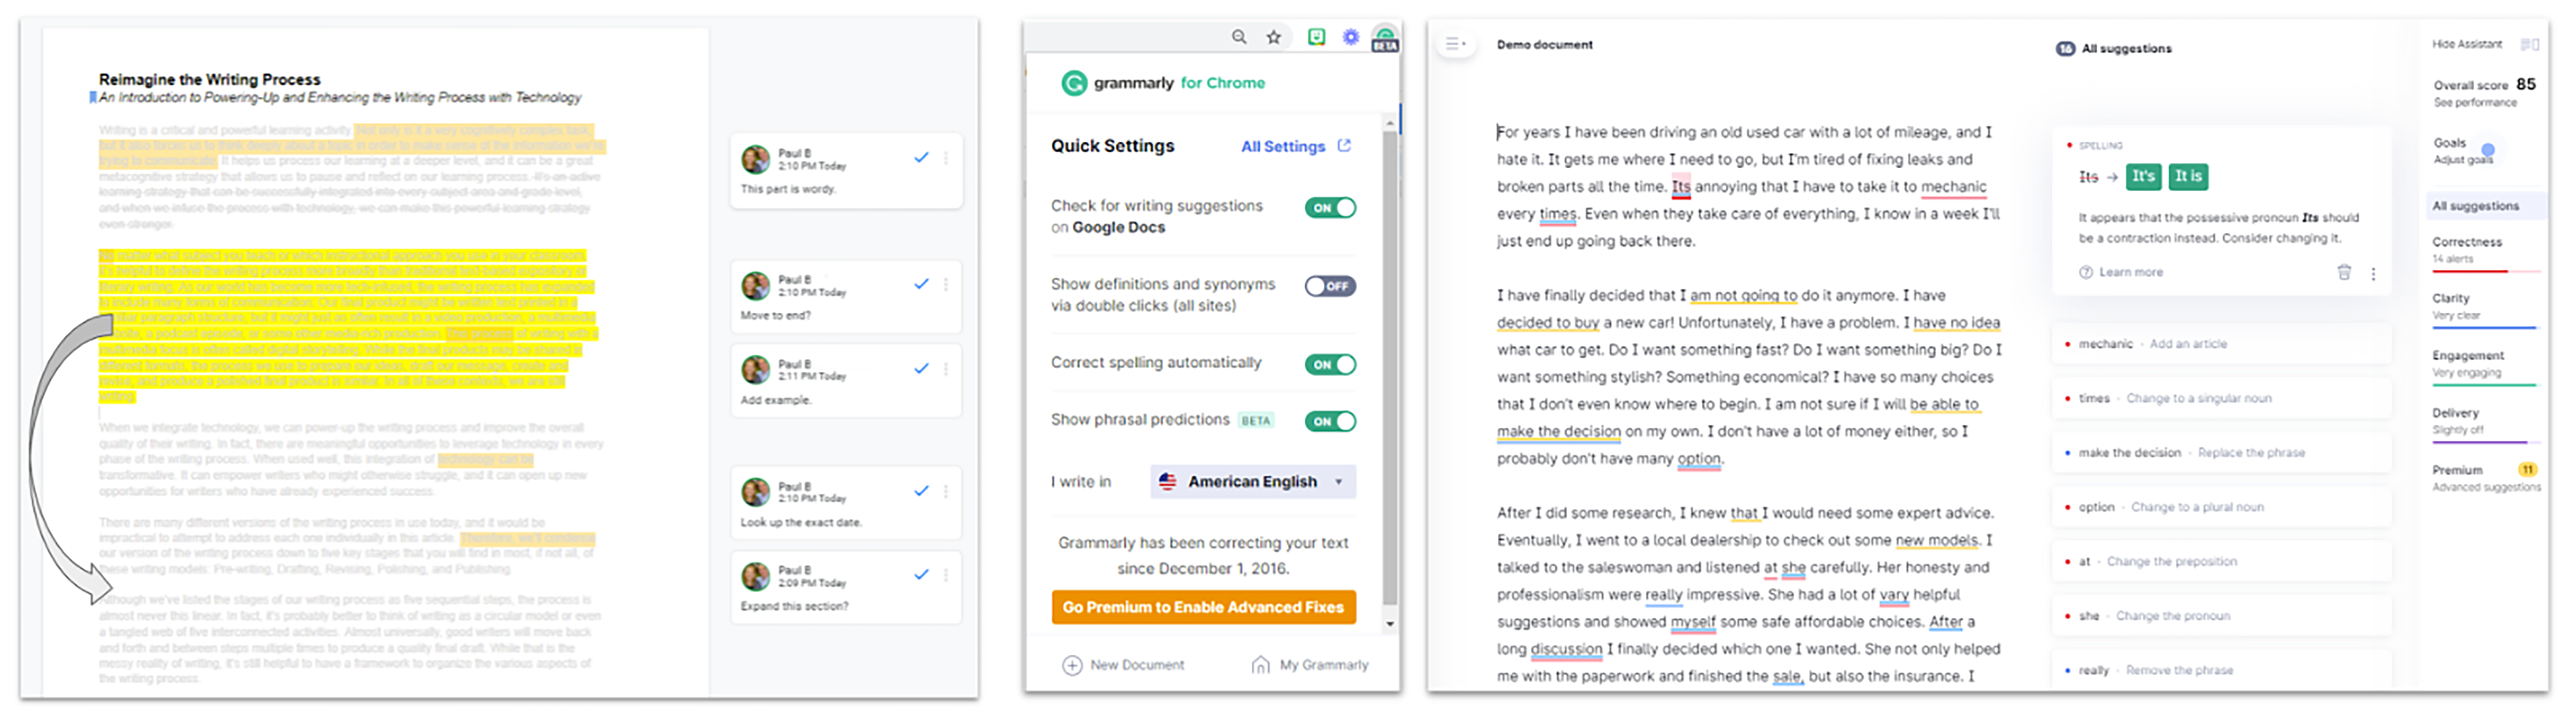
- Introduction: Reimagine the Writing Process
- Step 1: Pre-Write With Purpose
- Step 2: Draft With Direction
- Step 3: Revise With Resolve
- Step 4: Polish With Precision
- Step 5: Publish With Pride
Additional ideas can be found in the AVID Open Access article, Think It, Write It: Creative Writing Across the Curriculum.